
Many thanks to Björn Hantschel for the english translation! |
With the following picture documentation the way... |
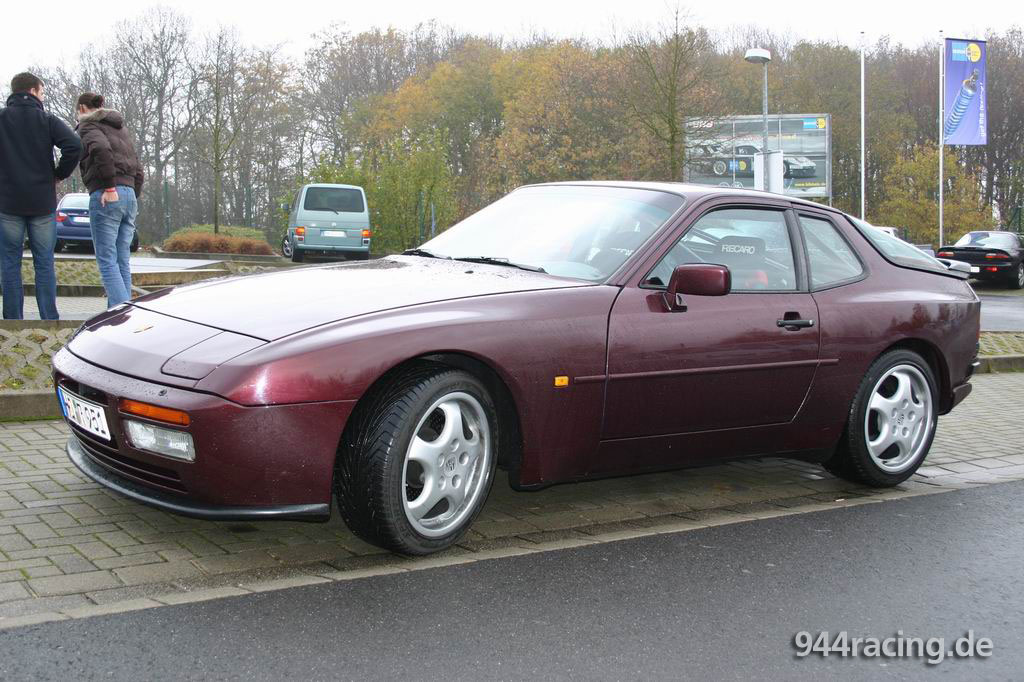
from a standard-951 ... |
to a 951 R is documented step by step. |
 |
 |
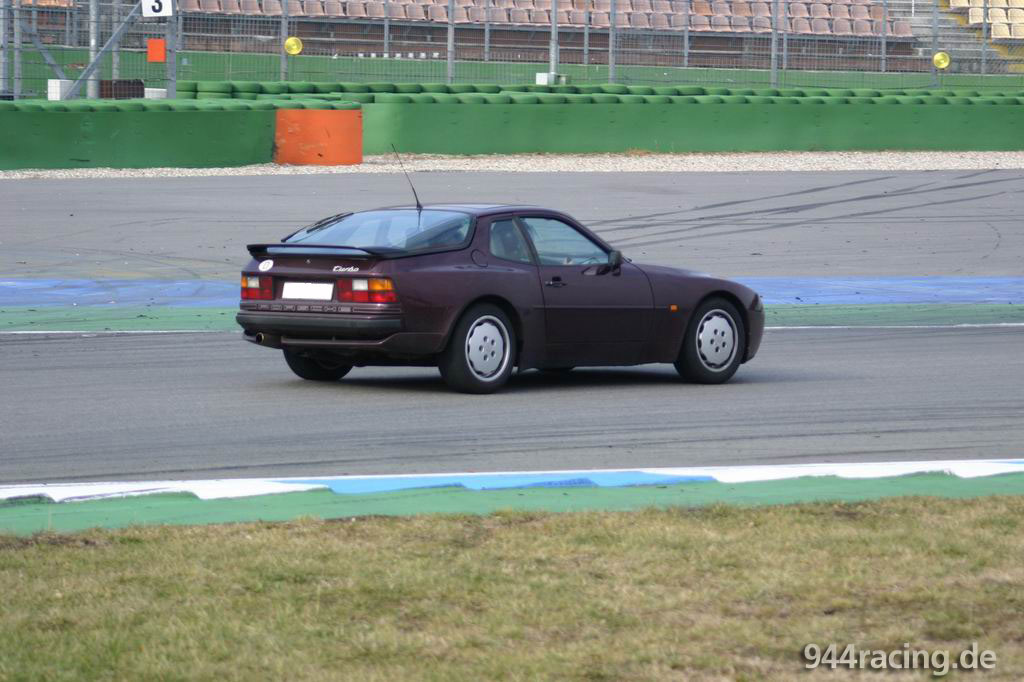
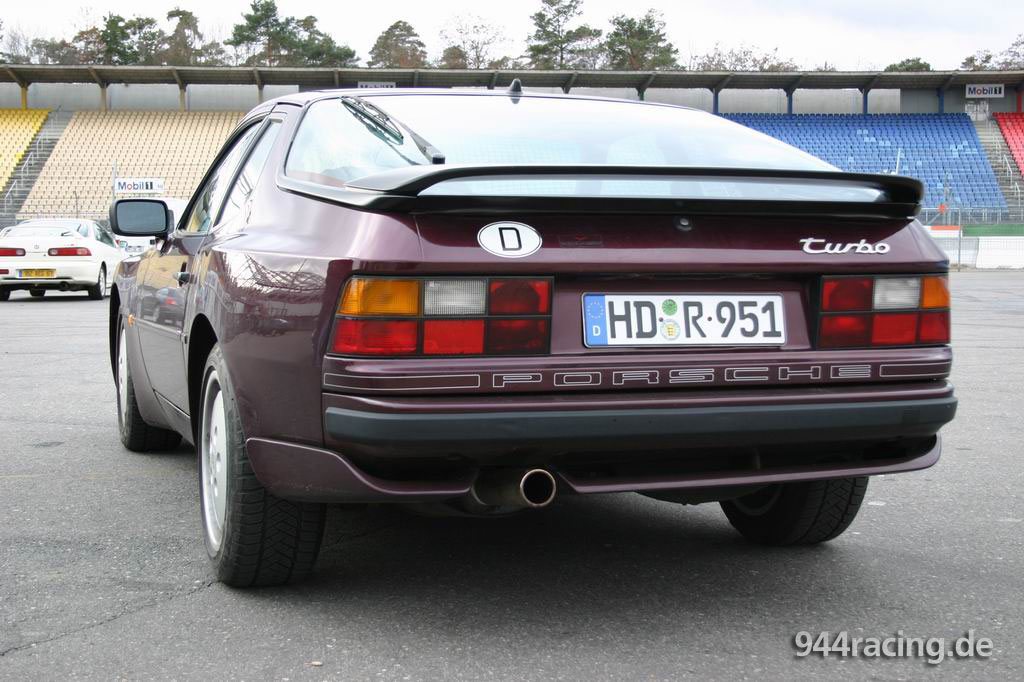
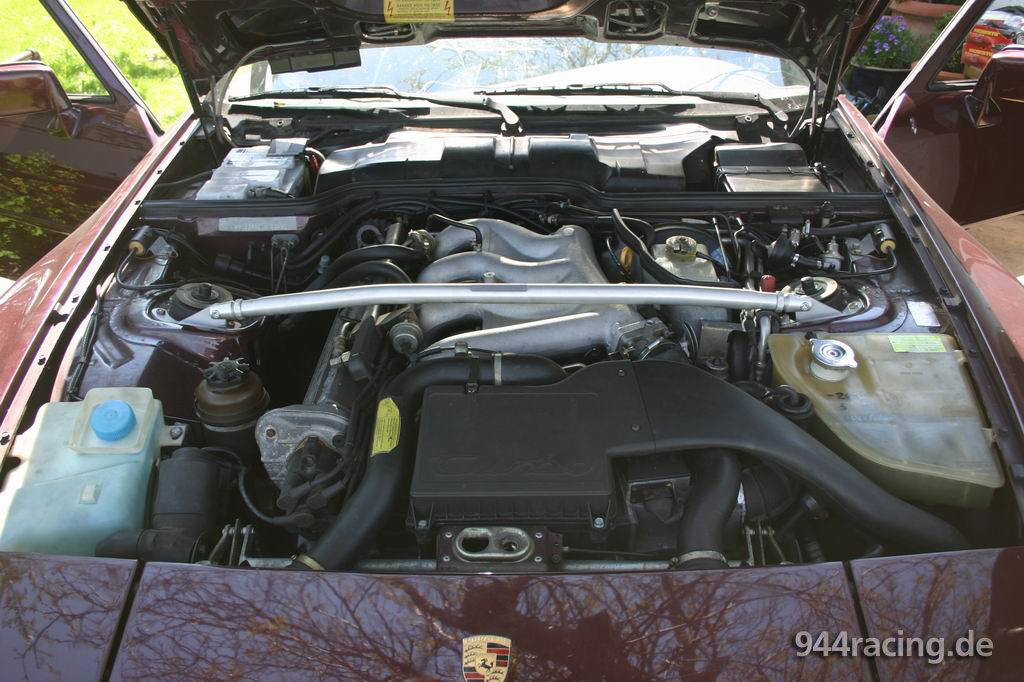
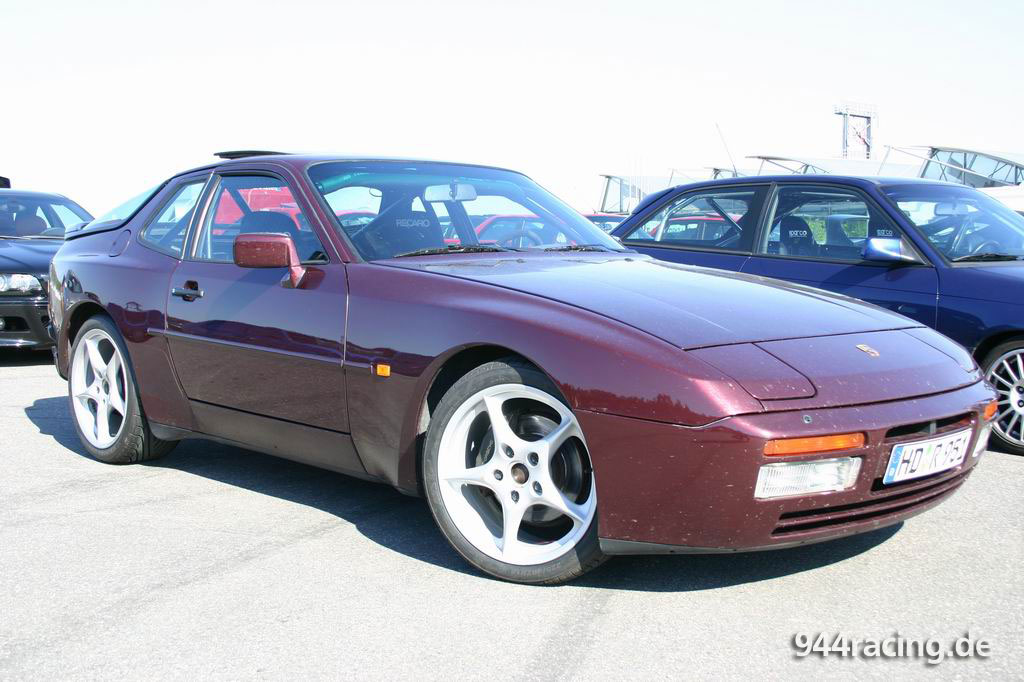
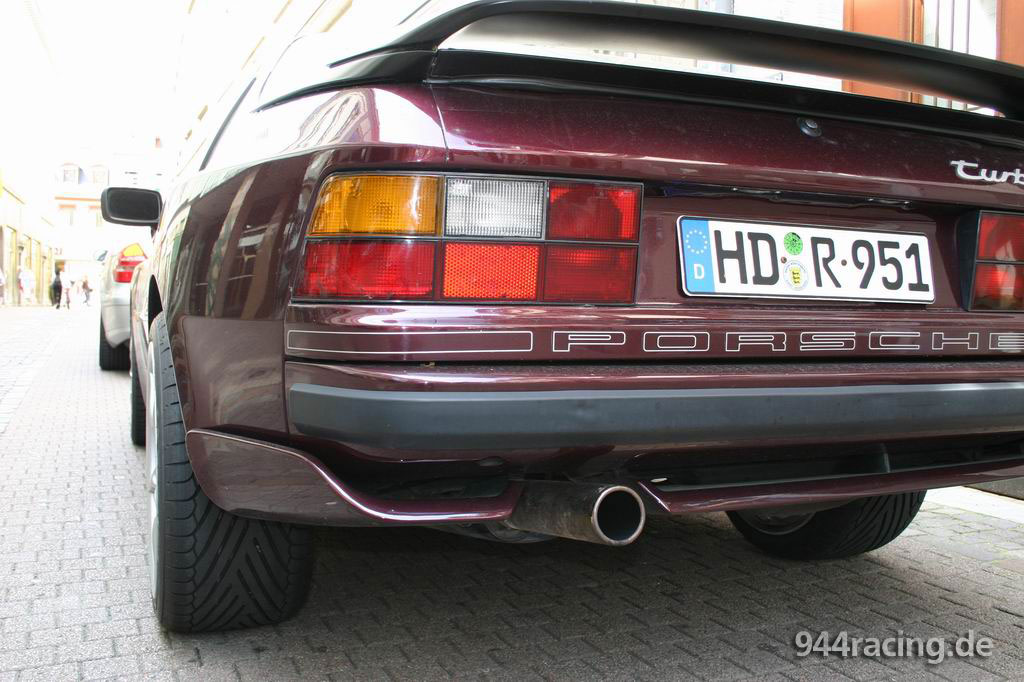
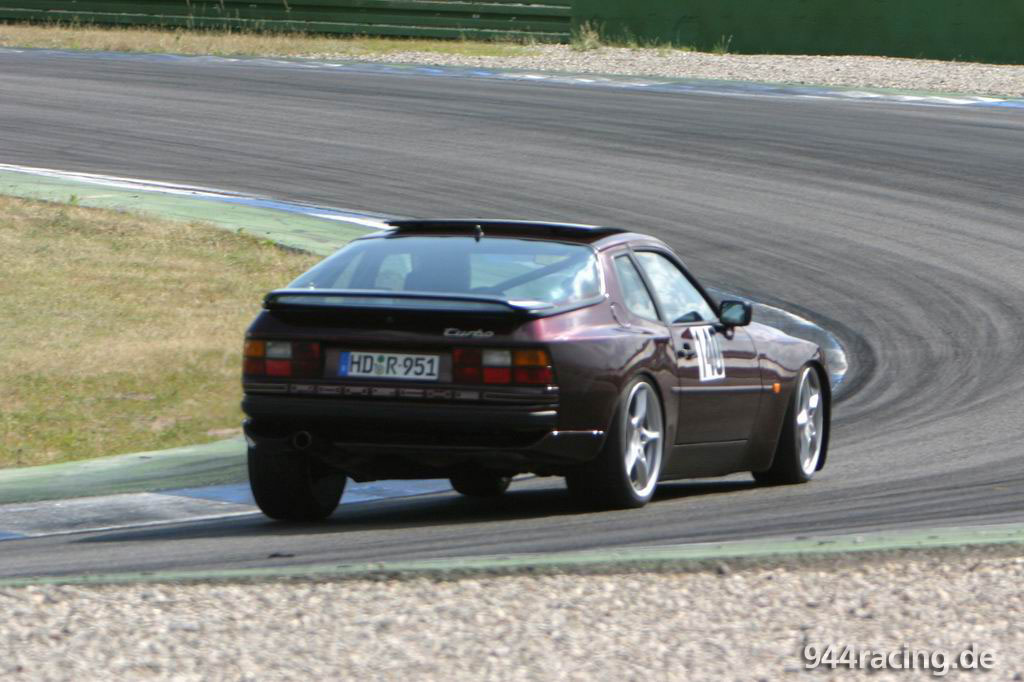
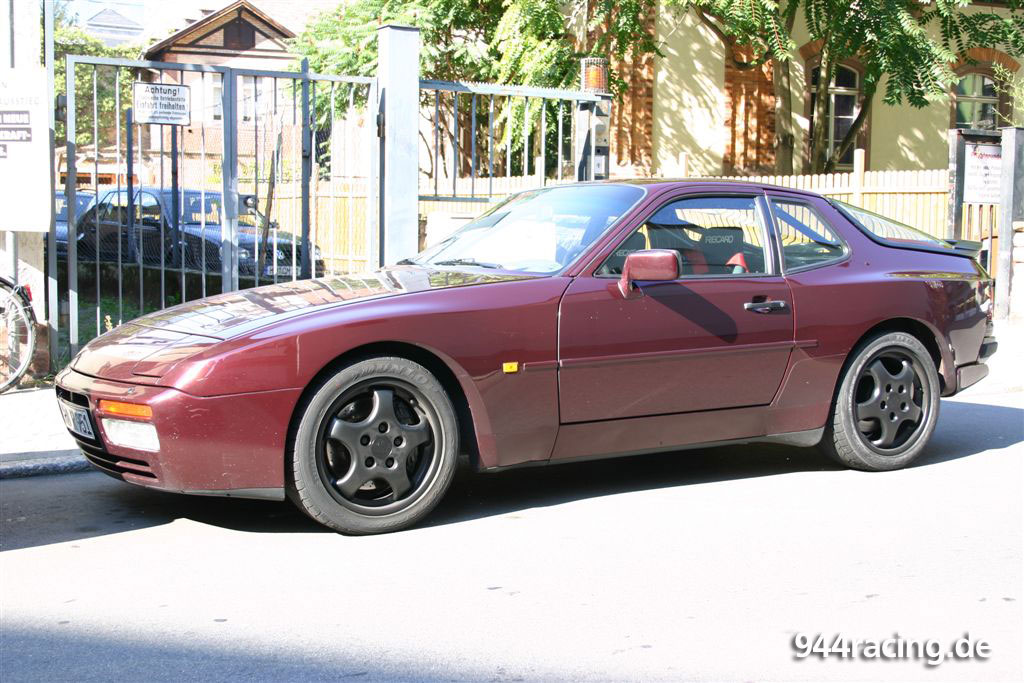
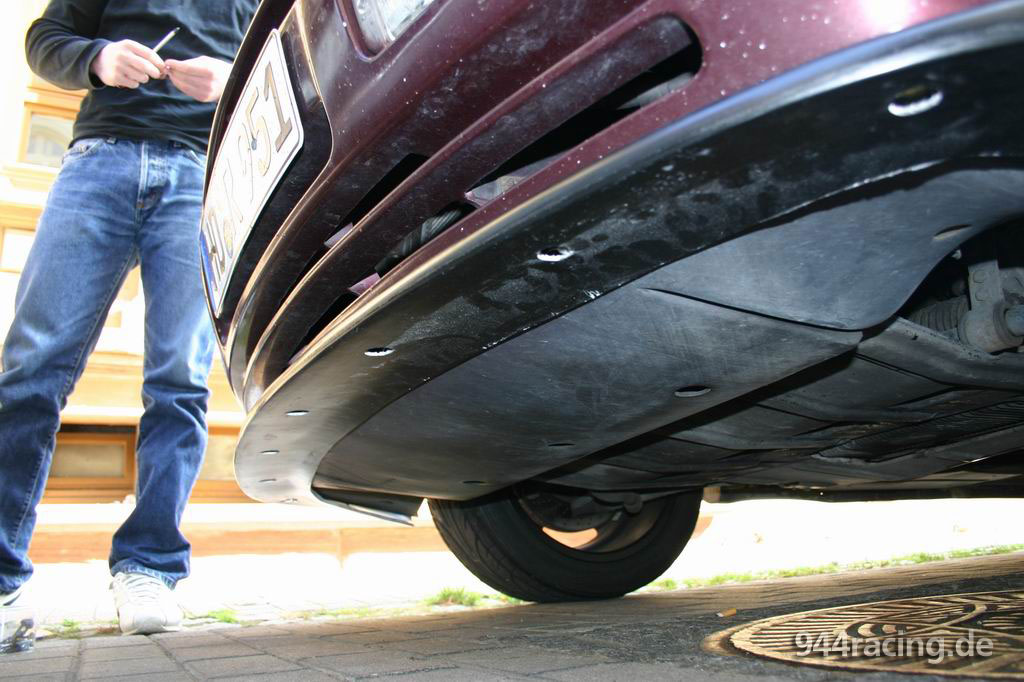
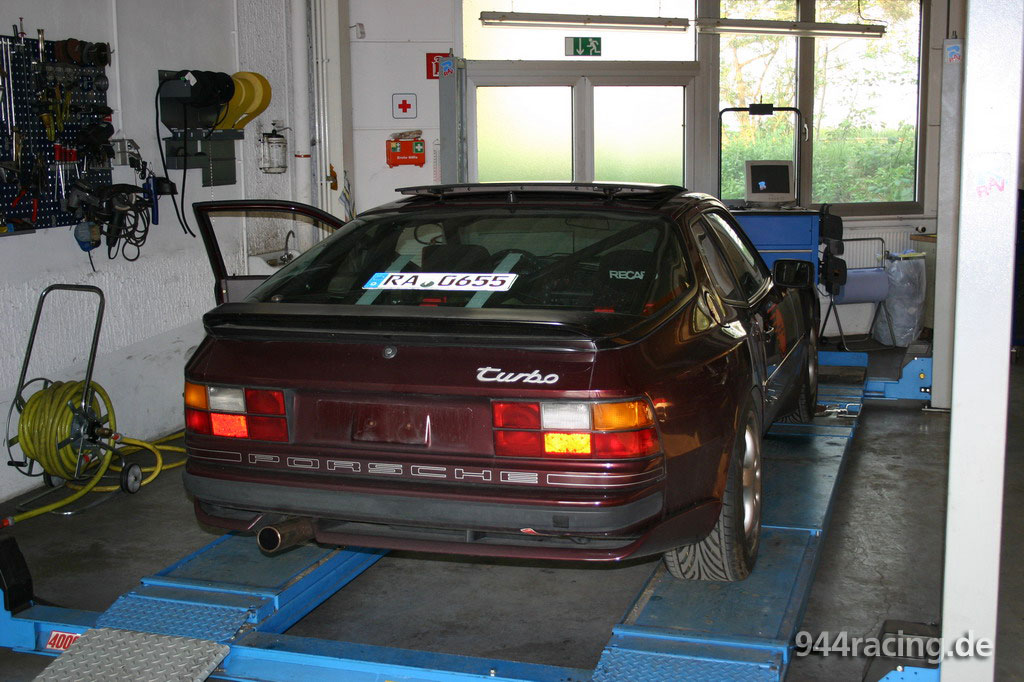
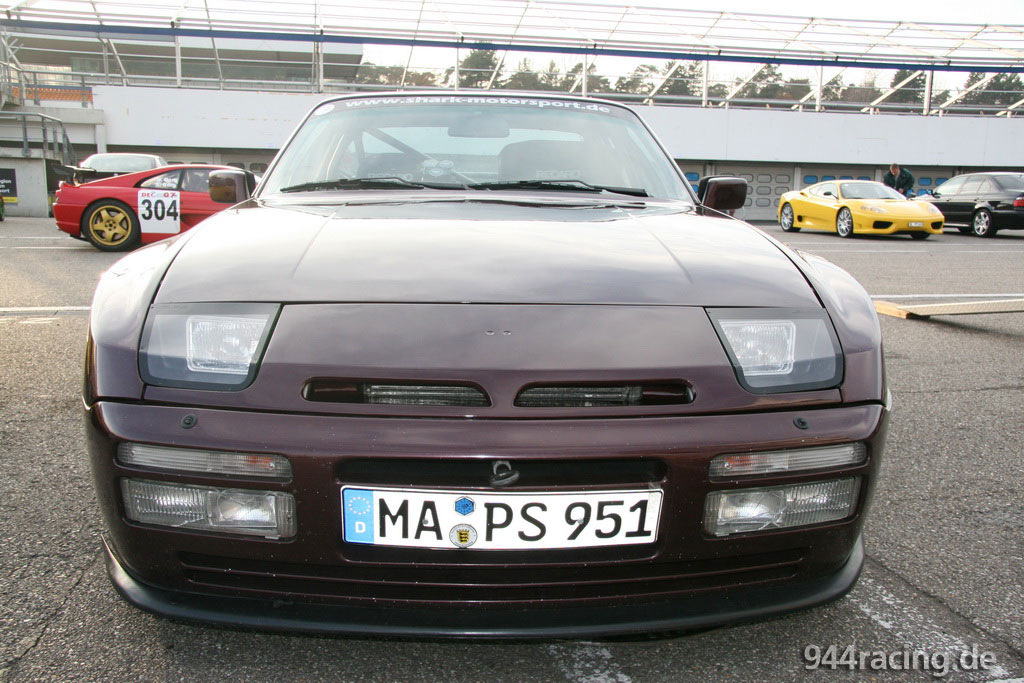
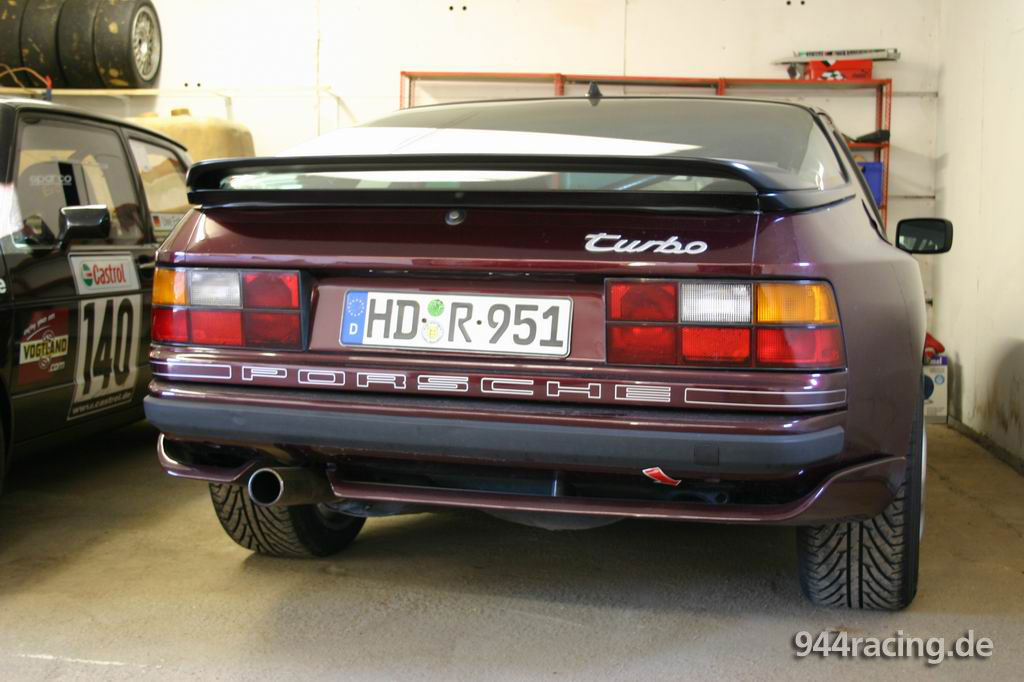
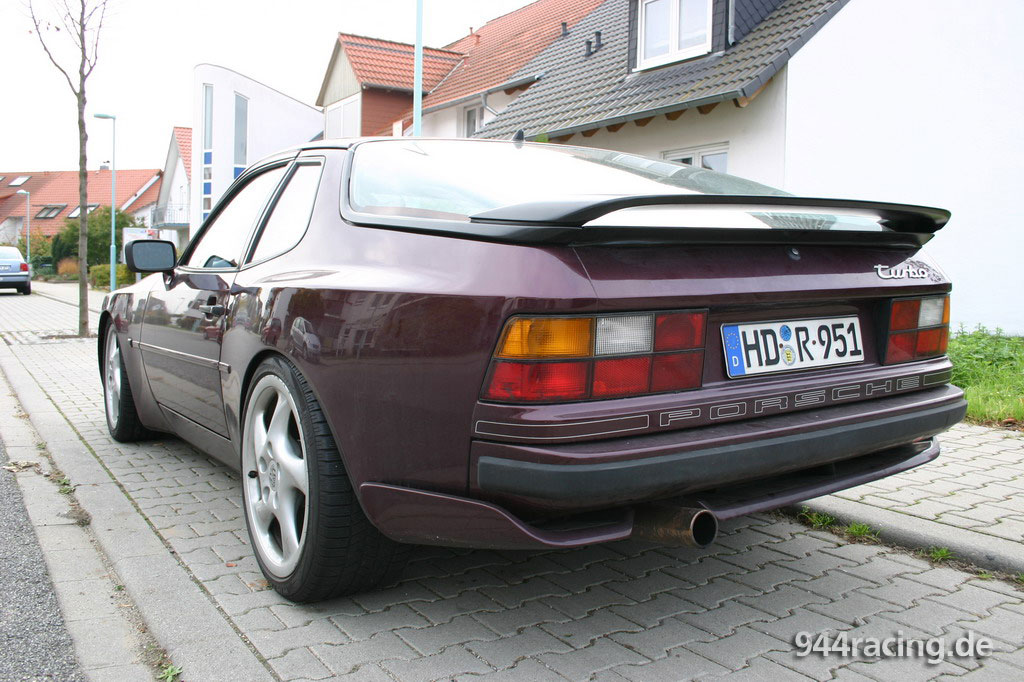
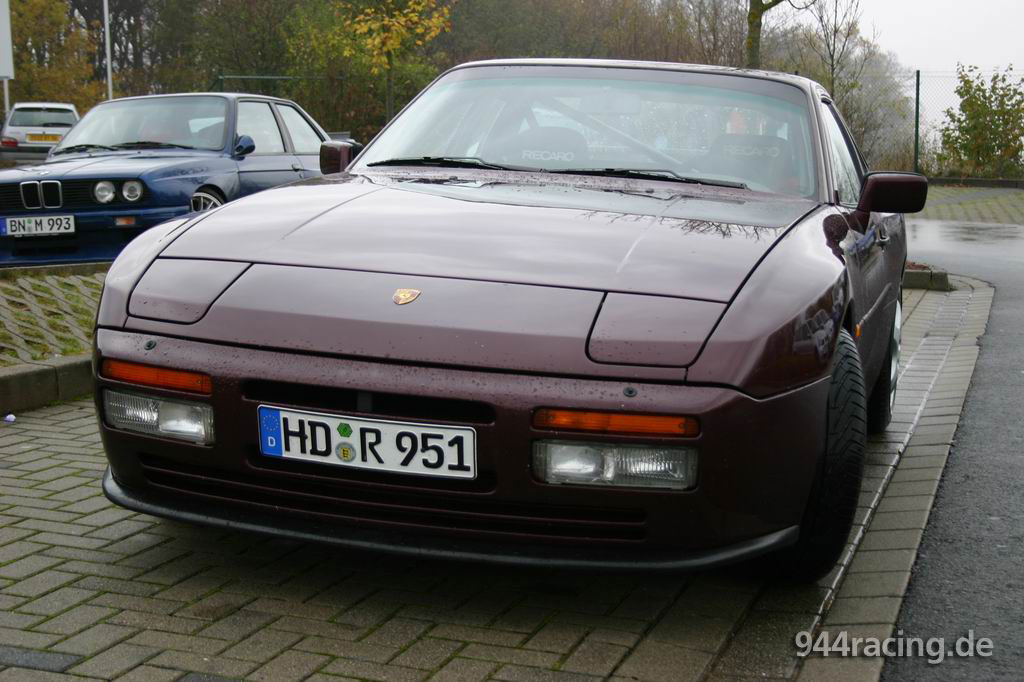
As starting point for this project serves a MY '91 944 turbo with full service history in outstanding condition from 1. Owner. The car had already the M030 package consisting of Koni shock absorbers and the large disc-brake assemblies with 304mm diameter. In addition it has a 40% limited slip differential (the option M220). A tuning chip was installed by german engine specialist Kerscher and a performance diagramm of the test bench run certifies 219kW (298 BHP) and 405 Nm torque. |
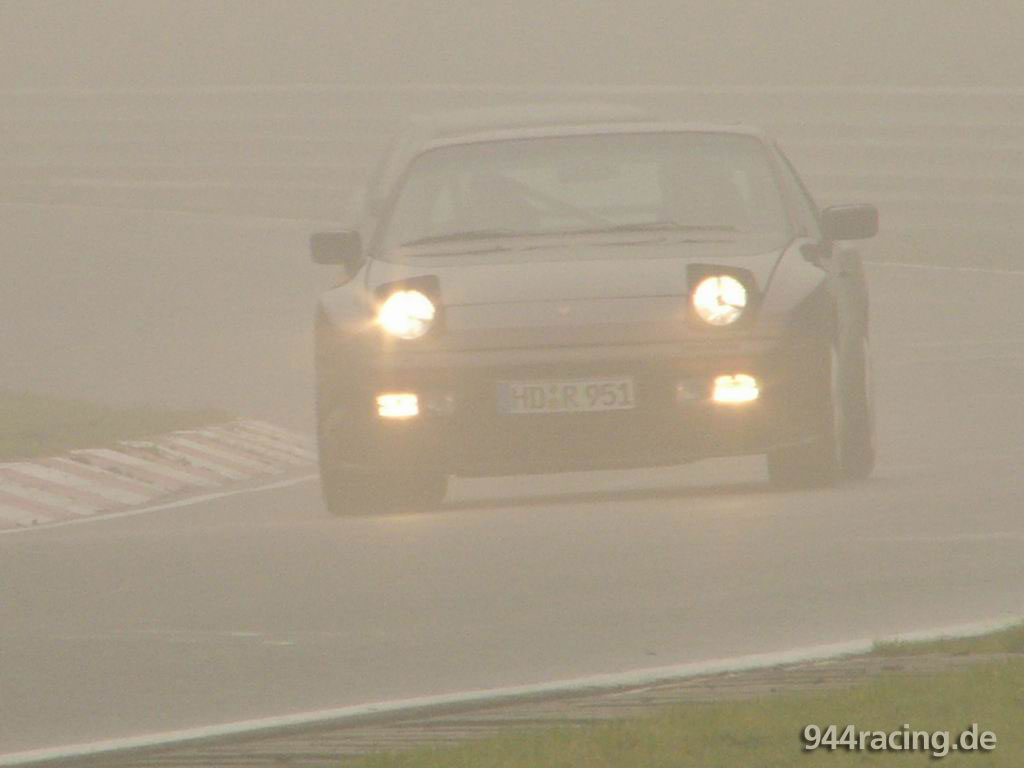
The first test miles at the Hockenheim track ran without problems! |
The 2:13,07 on the Laptimer (despite 205/50-16 winter tires) make me confidently for a time below 2:10 after the planned optimizations. |
 |
 |
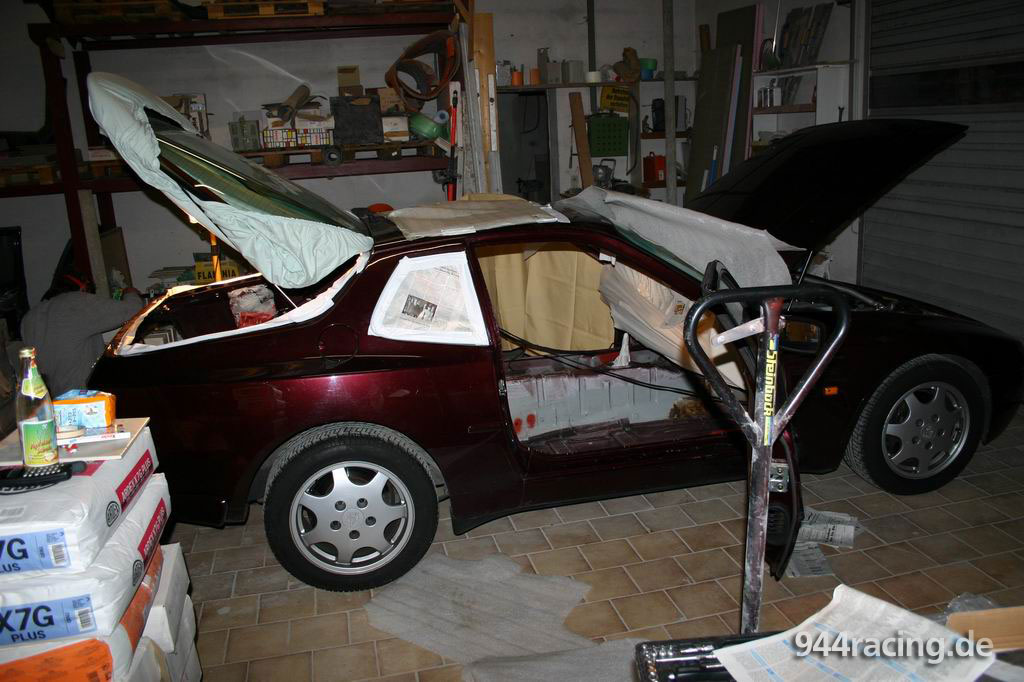
The car is outside, inside... |
... and technically perfectly maintained! |
|
 |
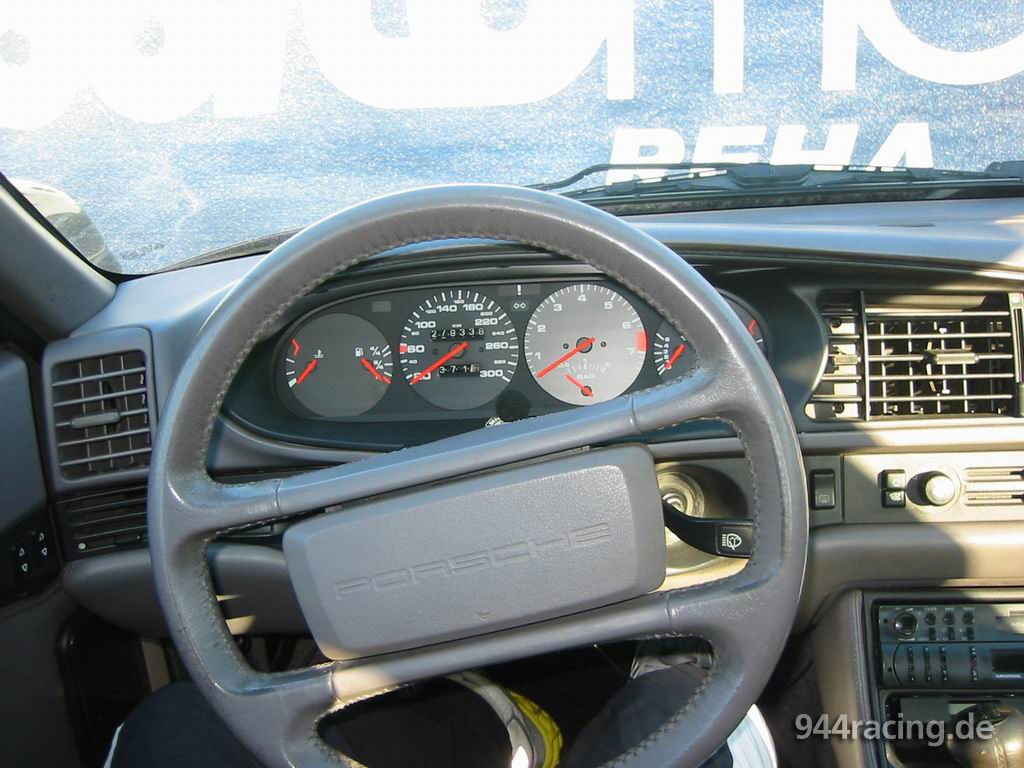
280.000 km is hard to believe. Everything still looks and feels perfect. |
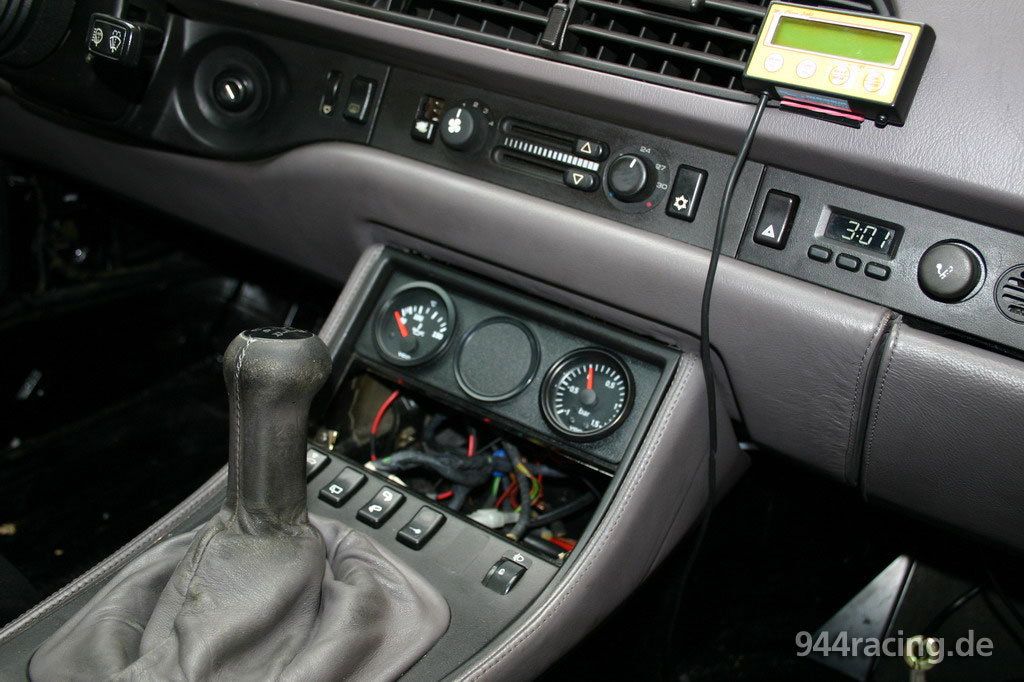
Also an external thermometer was installed by the previous owner beside radio and telephone. |
 |
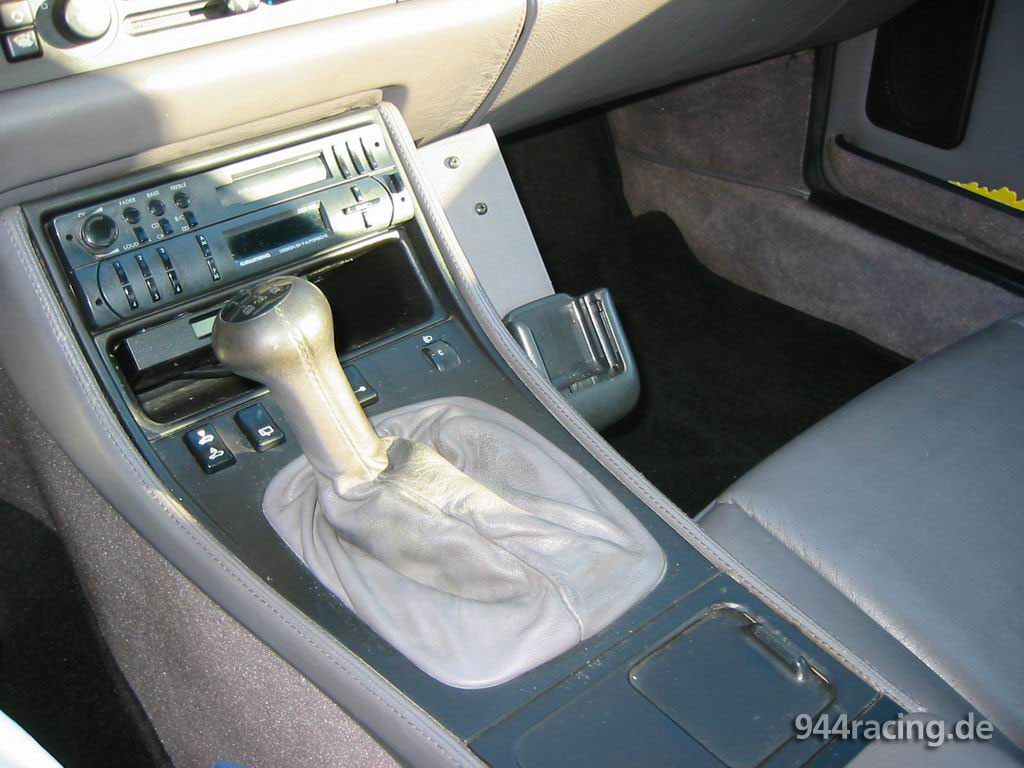 |
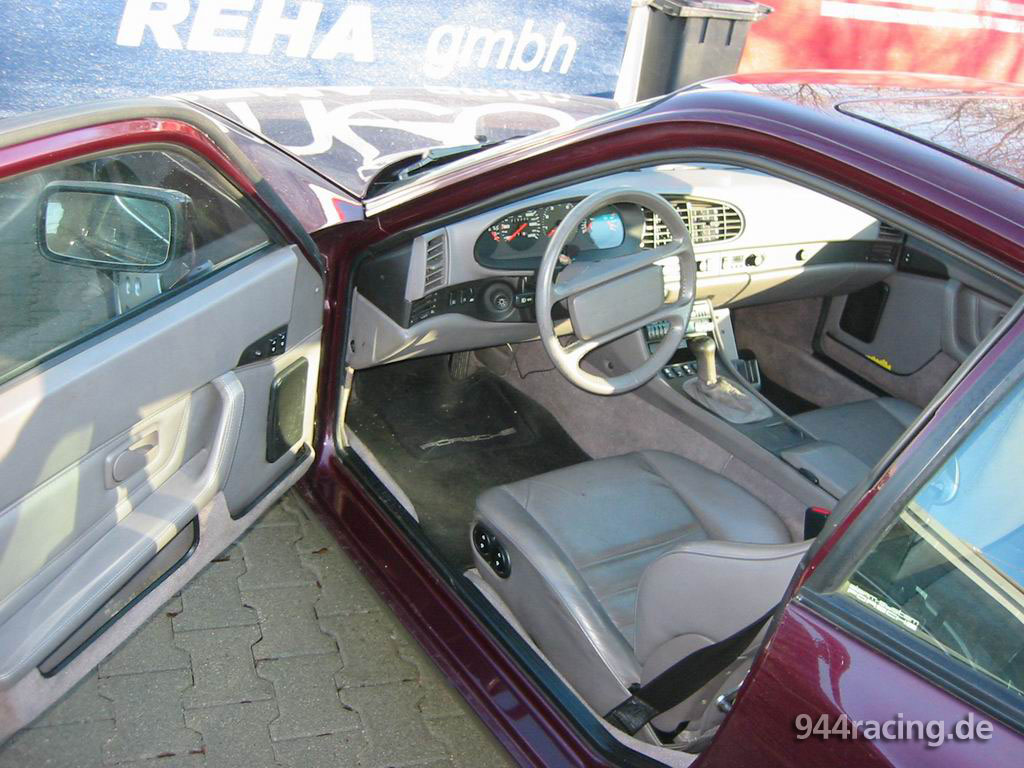
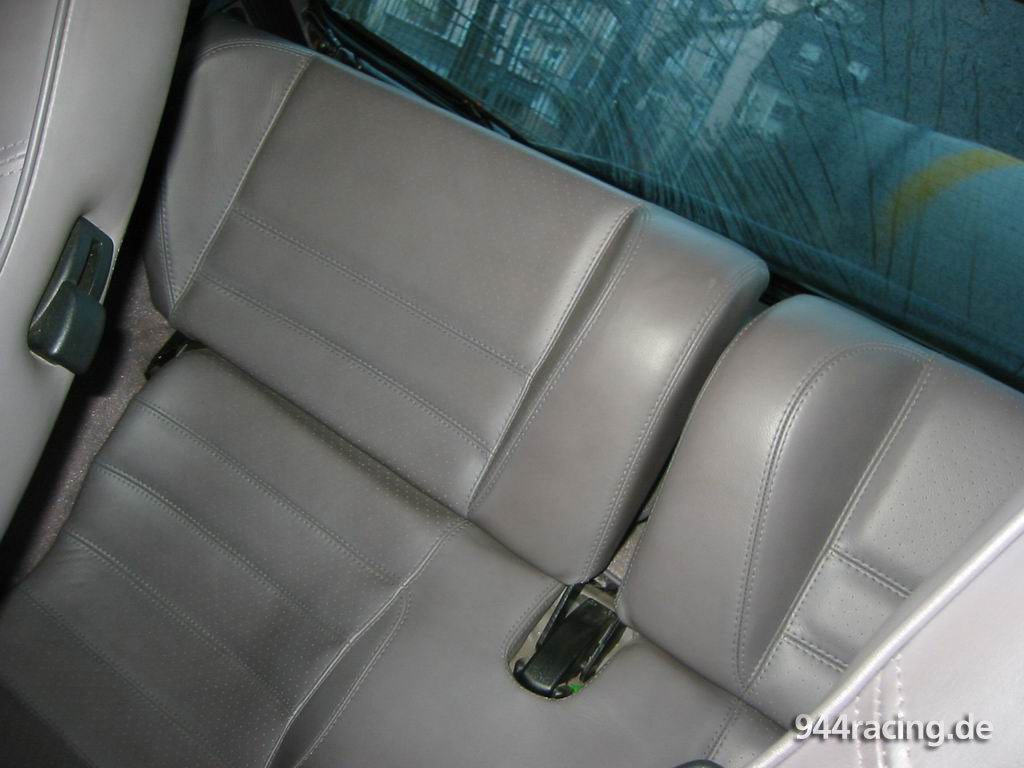
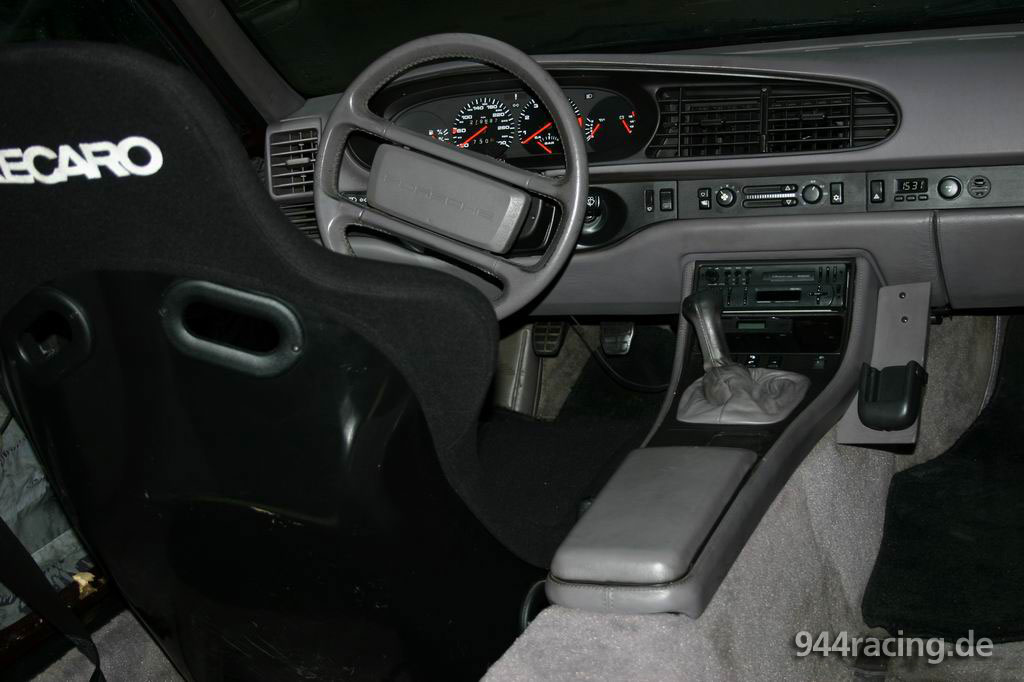
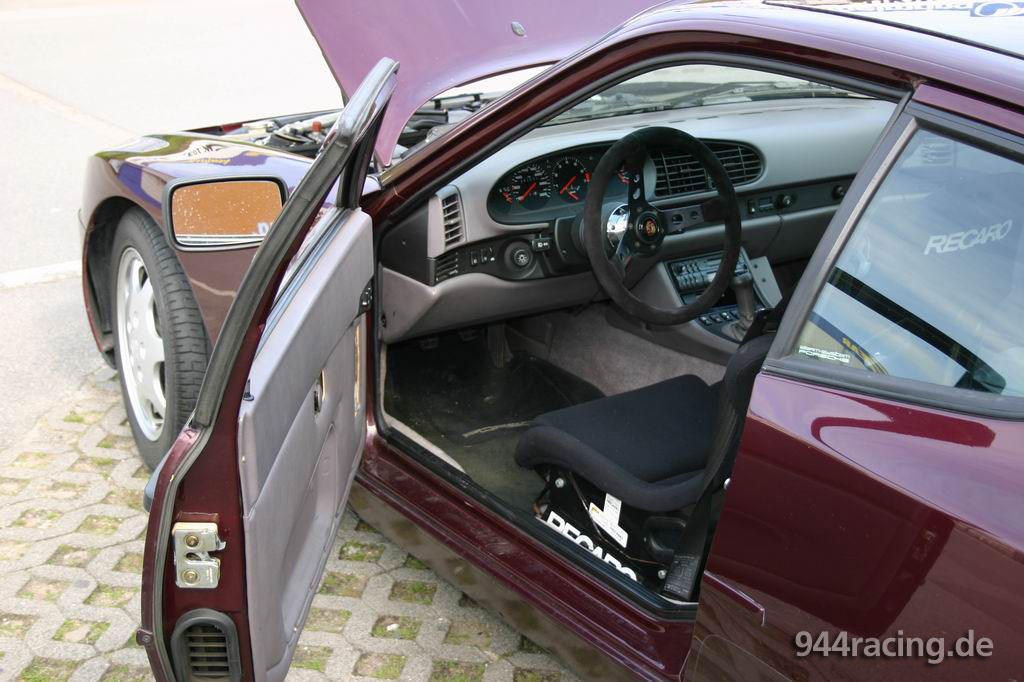
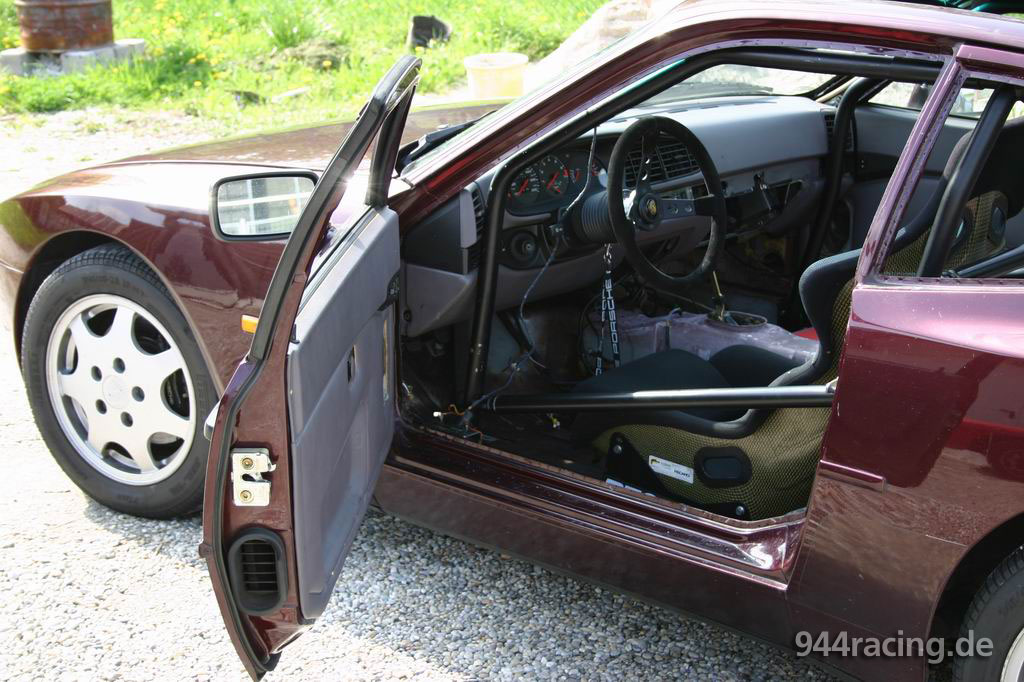
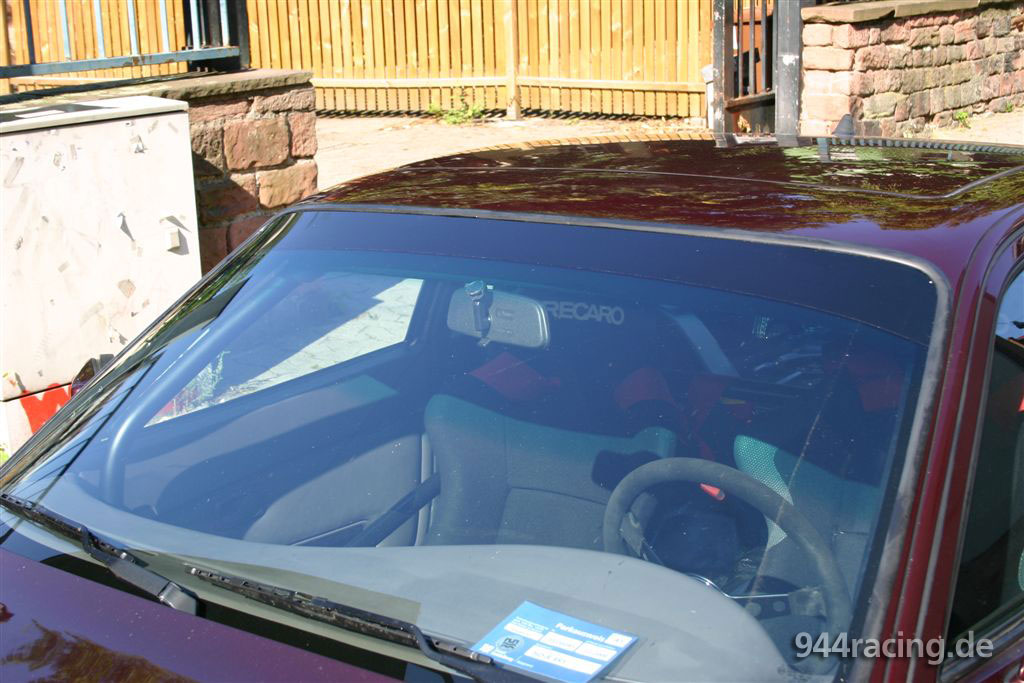
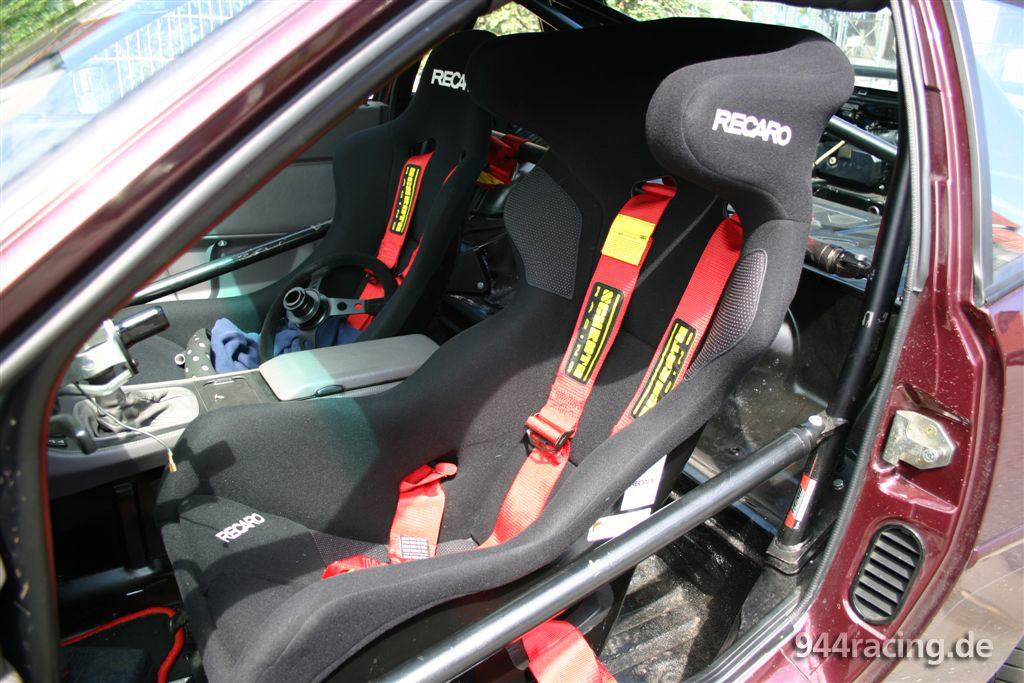
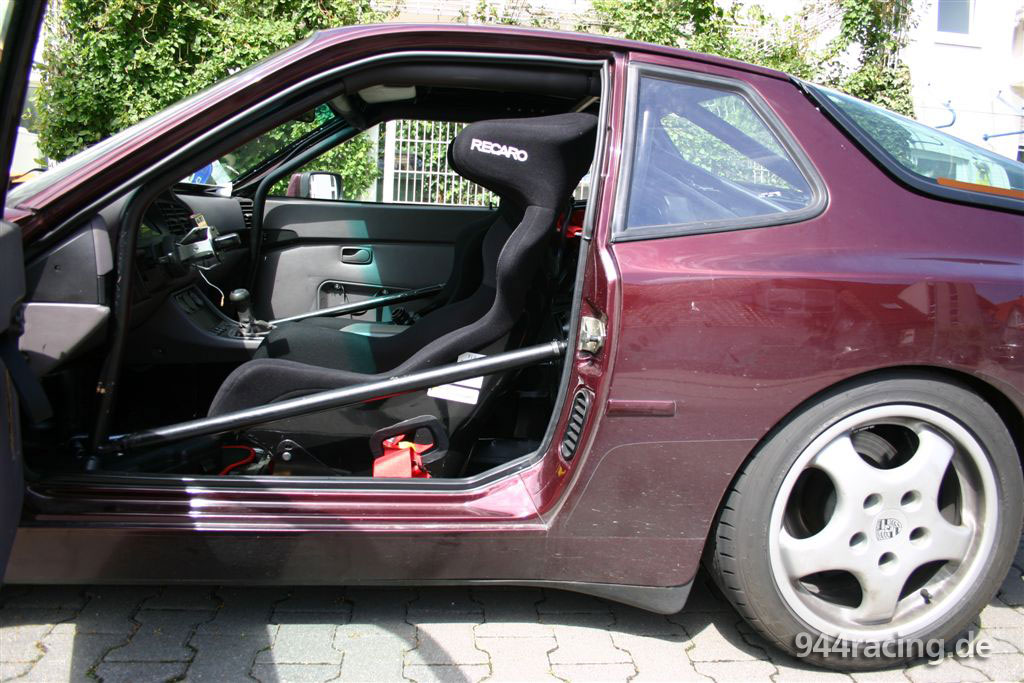
The classically grey full leather interior with turbo-seats... |
really looked great! Nevertheless they will become replaced by recaro racing seats. |
 |
 |
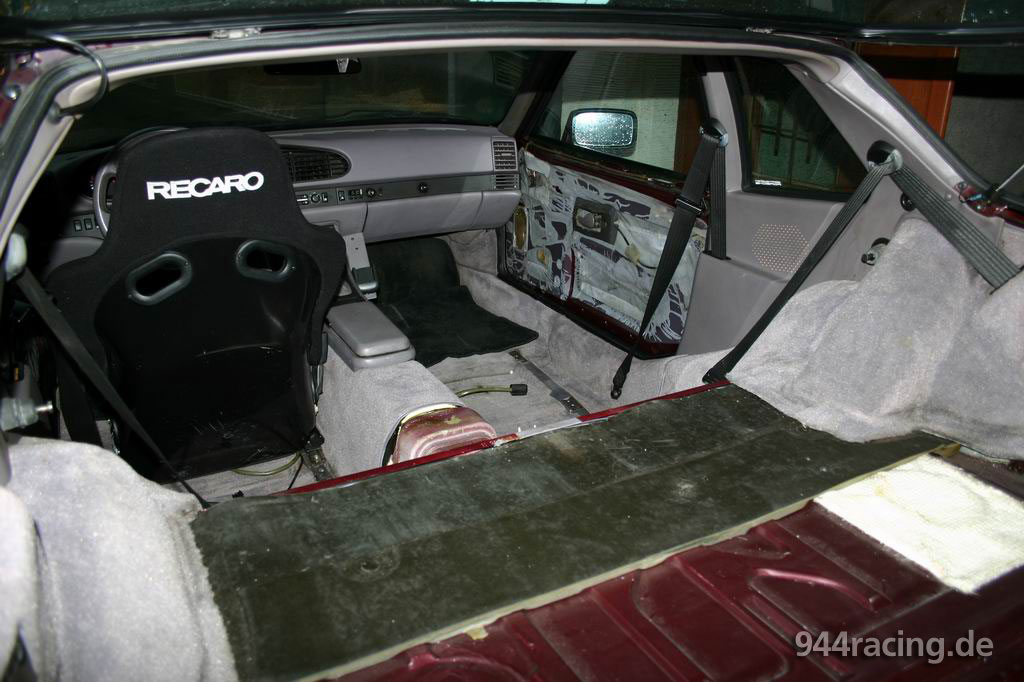
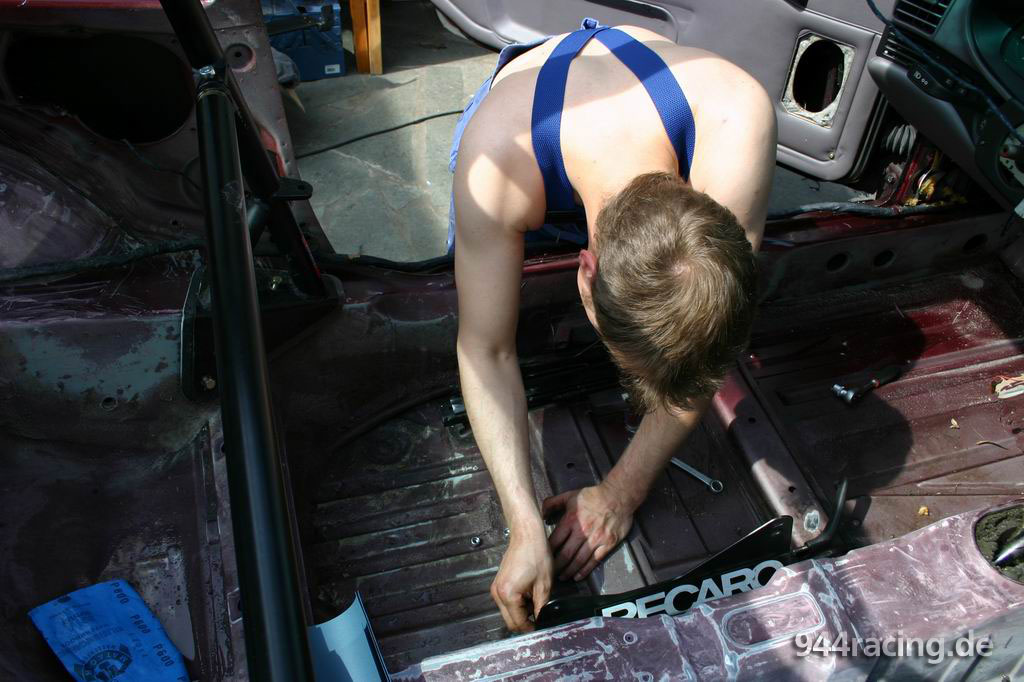
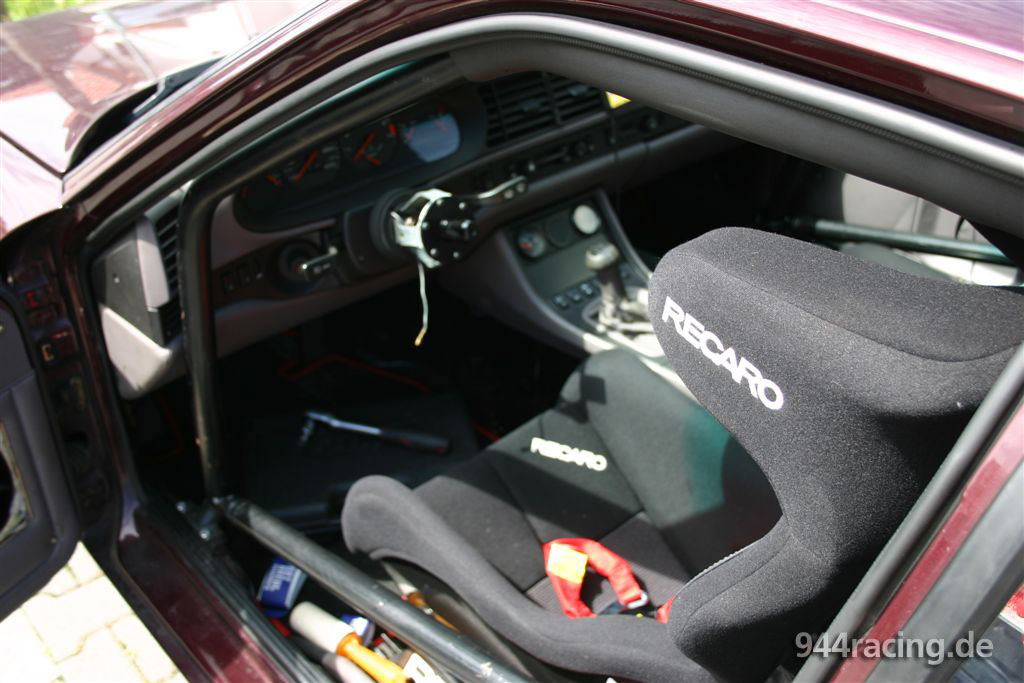
Seats, rear seats and door panels were removed quickly and the Recaro seat "pole position" including console fitted at first attempt. |
Unfortunately, the Recaro "Profi" seat was too narrow and the console needs some modifications to fit the seat! |
 |
 |
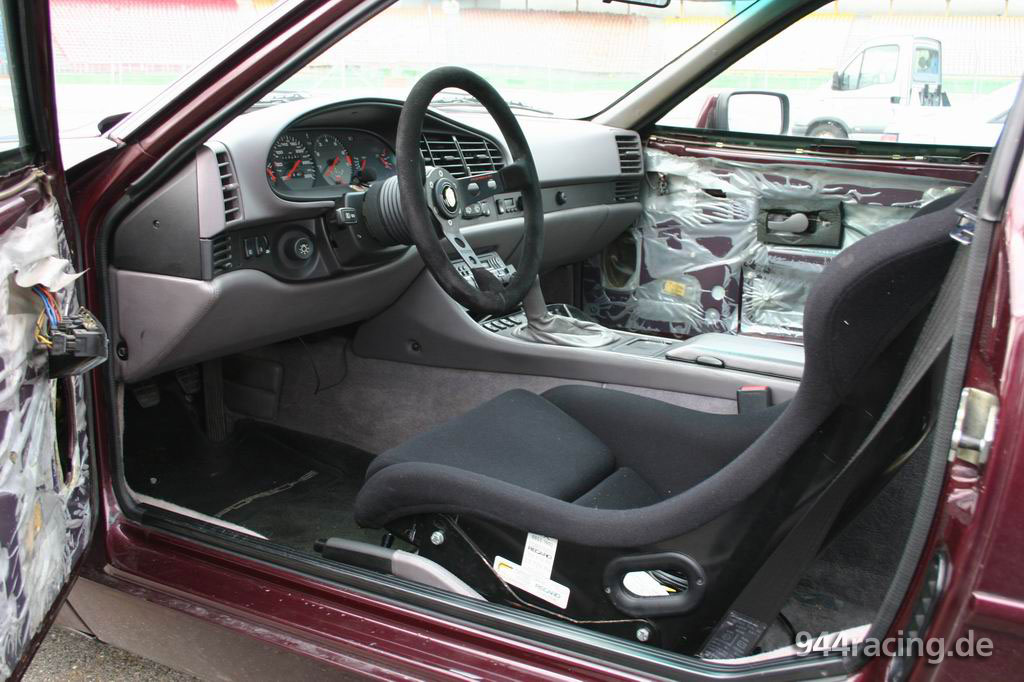
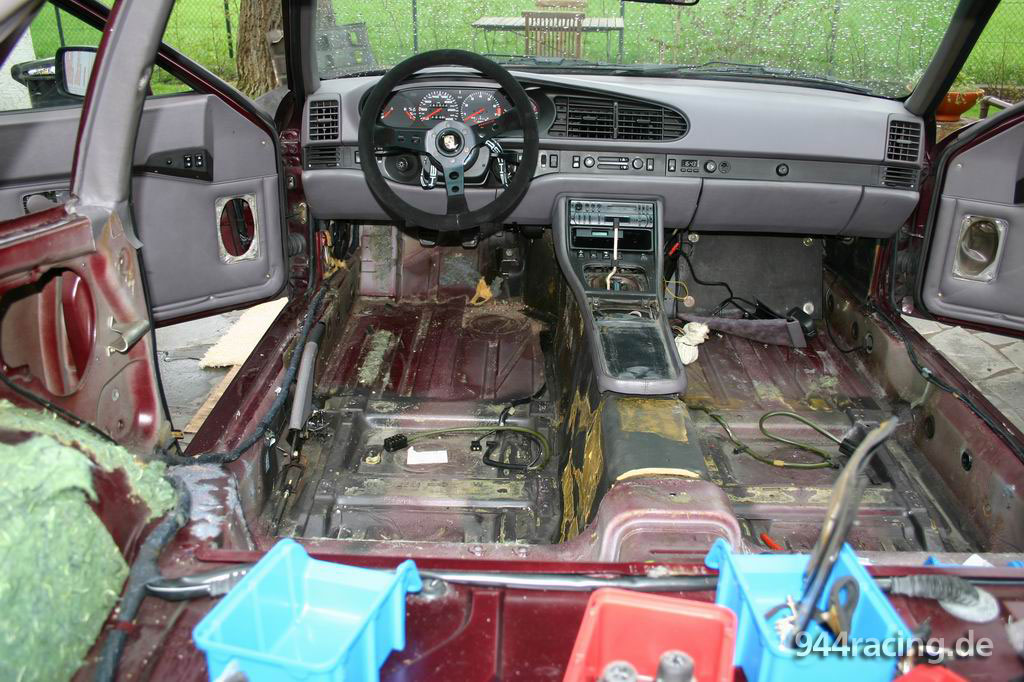
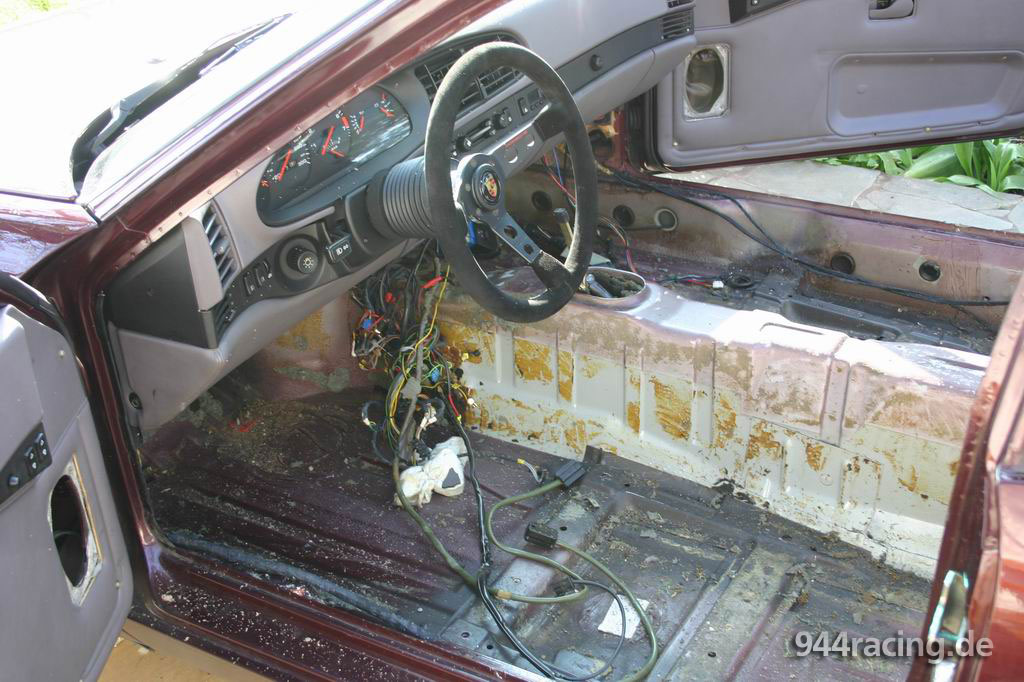
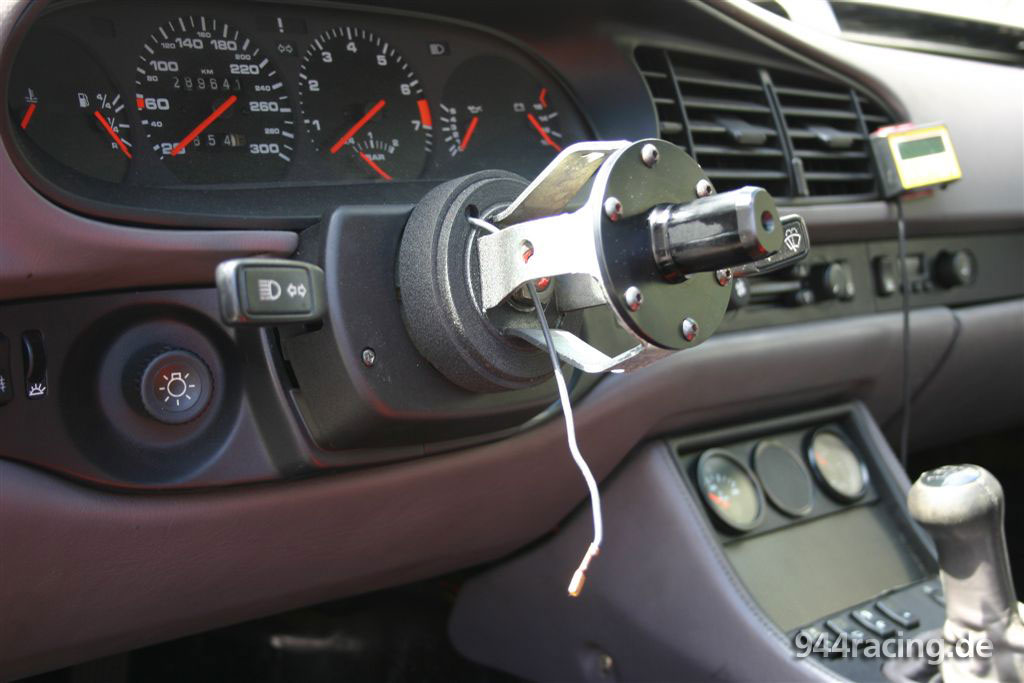
The original steering wheel had to leave... |
for a 75mm racing steering wheel from a 996 GT3 Cup racecar! |
 |
 |
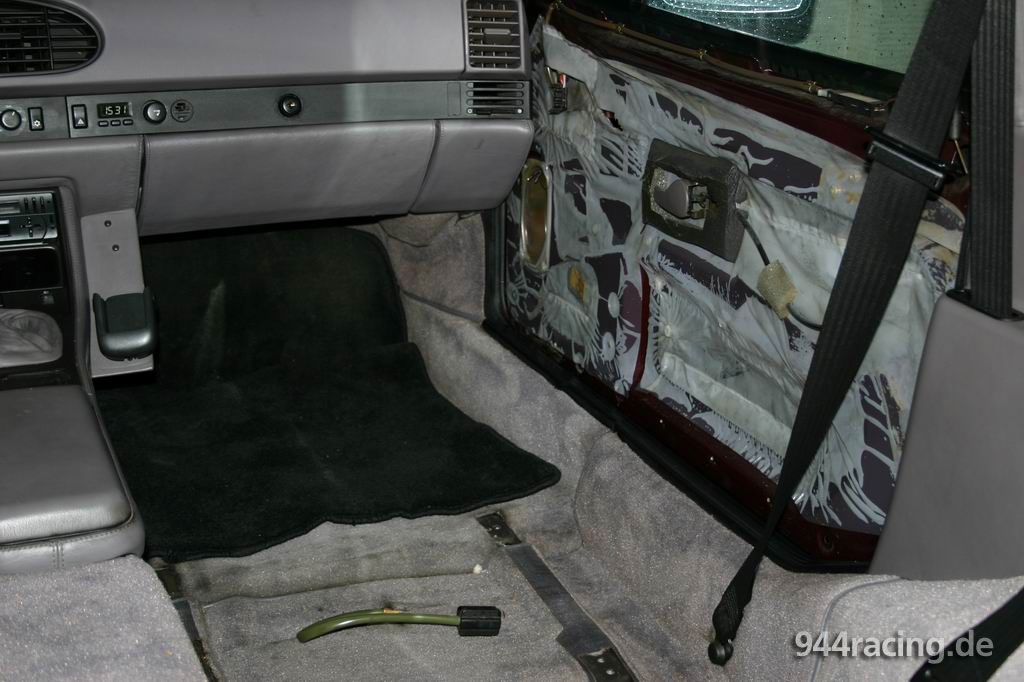
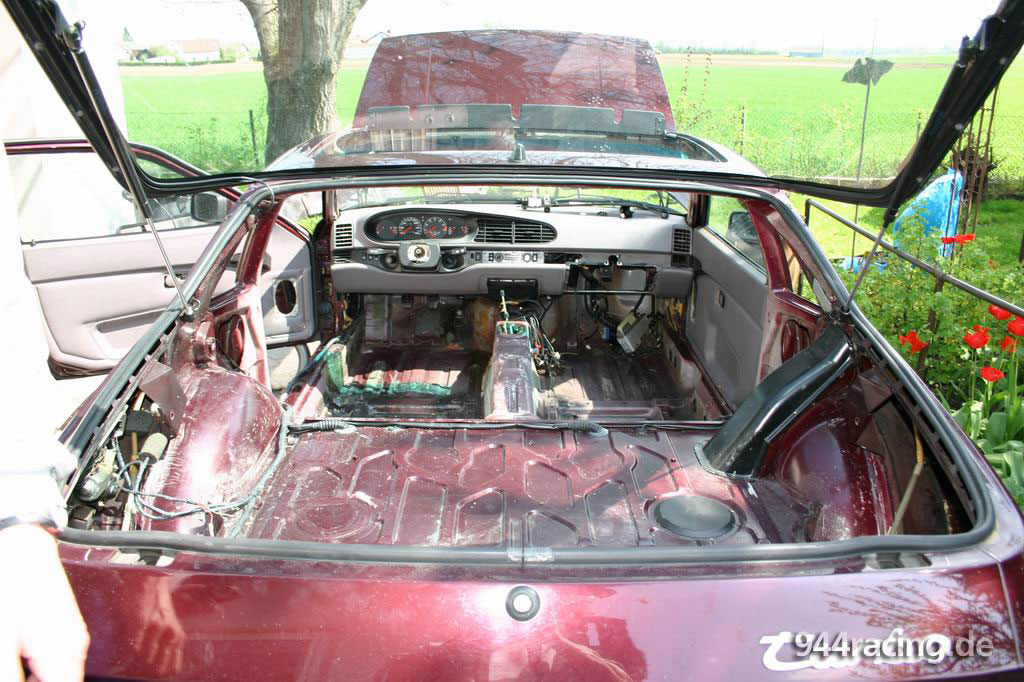
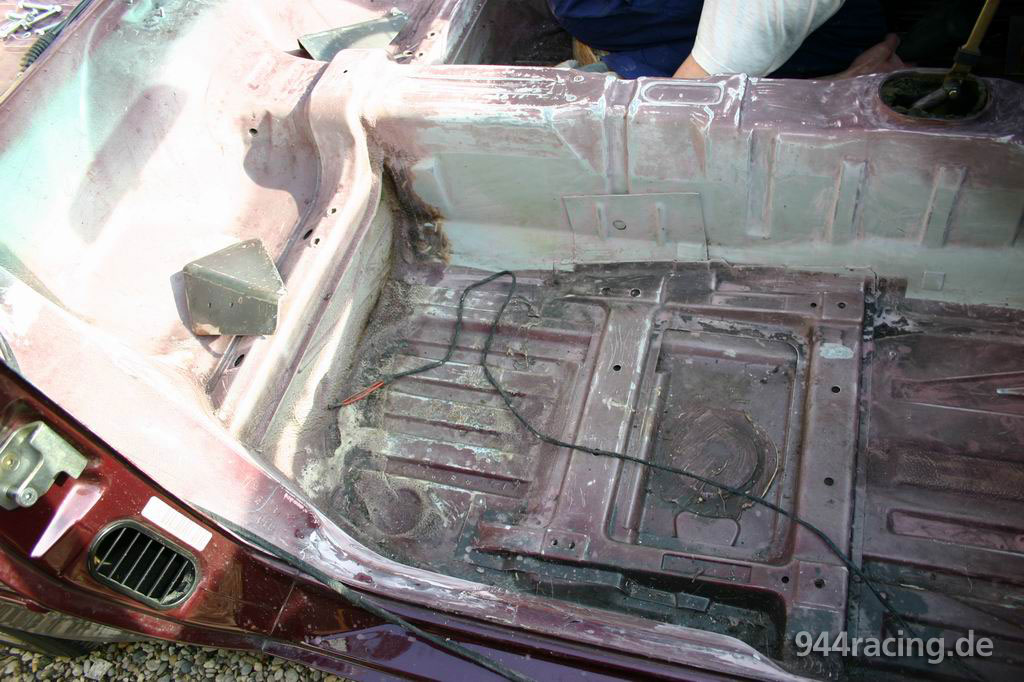
The rear carpet was removed and the back seat area
remained empty. |
Also the spare wheel and tools have been removed... the car jack followed a little later likewise! |
 |
 |
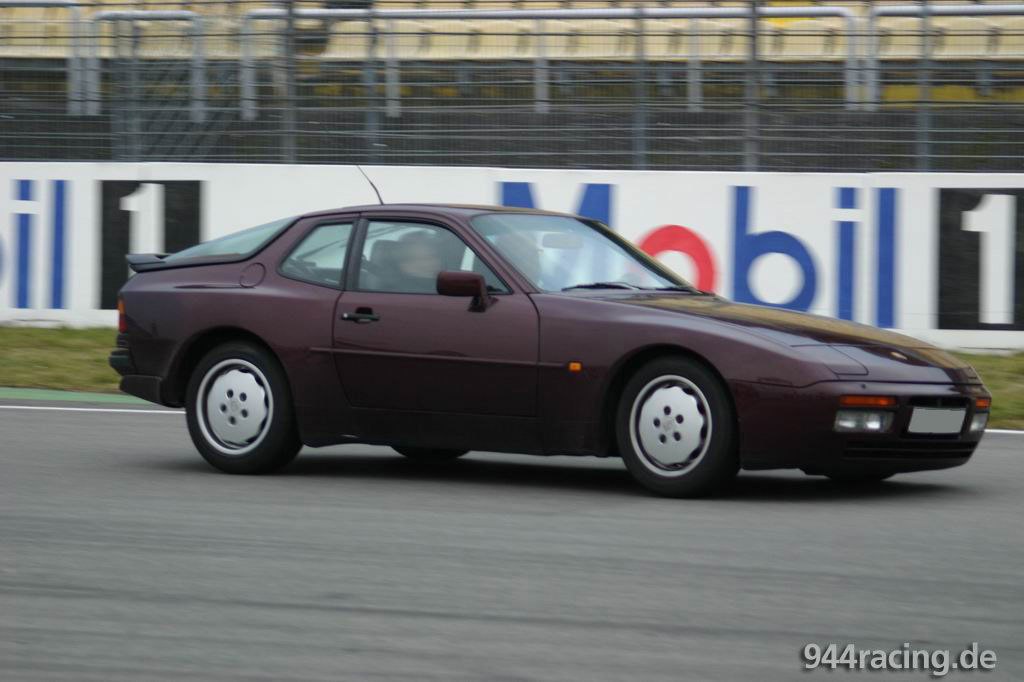
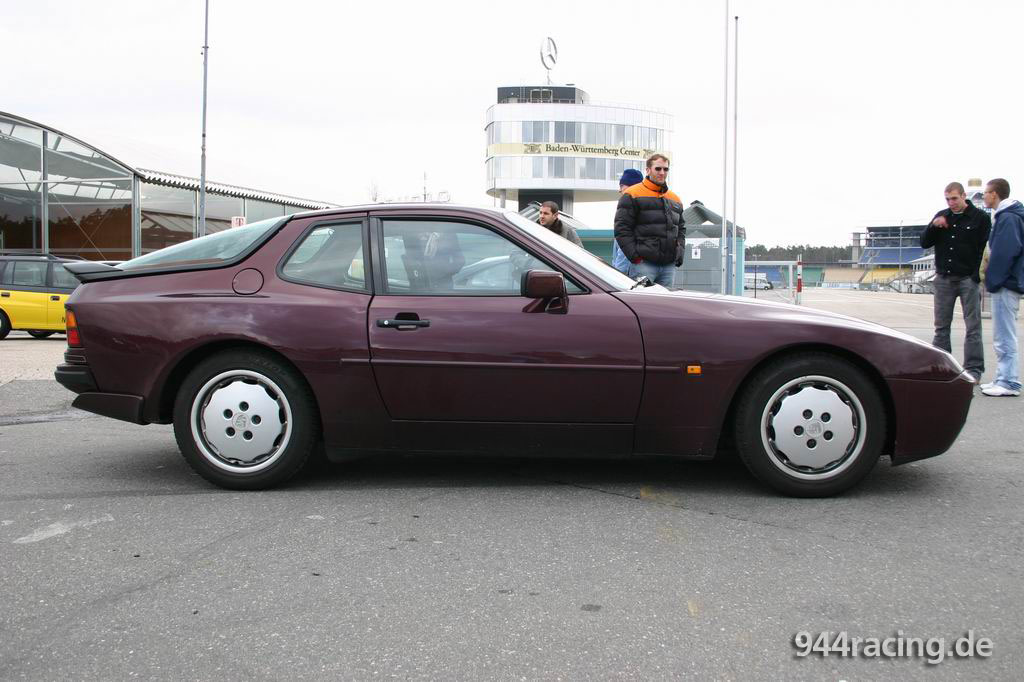
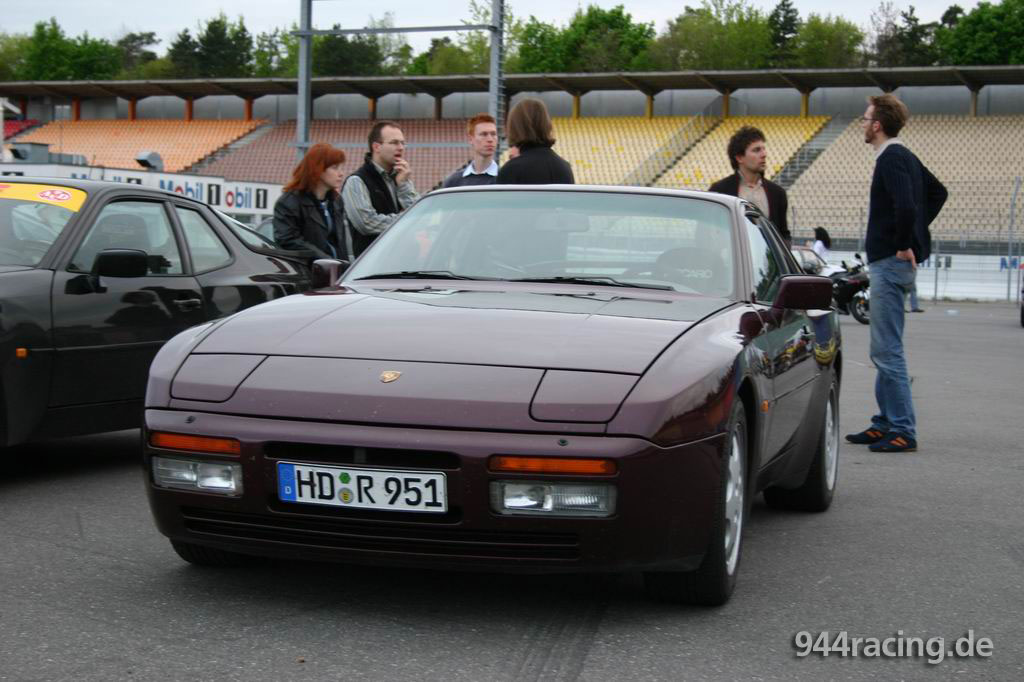
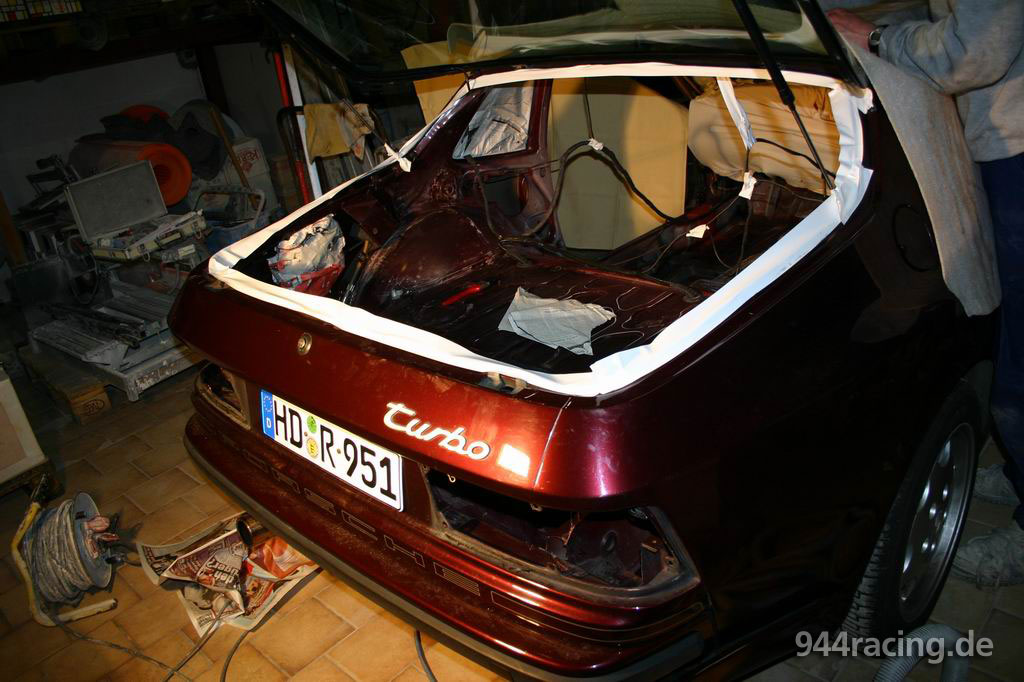
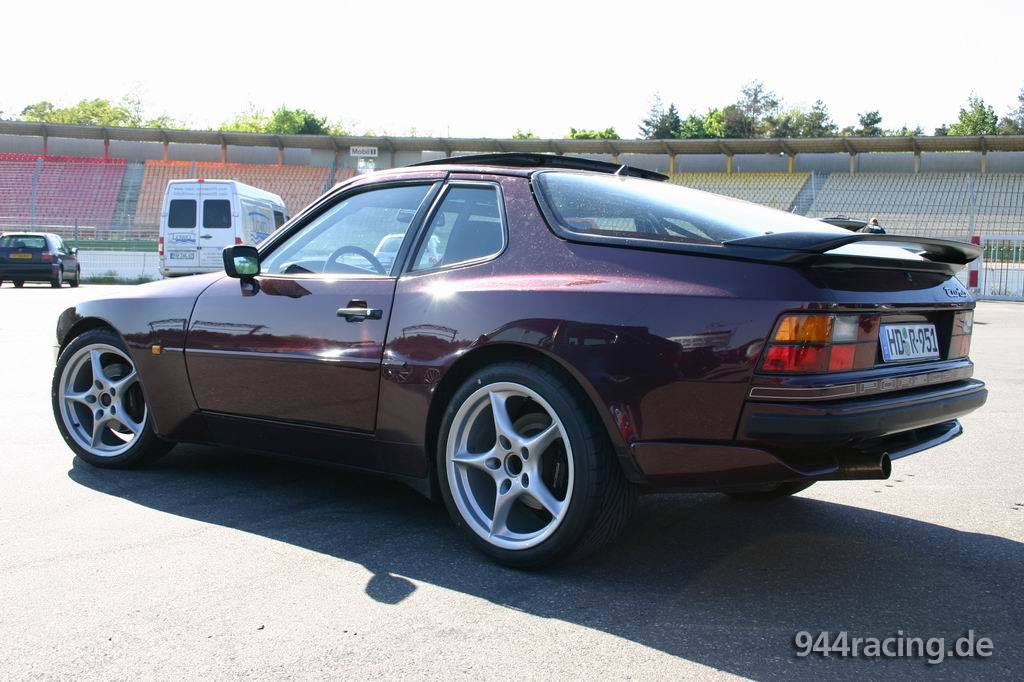
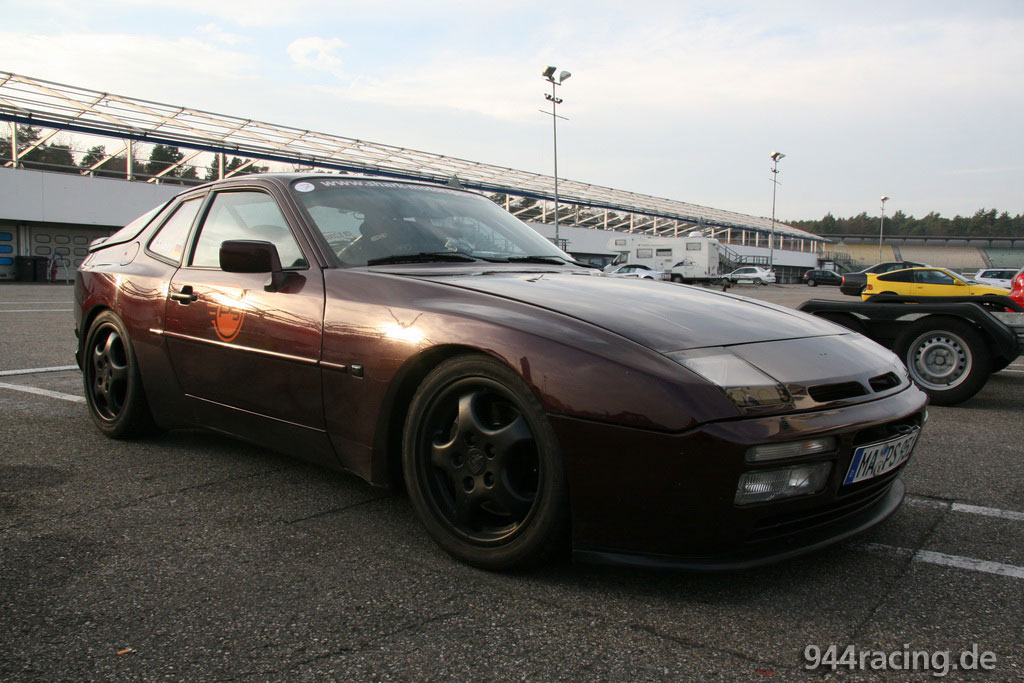
Outside still not modified... |
with the not really beautiful 16 inch winter rims of the 928... |
 |
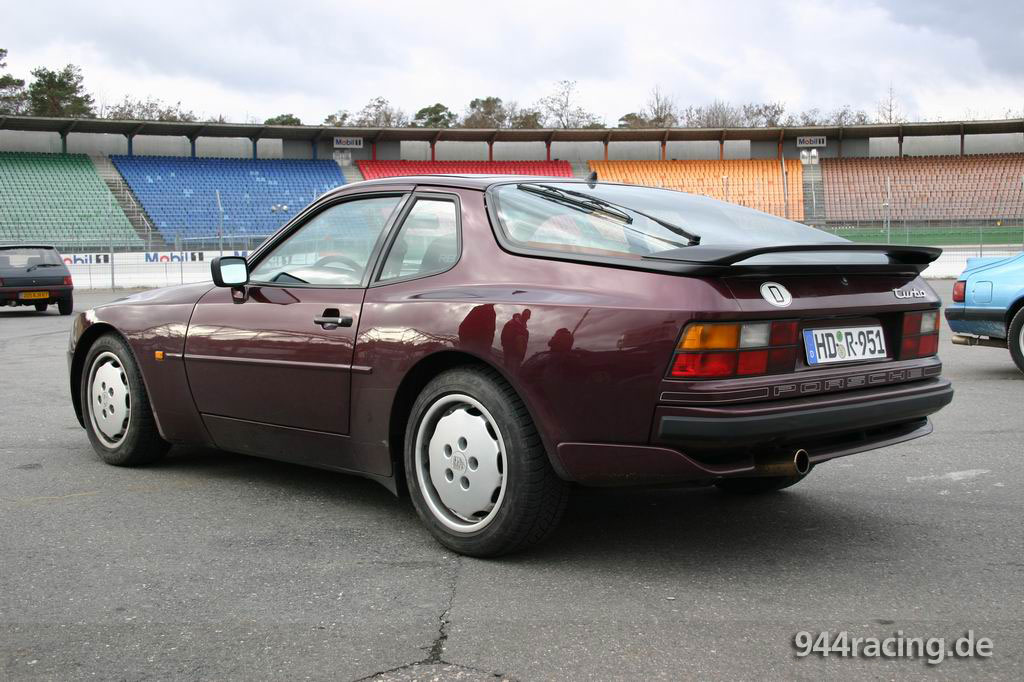 |
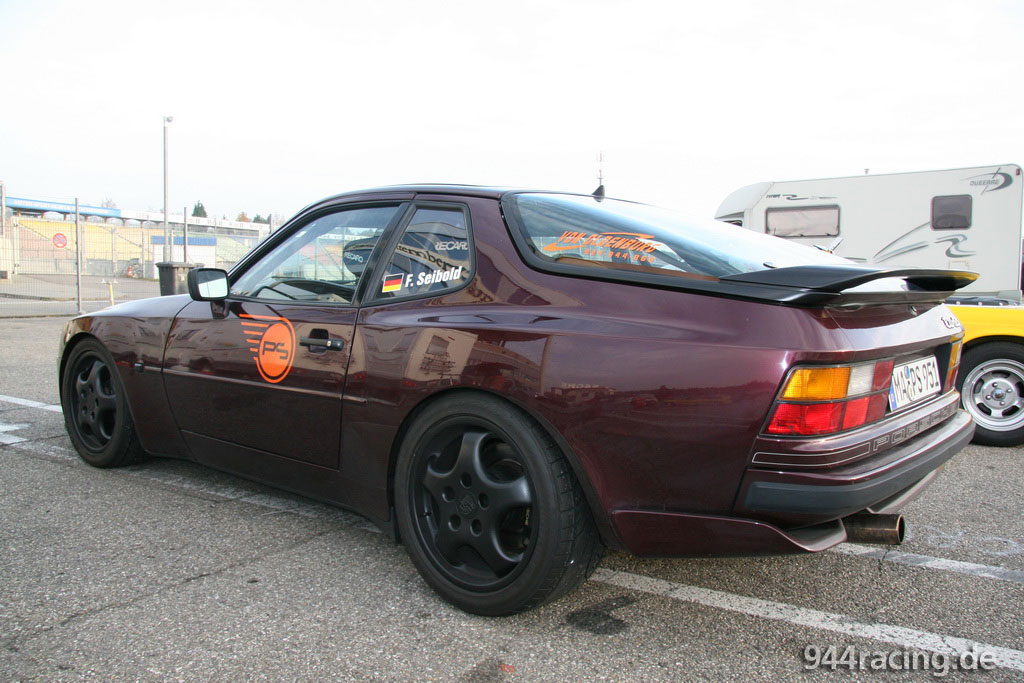
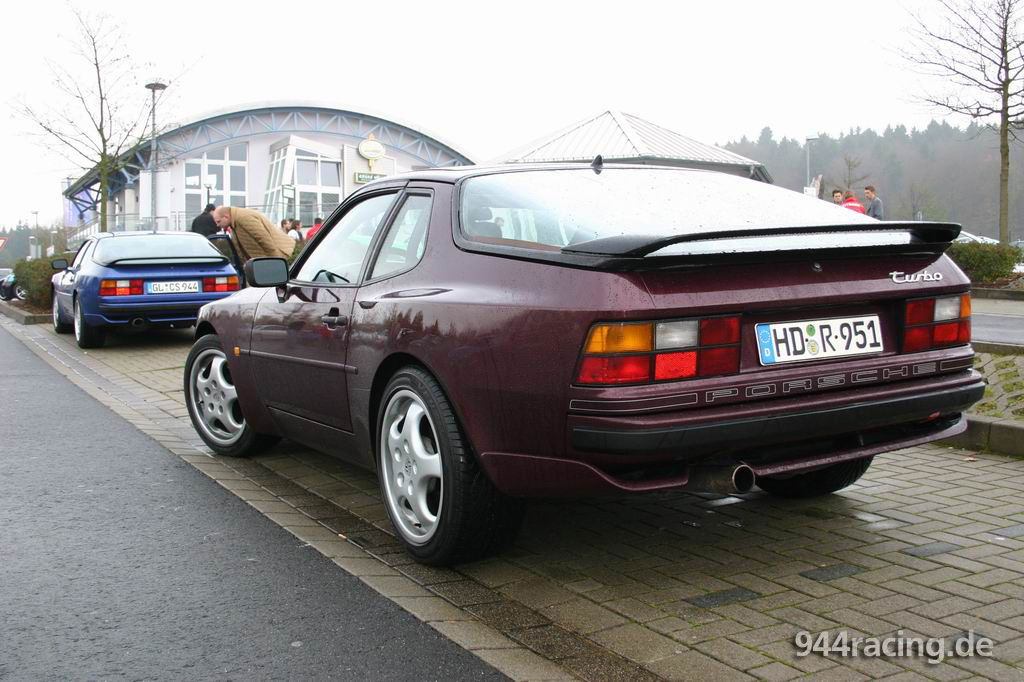
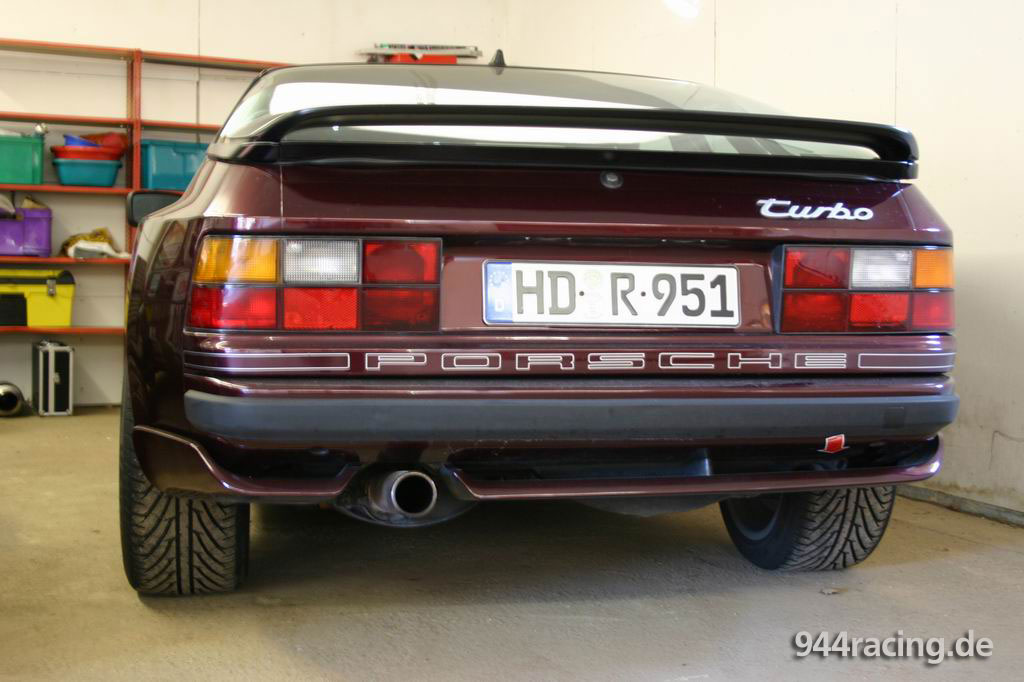
the 968-Style spoiler, which only the 944 of the last model year owned. |
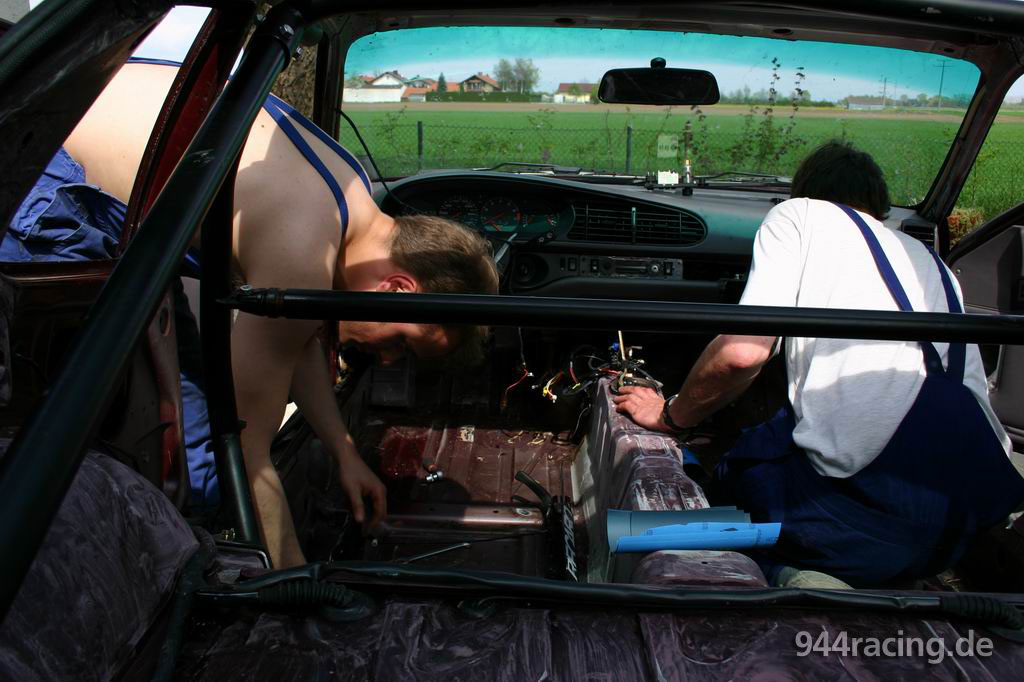
Inside the car was already racing atmosphere! |
 |
 |
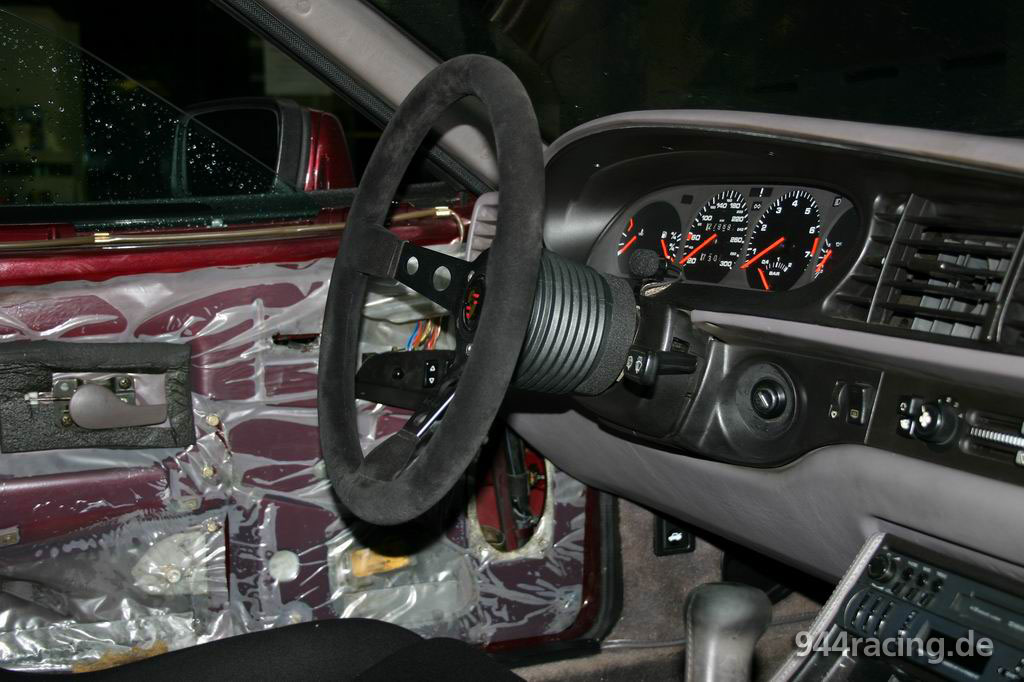
After a longer break with repairing (small load pressure problem and a few other things)... |
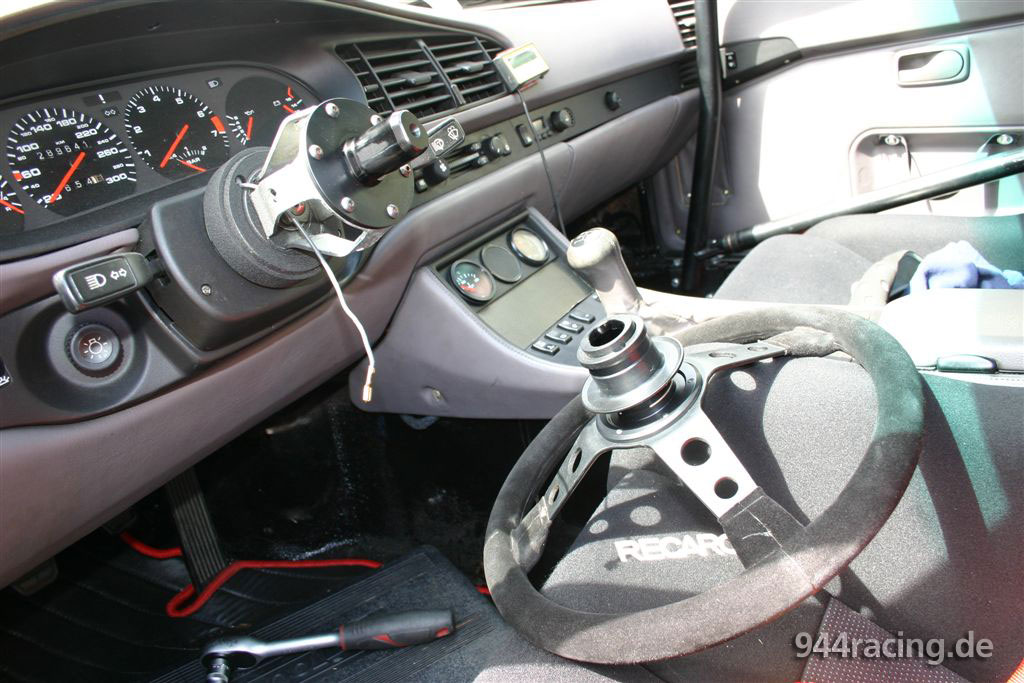
a steering wheel hub was installed, bringing the steerin wheel again 50mm closer towards the driver. Even a solution attaching the horn button on the hub was finally found. |
 |
 |
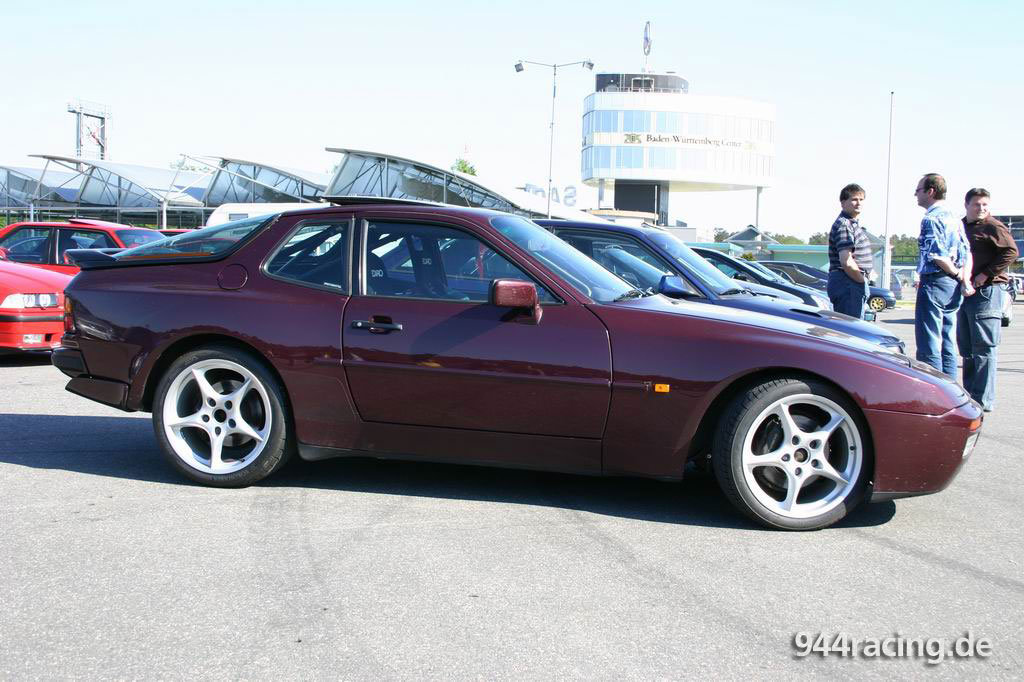
The car now comes with the Design90 16x7.5 Inch rims frontsided with Pirelli P Zero 225/50... |
and 16x9 Inch rims backsided with 245/40. |
 |
 |
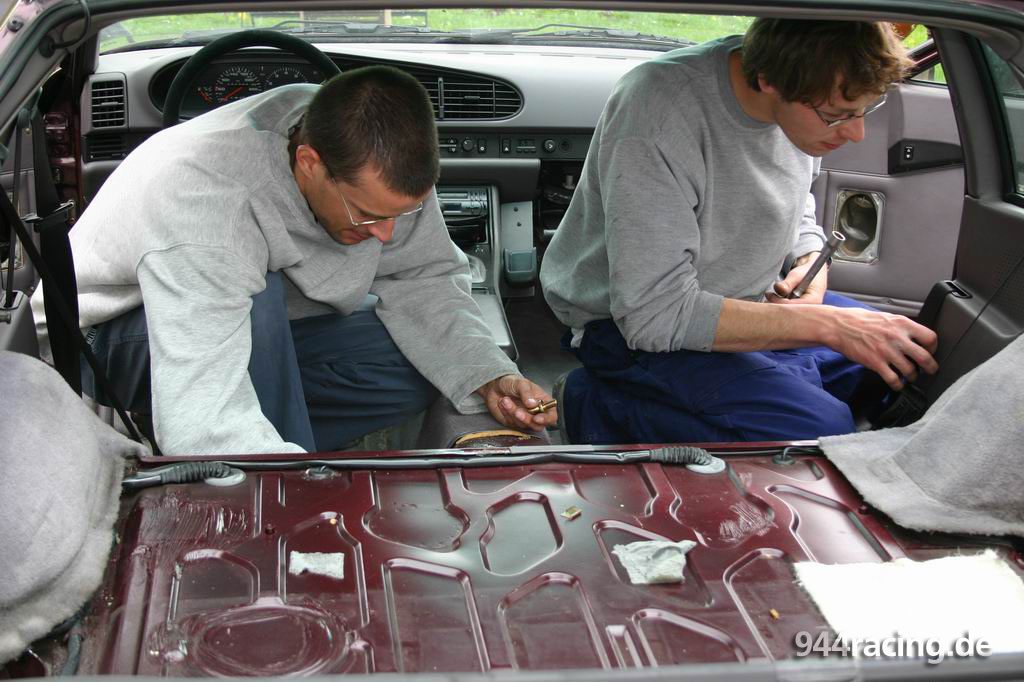
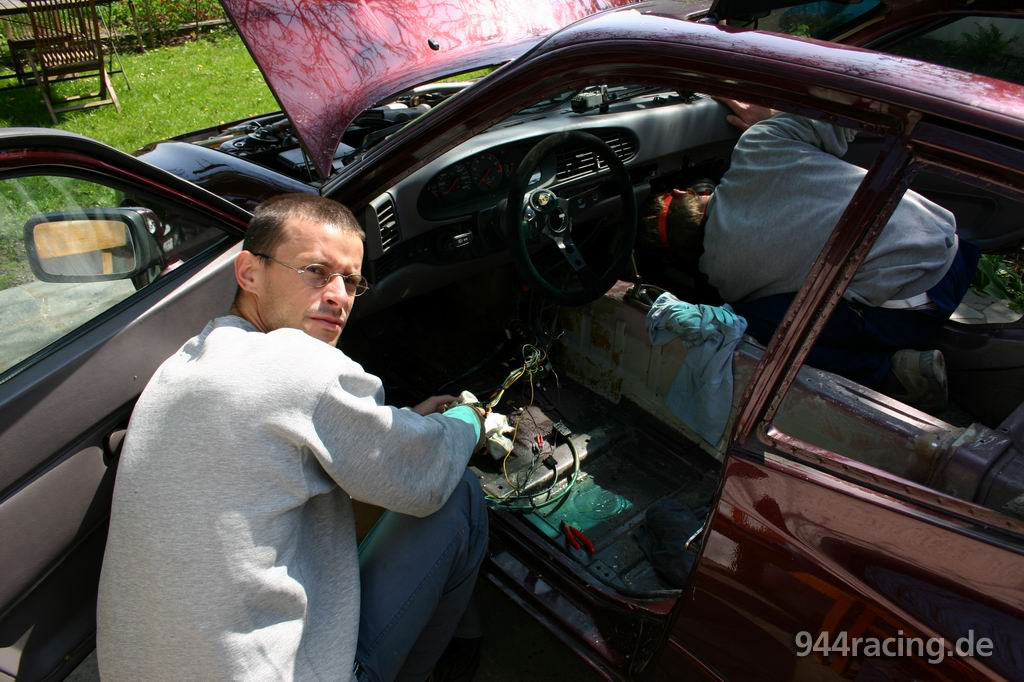
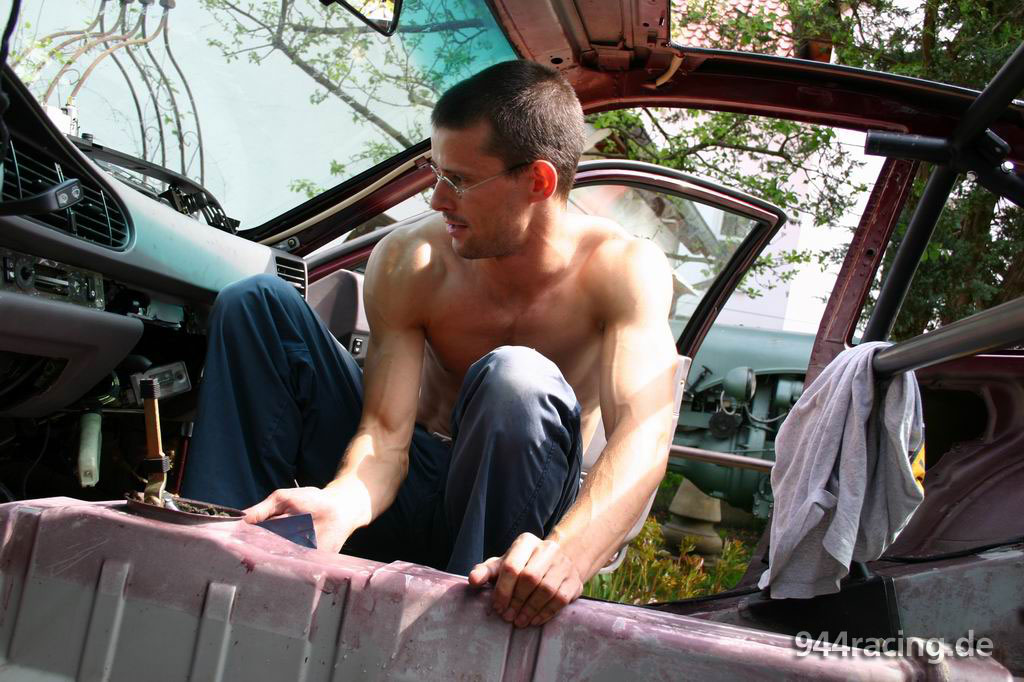
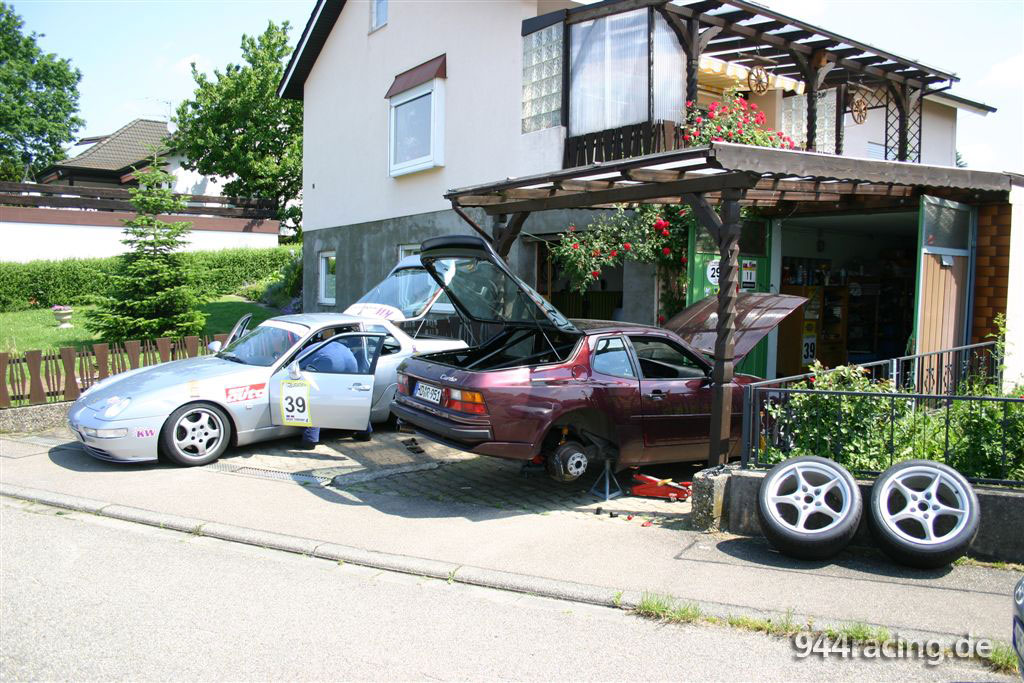
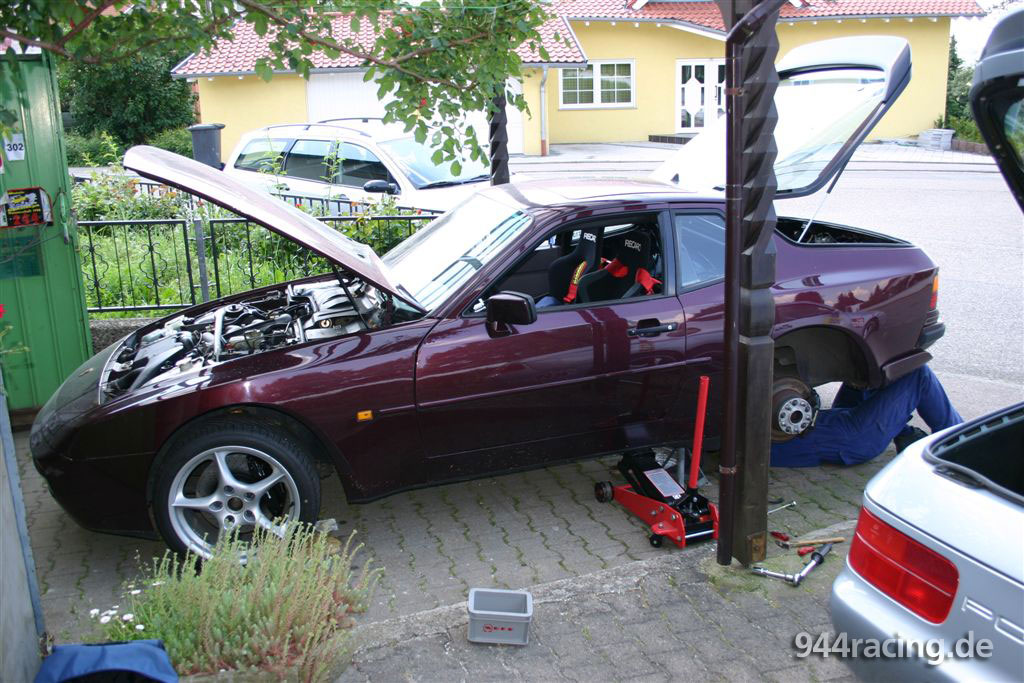
Since the car shows a solidly and perfect basis to transform it into a "Racing Tool", I drove it to Makus and Rainer over the weekend. Our work within the next two and a half days will be shown by the next pictures. |
It becomes serious: Rainer started with the carpet. Currently i was
in mind, that we are removing the carpet to remove the insulation. |
Subsequently, I wanted to put the carpets back into the car...but
Rainer and Porsche-Makus dissuaded me fortunately from that. |
 |
 |
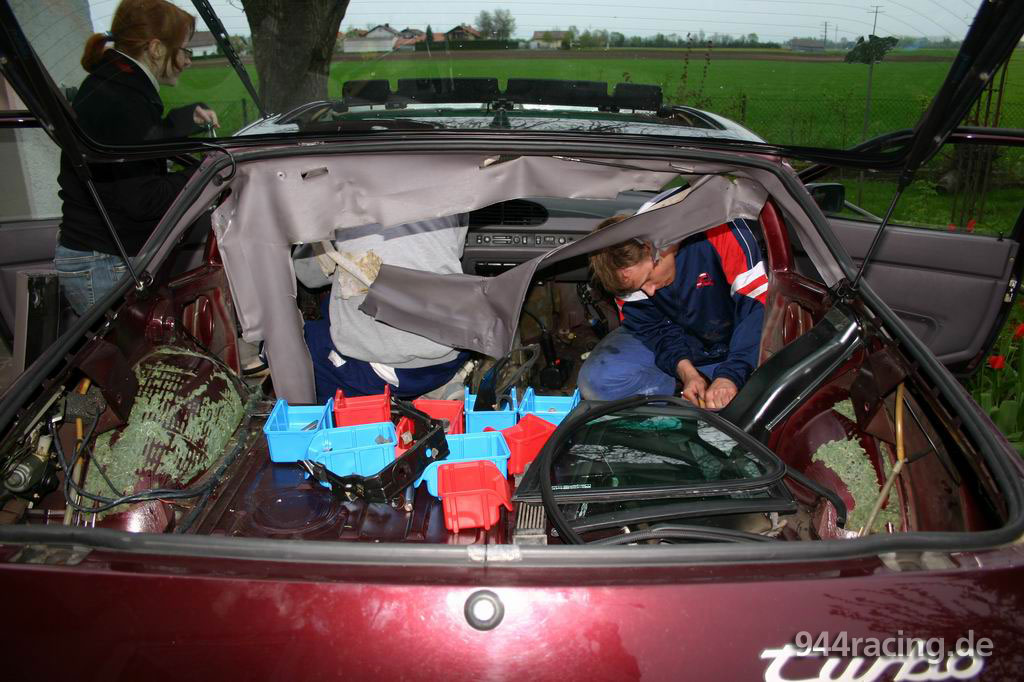
Removing carpets is funny and has to be completed fast. Doing it carefully,
remain the carpet completely. |
For the screws and small parts, small boxes are helpful in sorting
and keeping the overview. |
 |
 |
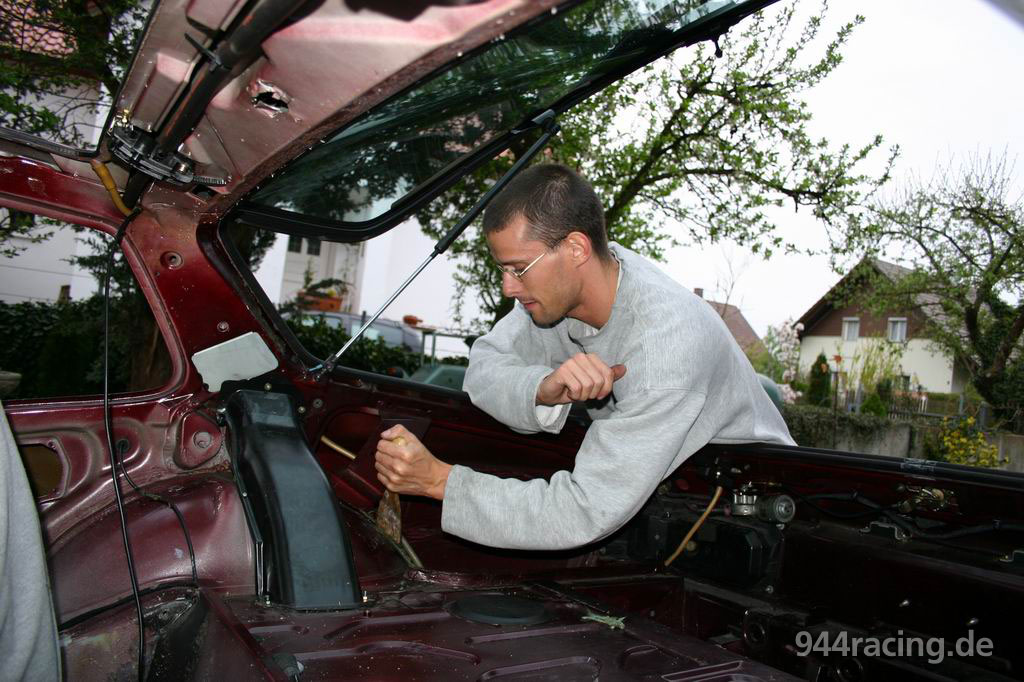
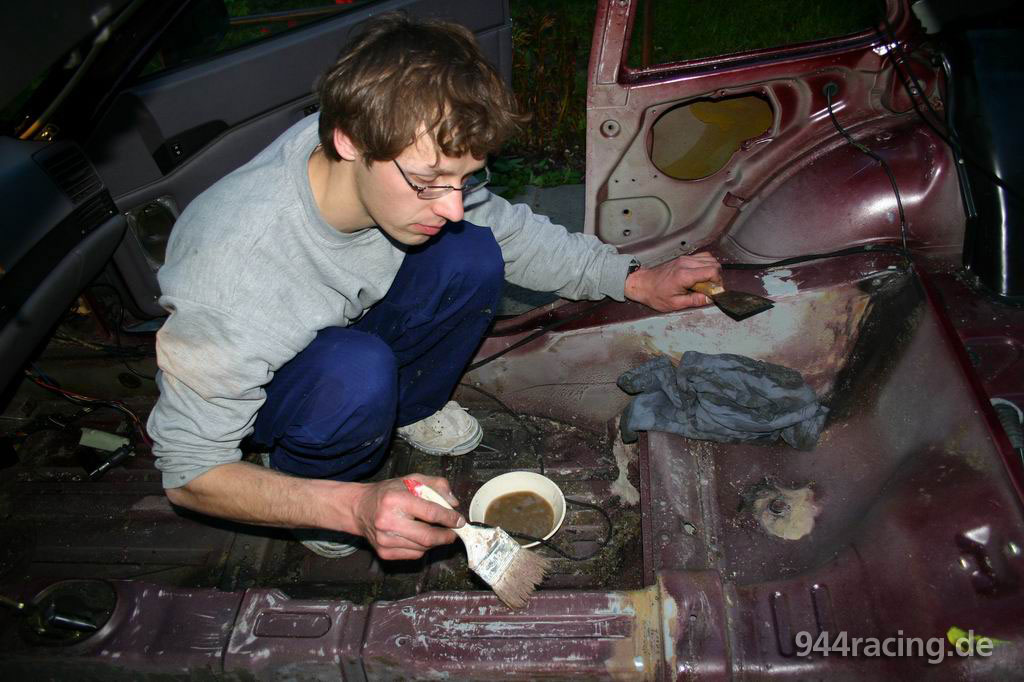
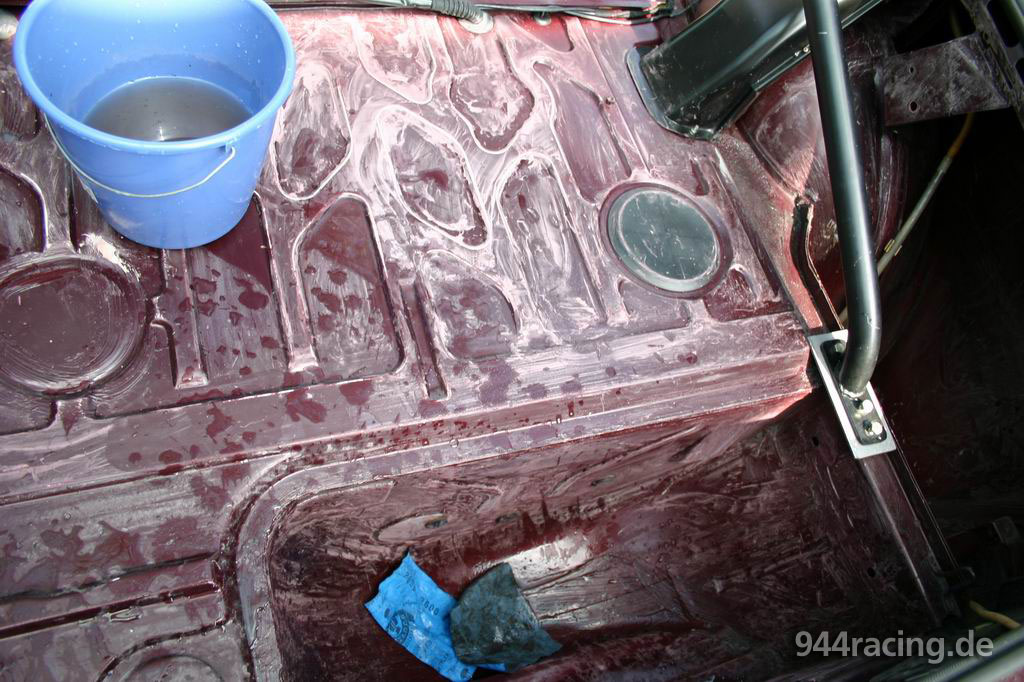
More complex and unpleasantly than the carpet removal is removing
the adhesived insulation. |
This picture shows the start of work... later with loosing not only
the glue from sheet metal but also skin of the fingers, I stopped laughing. |
 |
 |
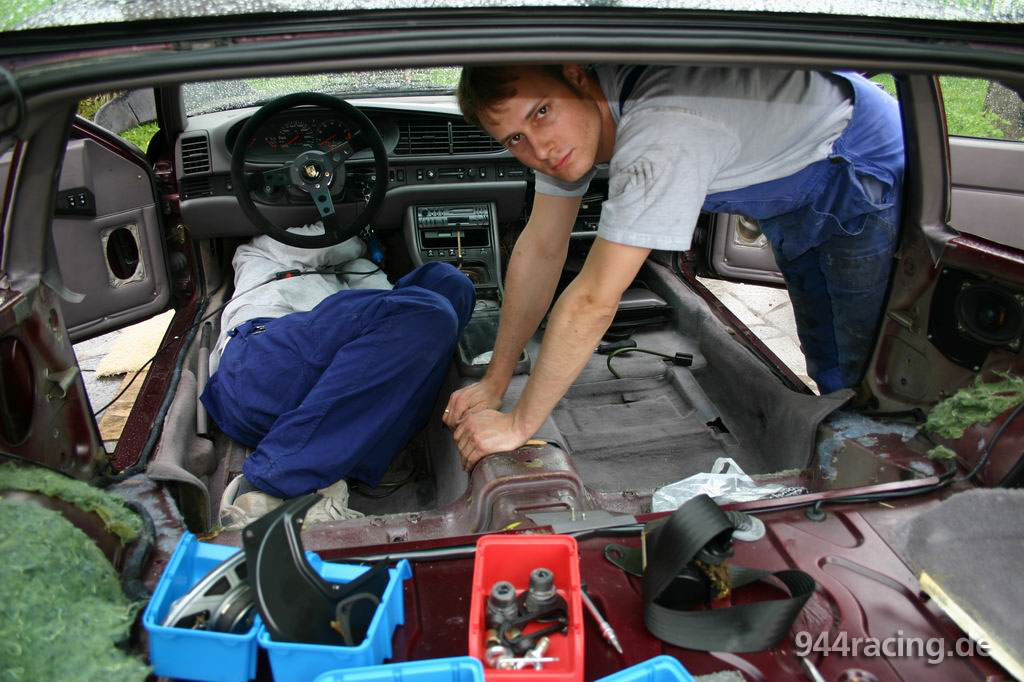
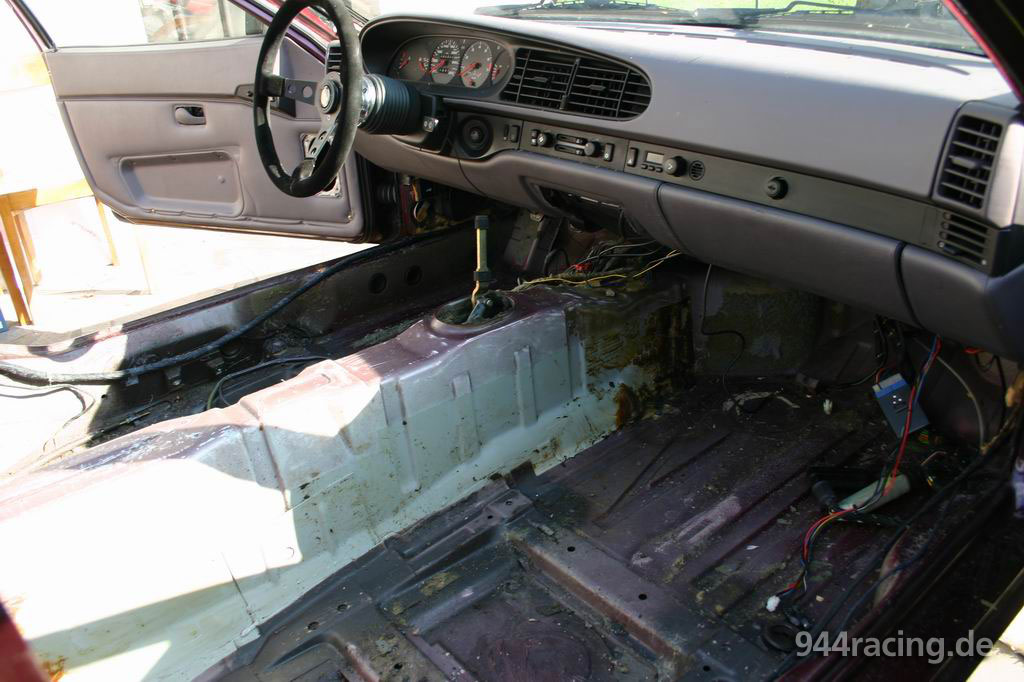
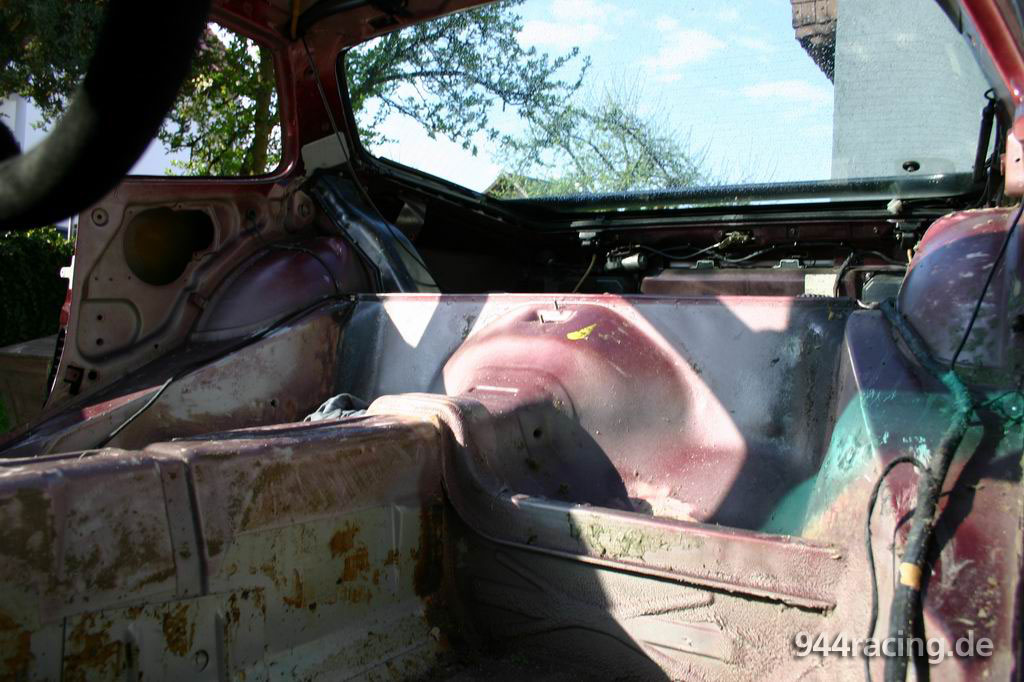
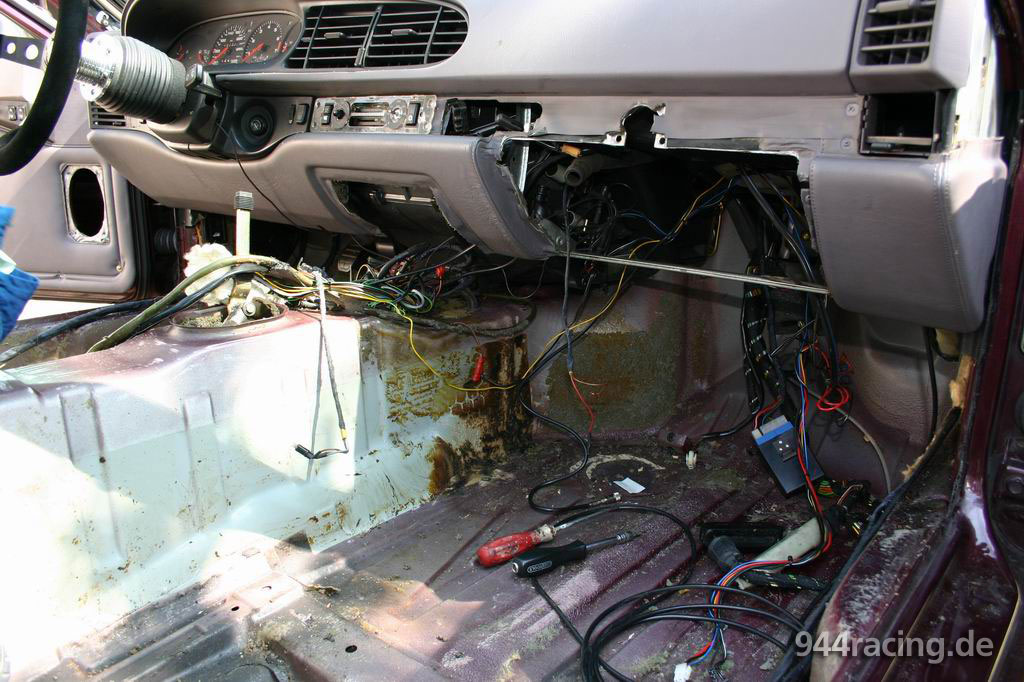
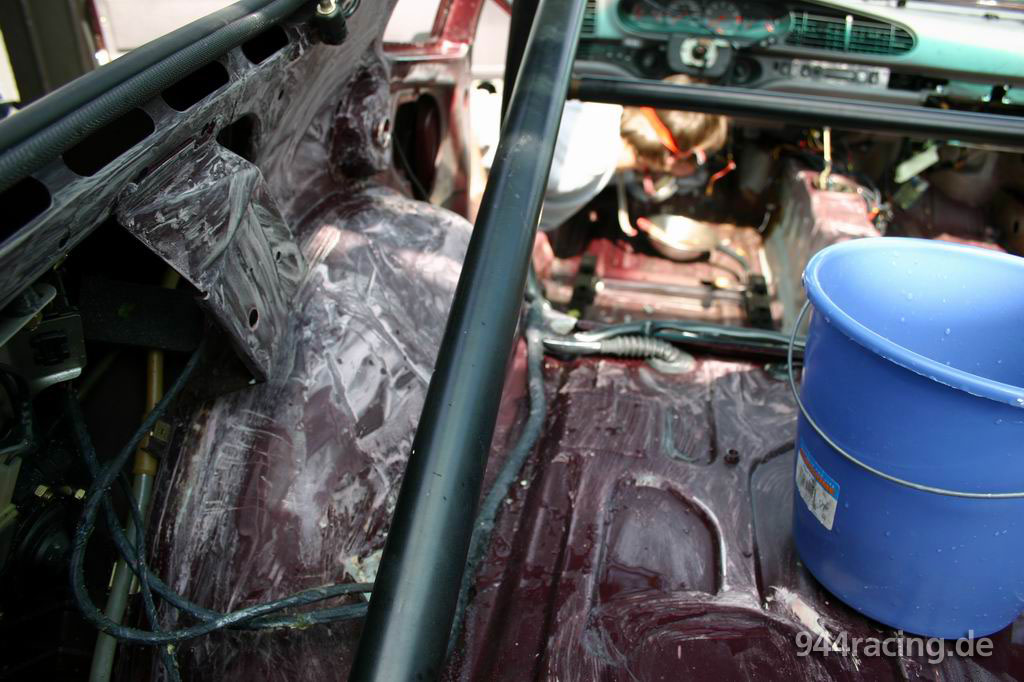
In this Picture the car seems to be really empty.... |
but the mainpoint of the action "flash-bright interior" has yet to
be actioned! |
 |
 |
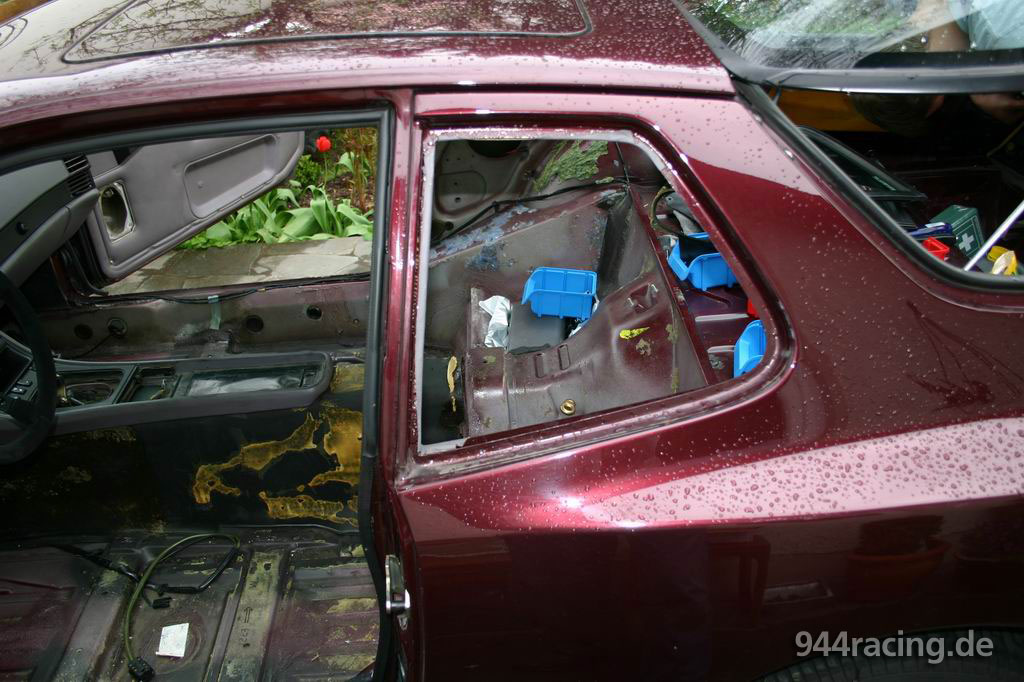
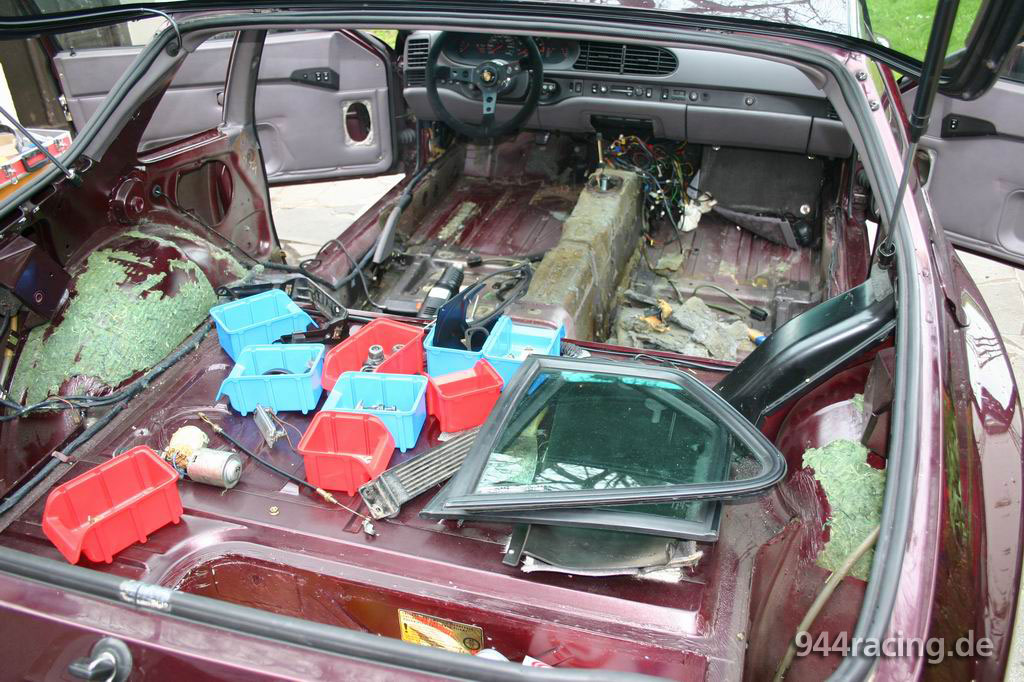
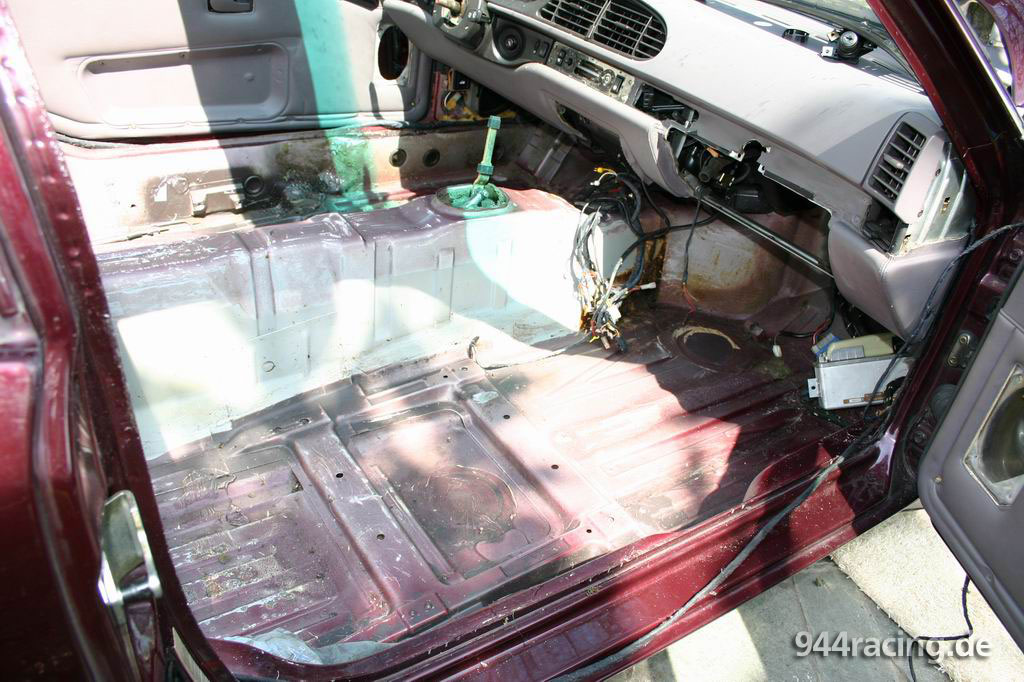
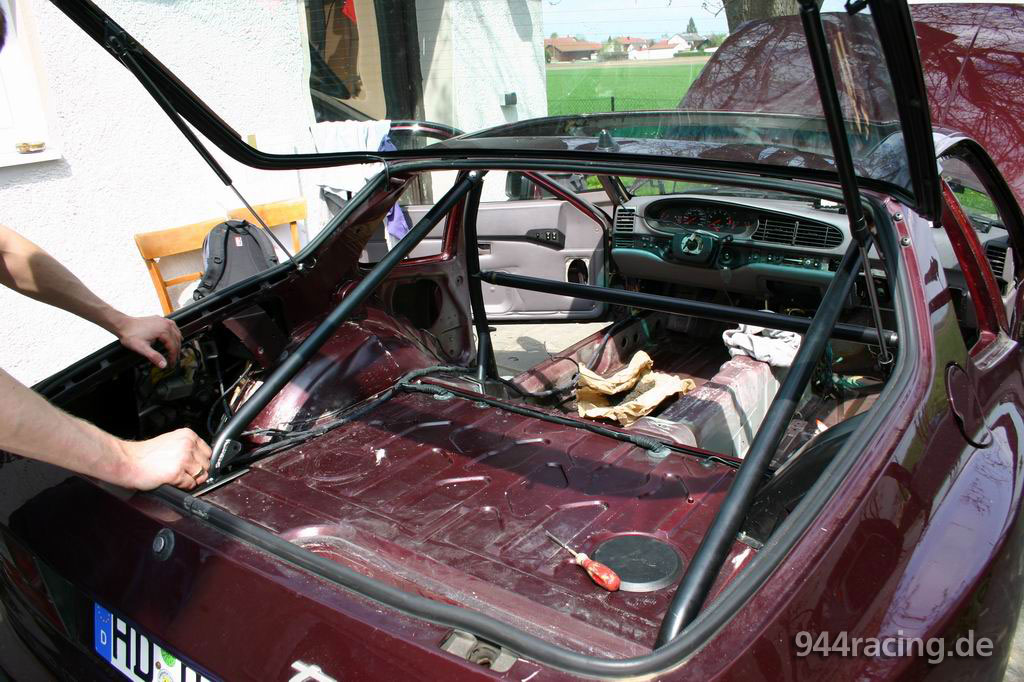
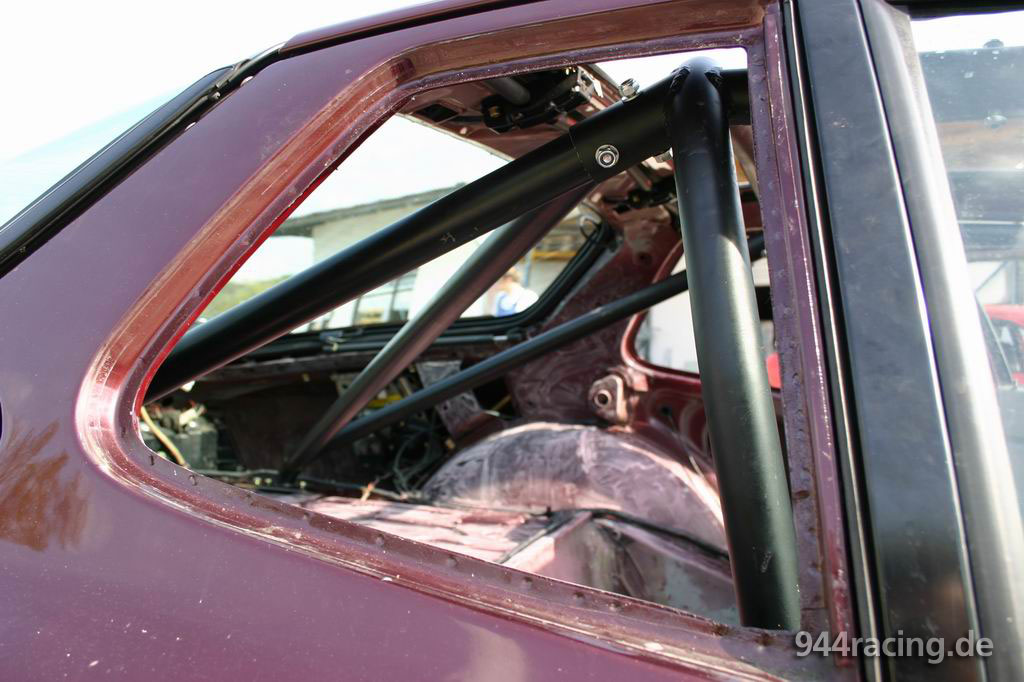
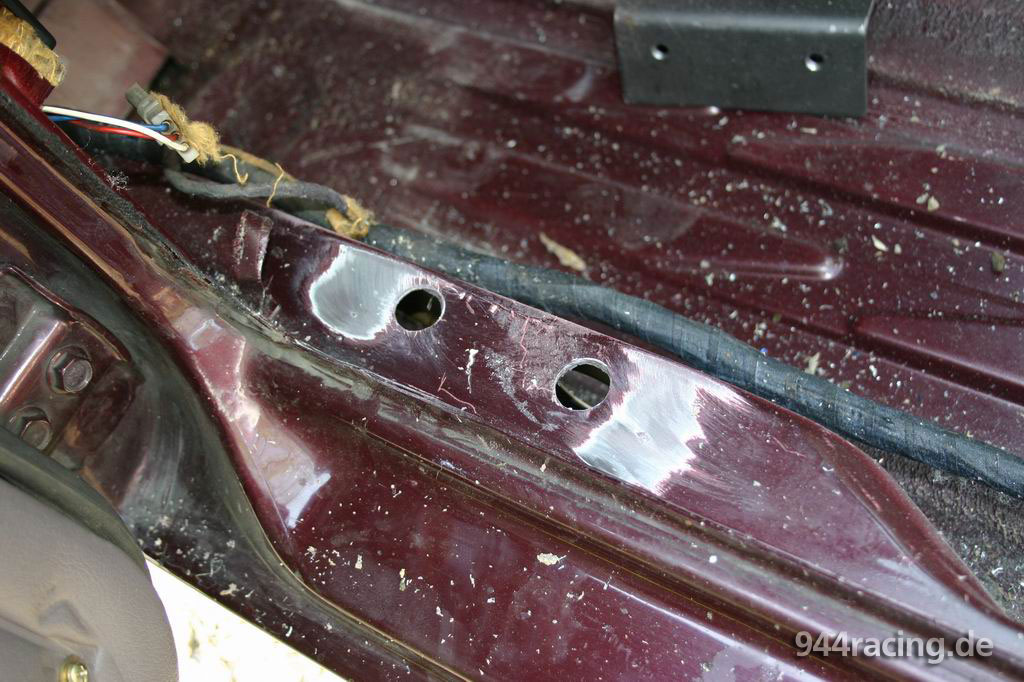
The rear triangle windows were pressed out for removing the rear side
panels...in addition this hole is helpful for the following works. |
The rubber insulation is now removed from the gearbox tunnel, the triangle
windows and the sort boxes are laying in the trunk. |
 |
 |
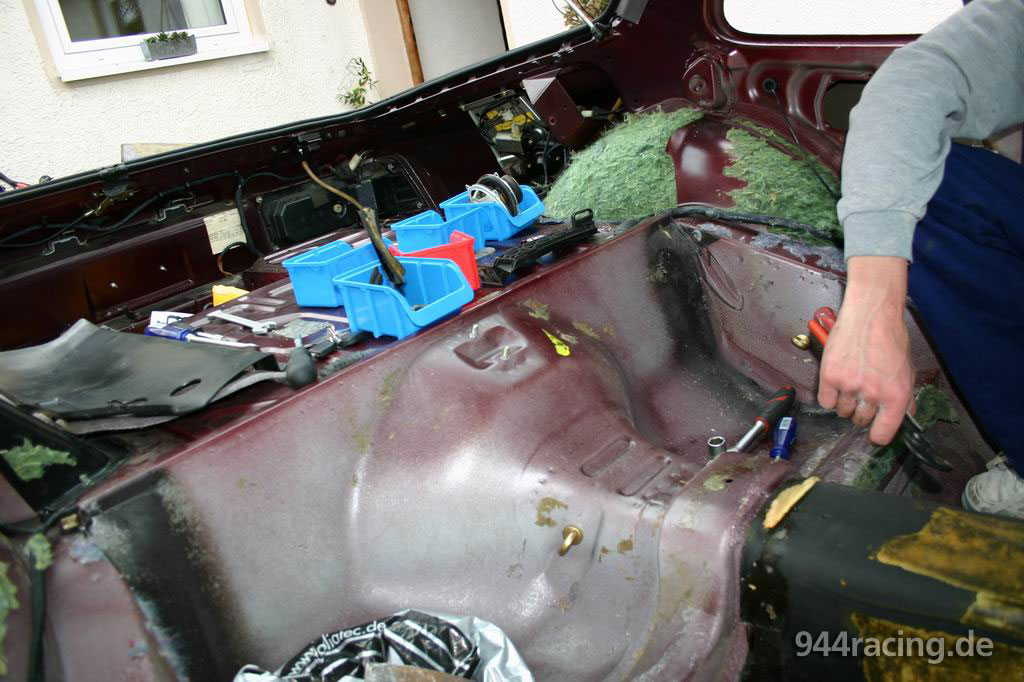
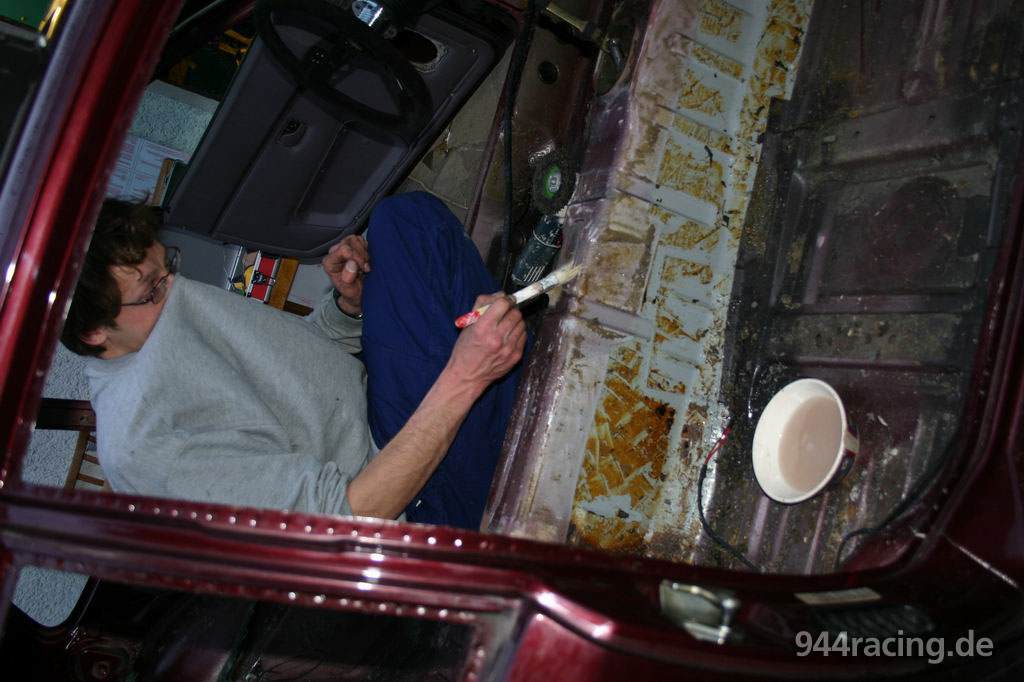
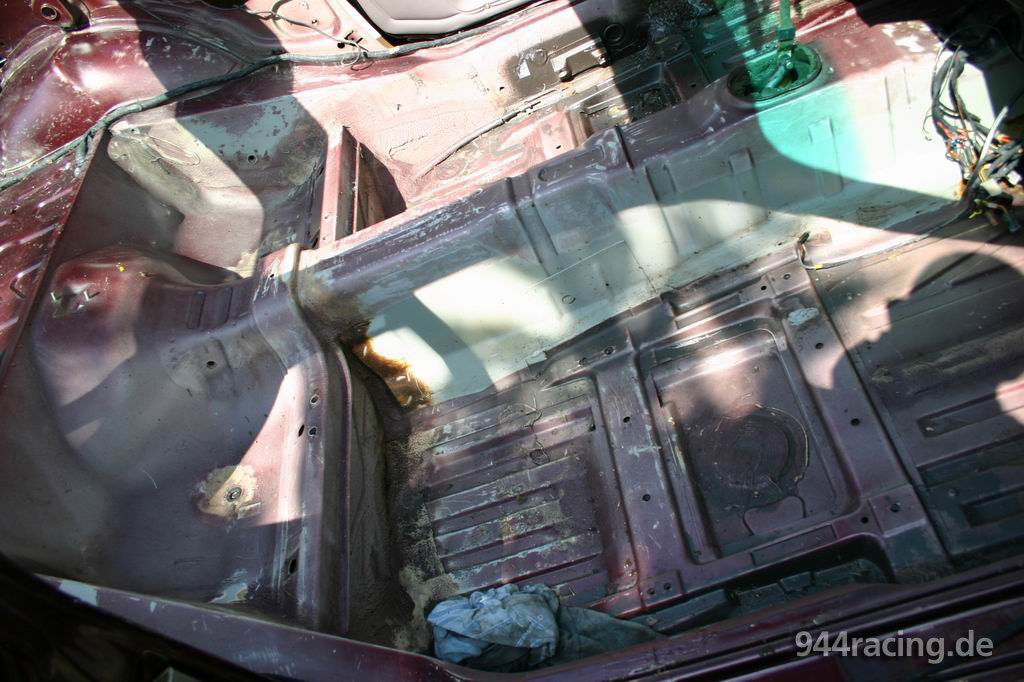
Under the rubber insulation a bitumen insulation appears at the right
and left side of the gearbox tunnel. |
The best way to remove this bitumen insulation is simultaneously done
by spreader and hot-air hair dryer. |
 |
 |
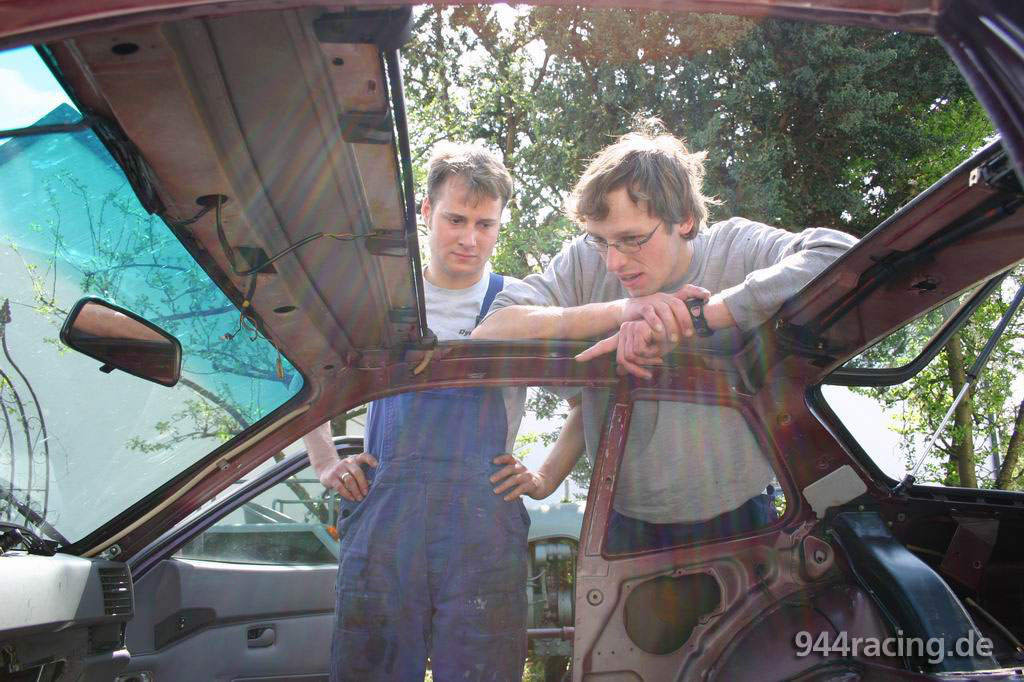
Now it is time for the headliner. I did not want to remove it but
Rainer and Porsche-Makus convinced me for a full interior painting. |
And here are the controllers, which we removed due to safety protection...
likewise the battery became clamped. Since we also want to clean the
wiring harness, disconnecting the battery have to go ahead! |
 |
 |
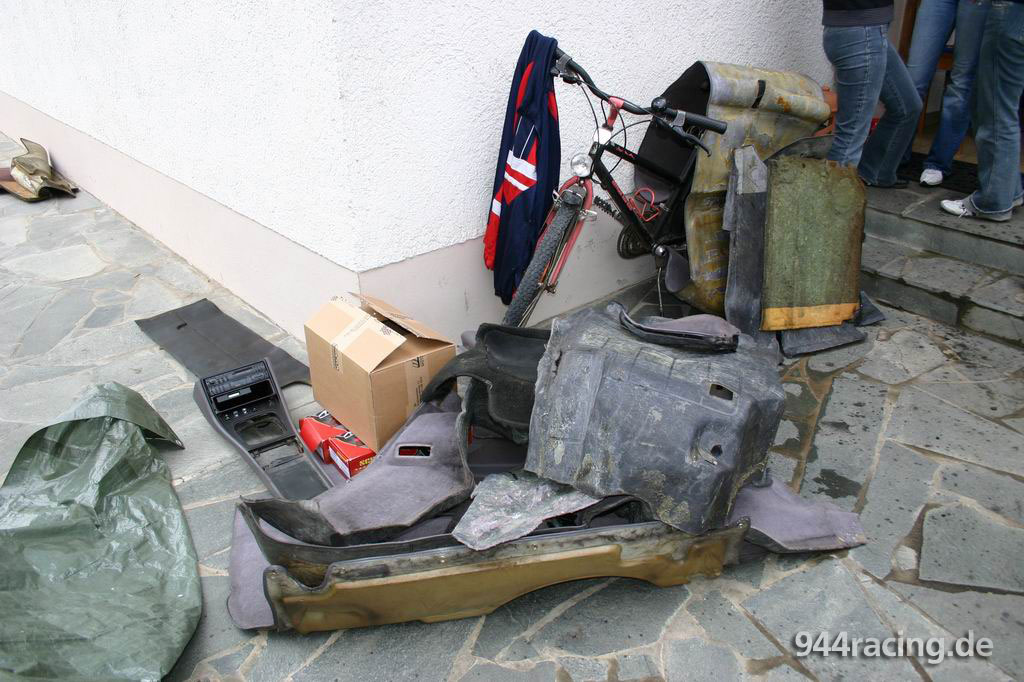
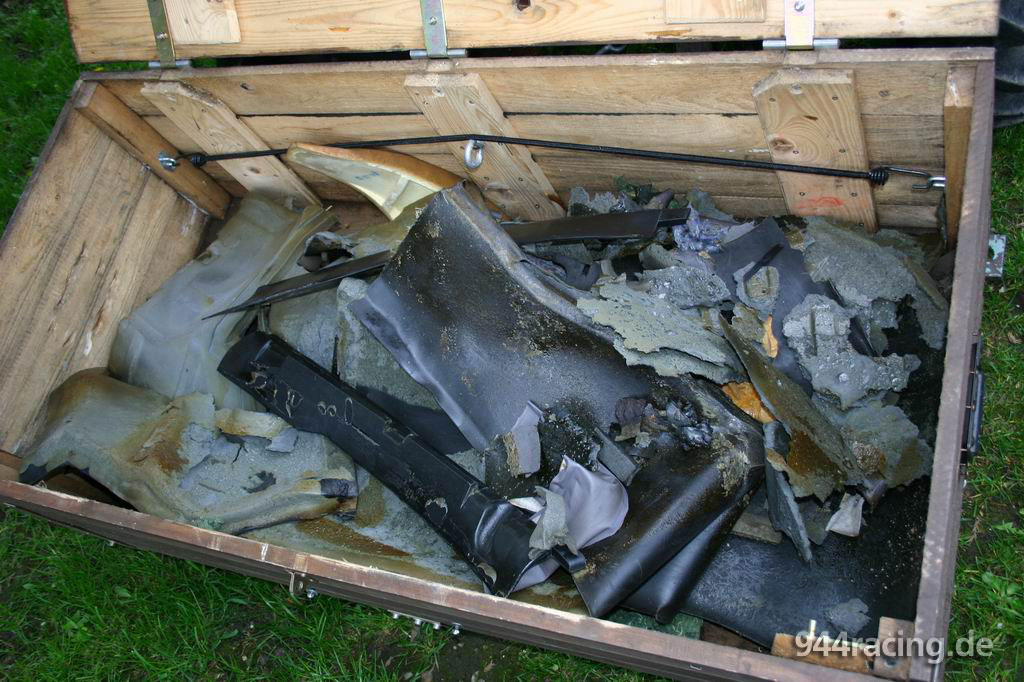
Here are parts of the "cannibalized" interior equipment. |
Some of the insulation and other rubbish out of the car. |
 |
 |
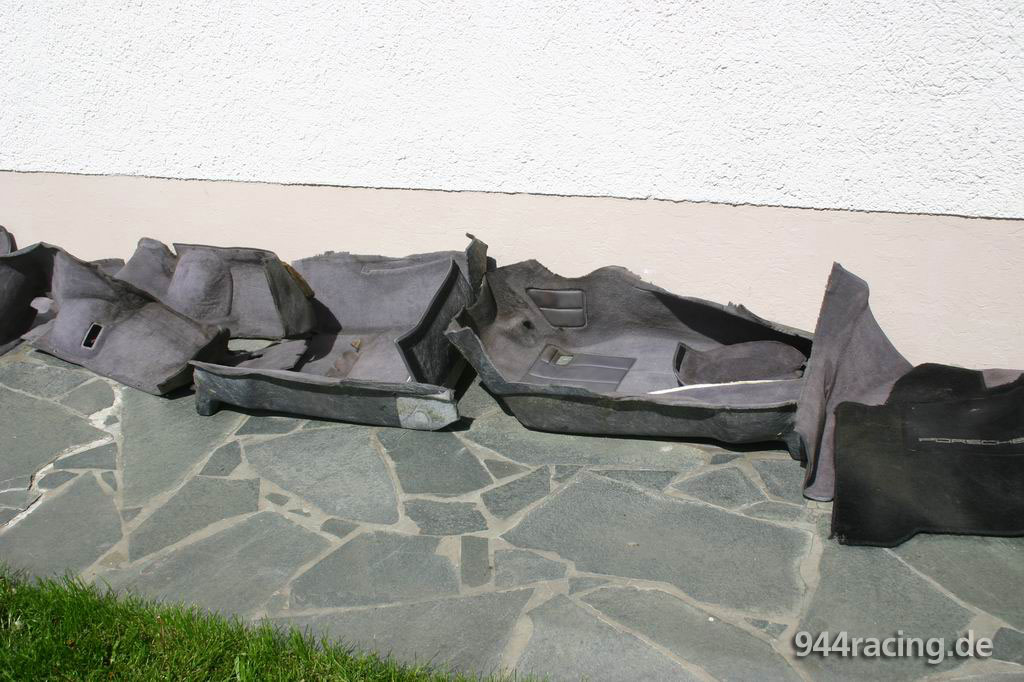
And still the enormous amounts of carpets ... |
...installed inside a 944! |
 |
 |
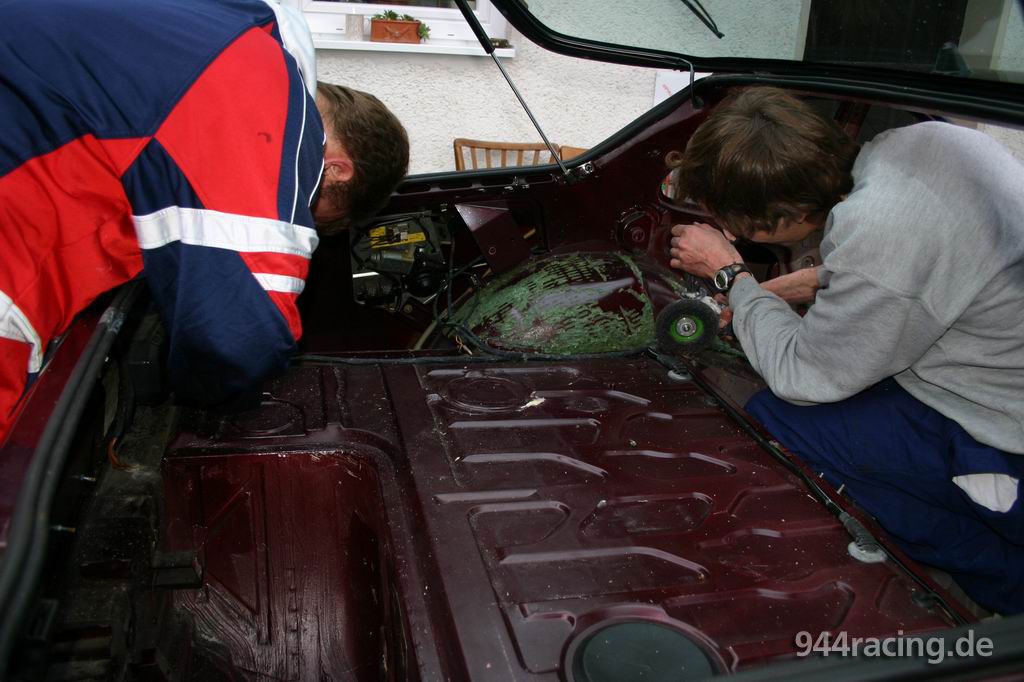
Removing Glue and adhesives mats from the interior is a hard work.
With the spreader... |
...as well as with the Flex and by hand all had to help. |
 |
 |
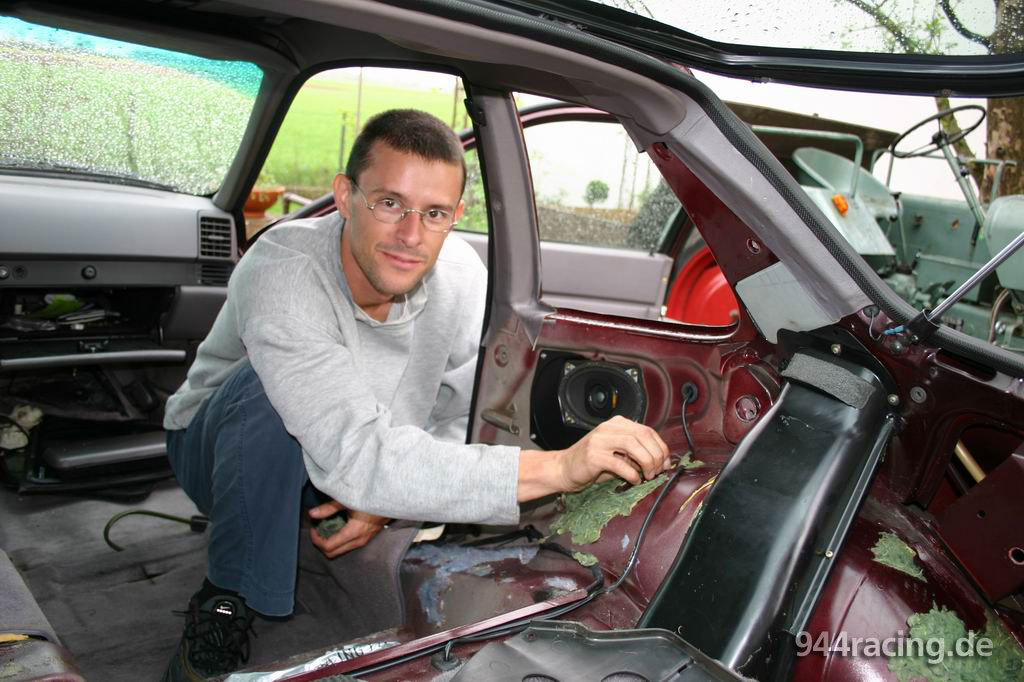
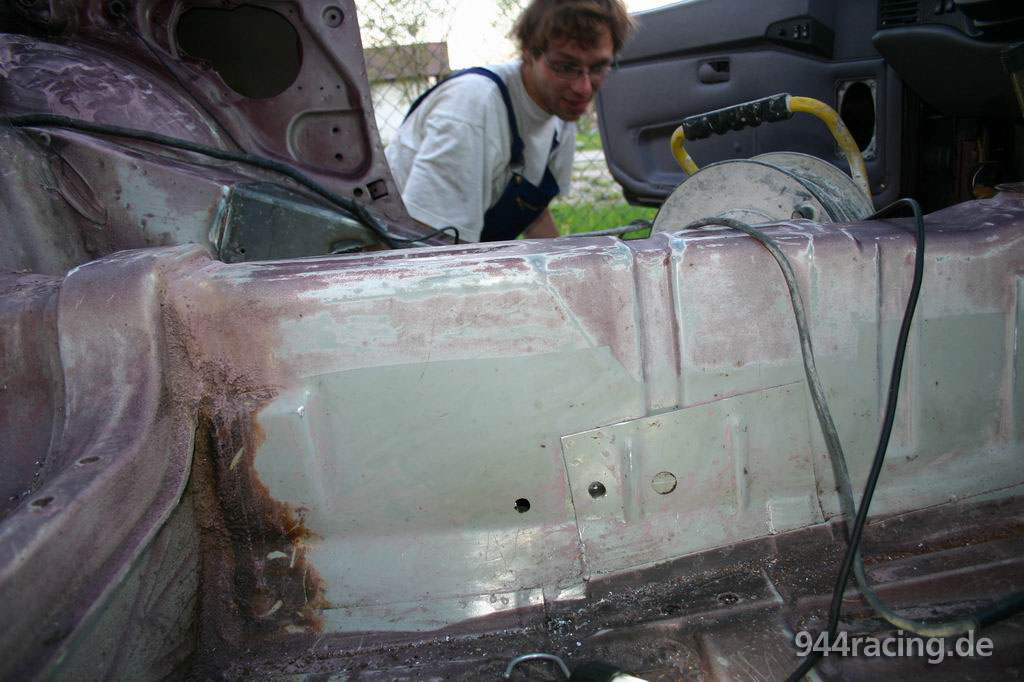
Rainer cleans the gearbox tunnel and i am still in work at the rear
fender. |
Remainders of sanding the insulation are distributed all over the floor. |
 |
 |
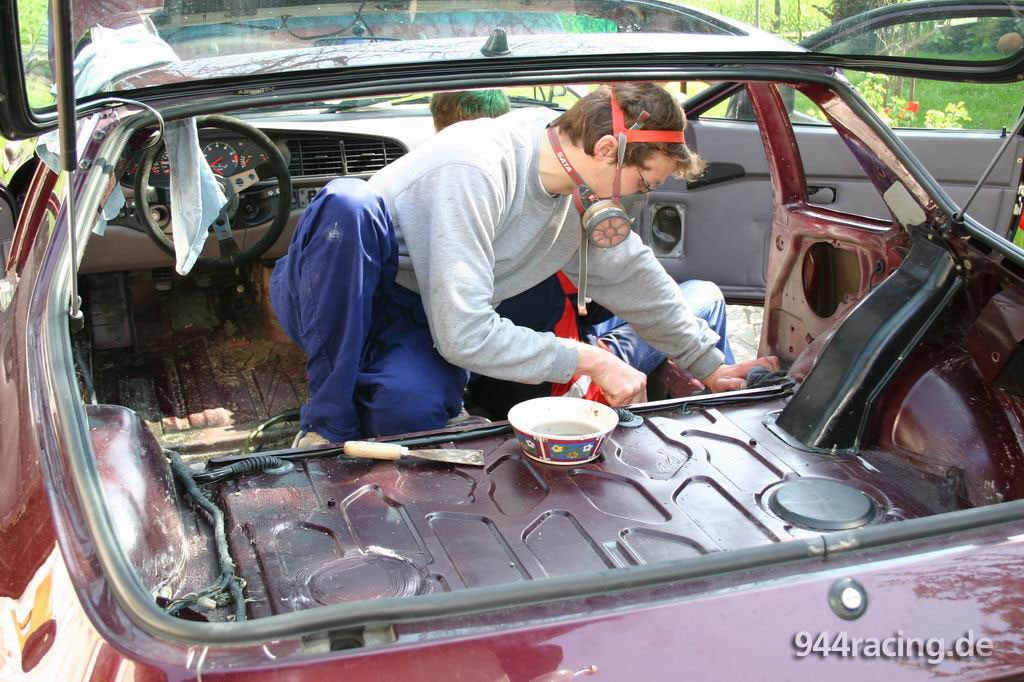
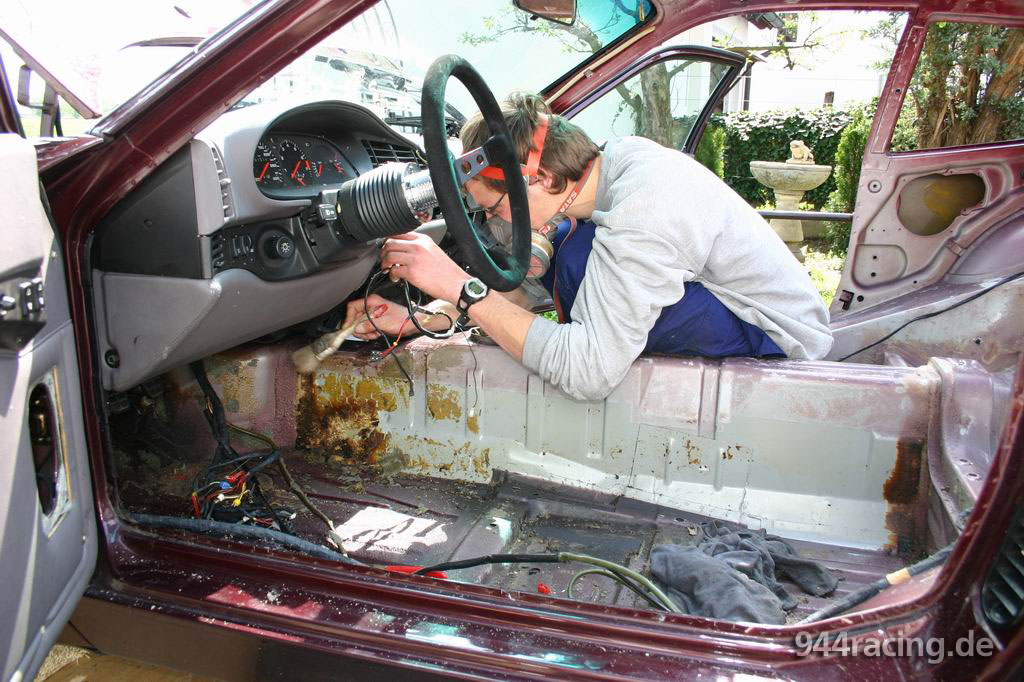
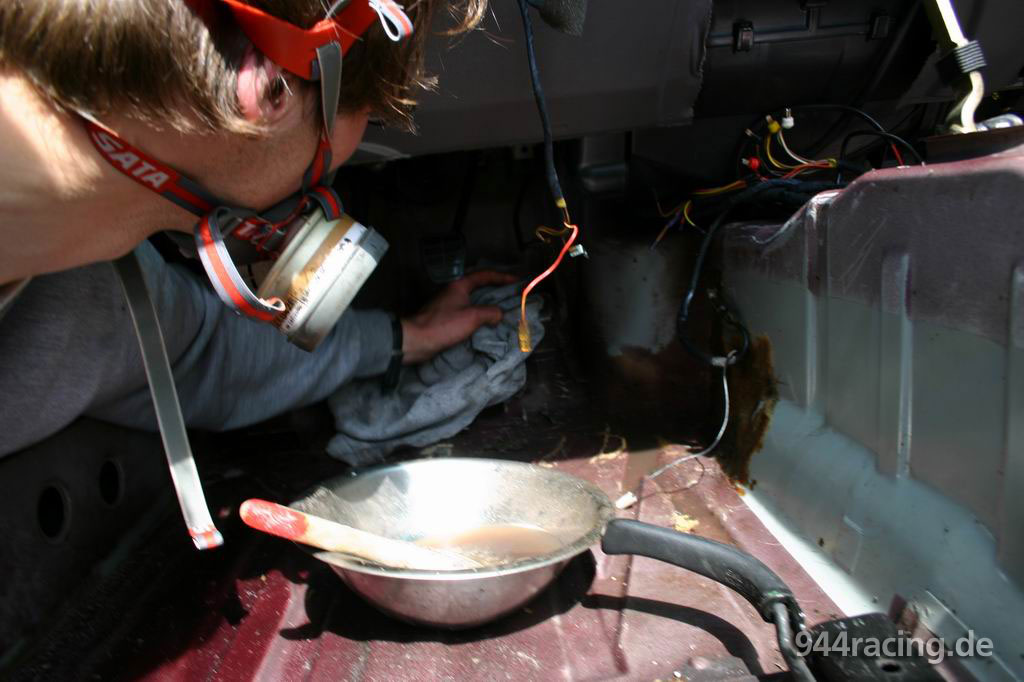
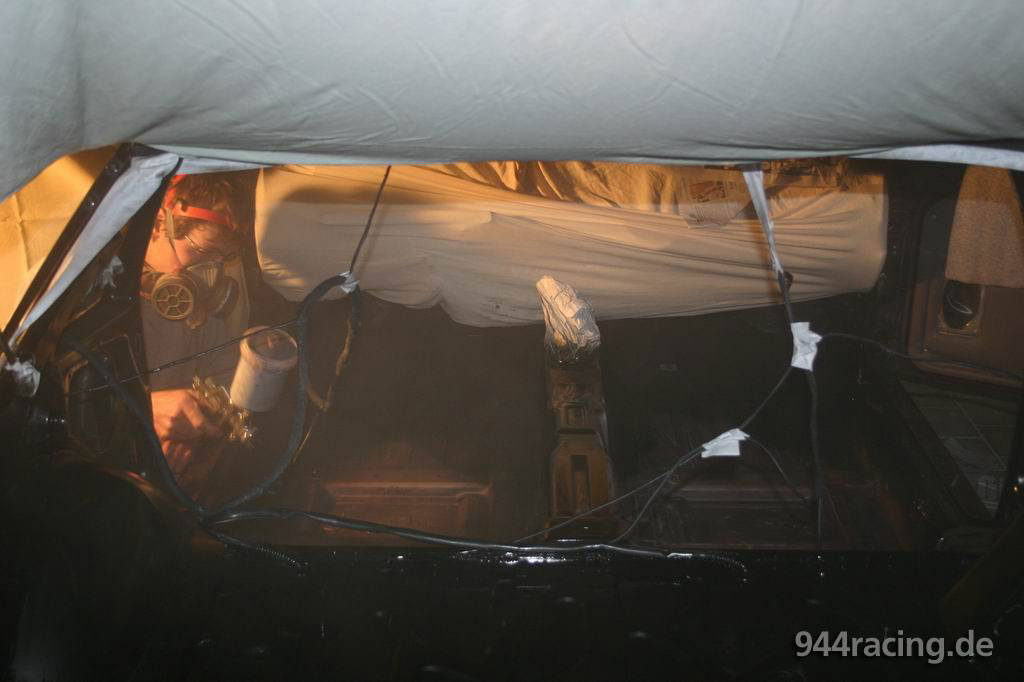
And now the "most beautiful" part of the interior cleaning: removing
the persistent adhesives remainders with much Nitro and a brush! |
The smell of the Nitro is madly... an "optimized" mask follows later! |
 |
 |
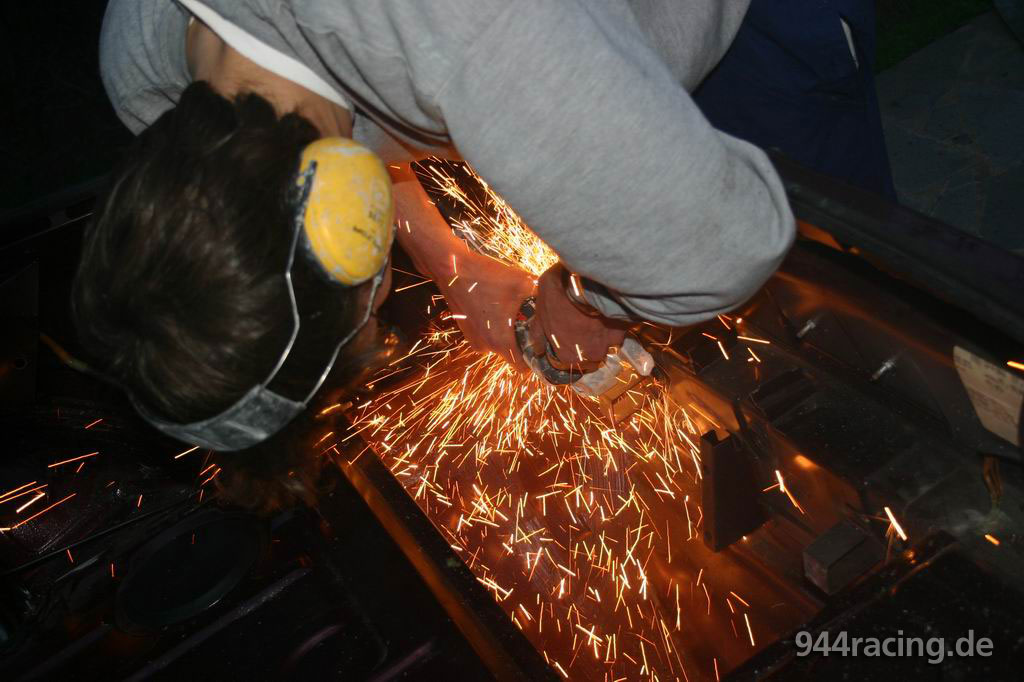
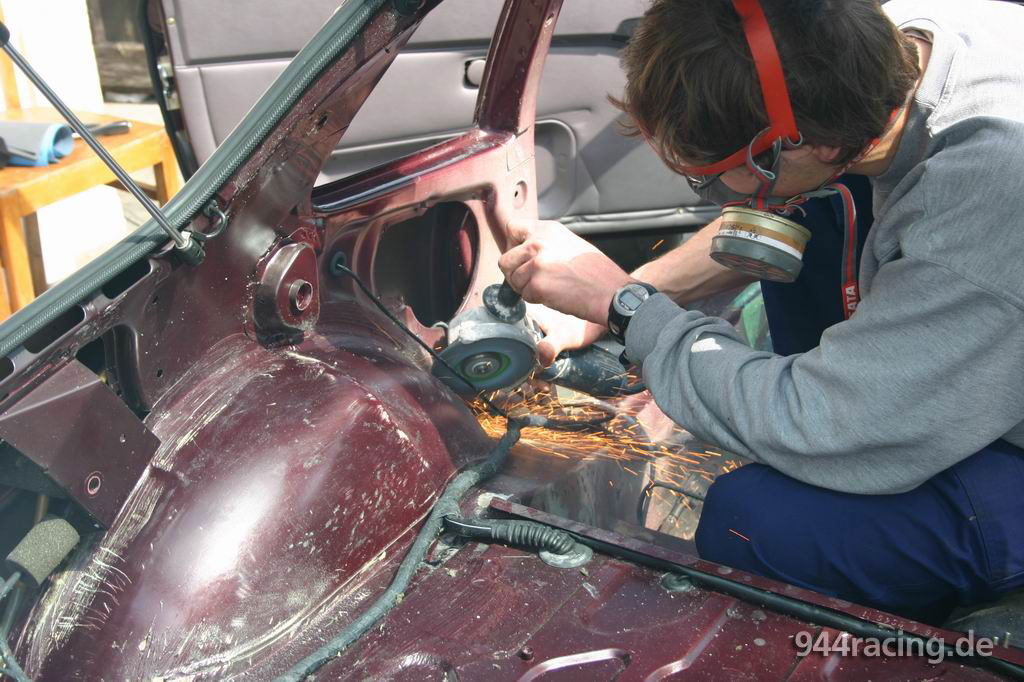
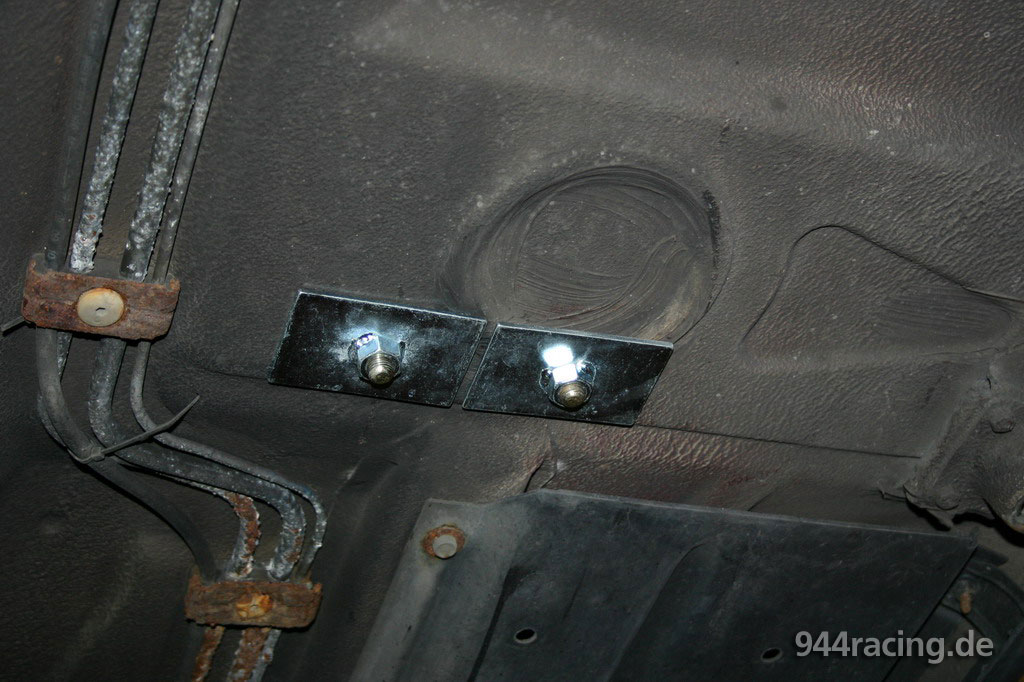
For alternation (and thus Rainer gets the Nitro flavour out of his
head), he out-raves with the Flex in the spare wheel area. |
The mounting plates of the spare wheel are useless and have to be cut off. |
 |
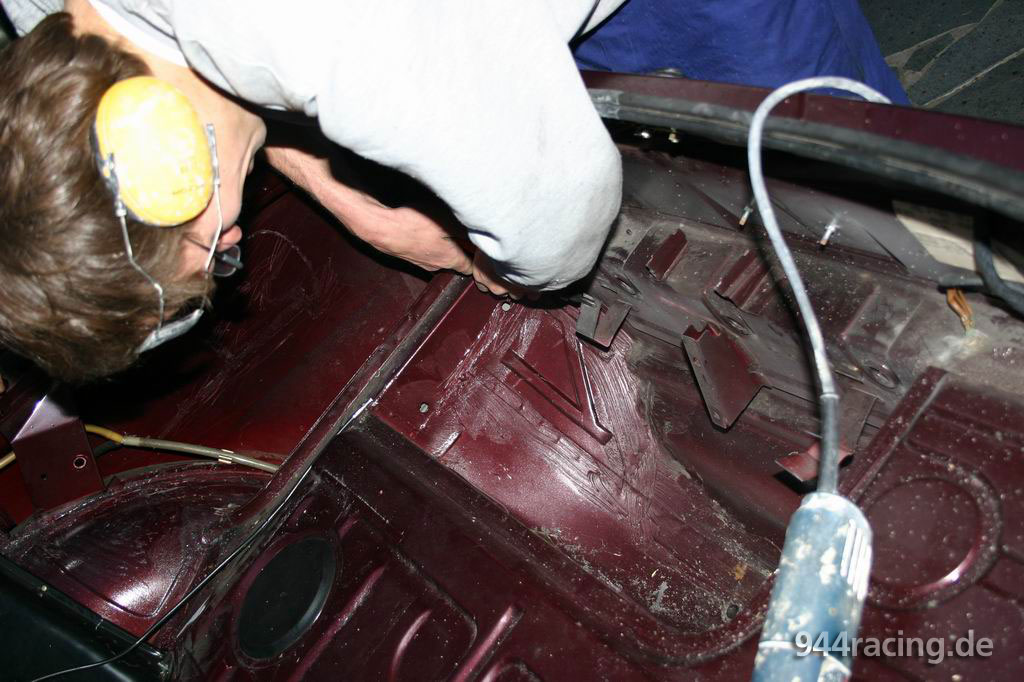 |
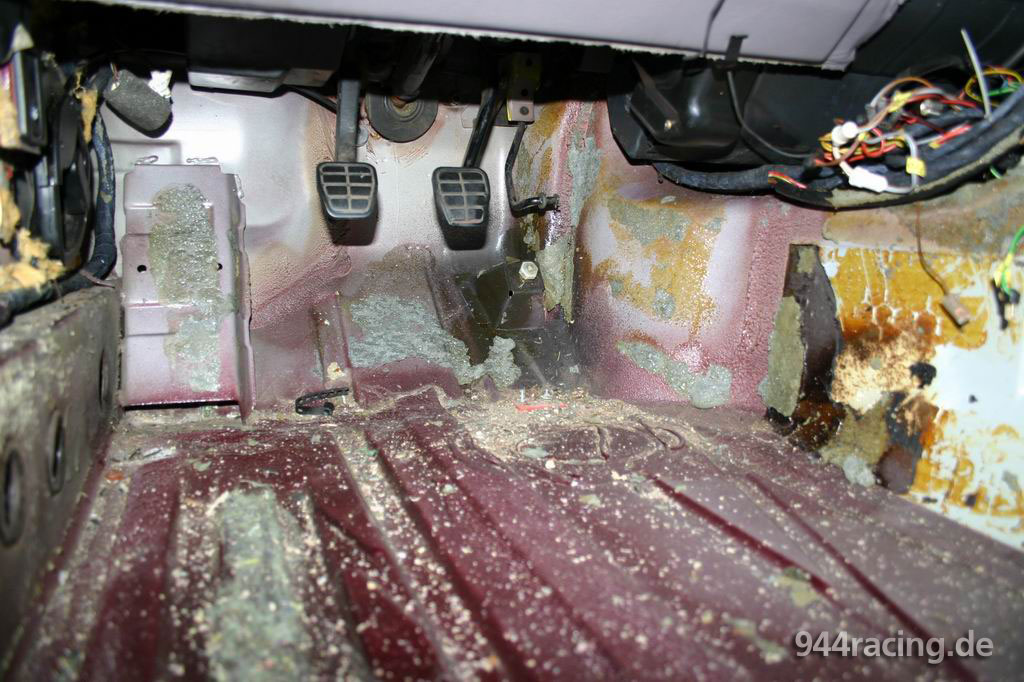
Slowlyyyyyyy... |
but surely the interior becomes clean and free of adhesive remainders! |
 |
 |
Also in the rear it looks ever more cleanly ... |
...and Rainer continues painting courageously and industriously (now also with an adequate mask). |
 |
 |
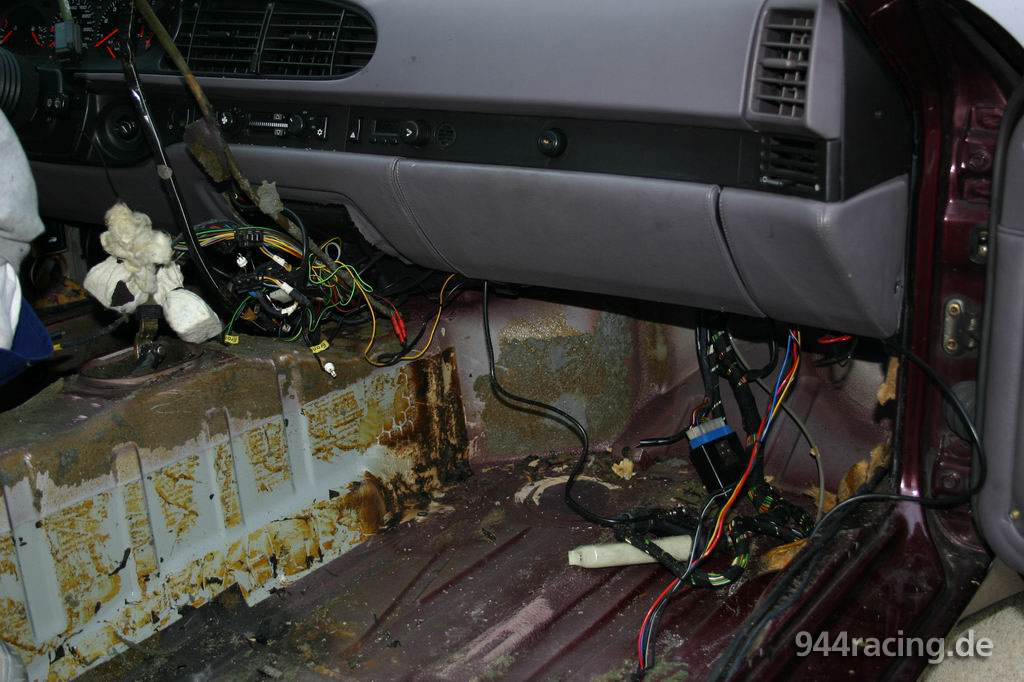
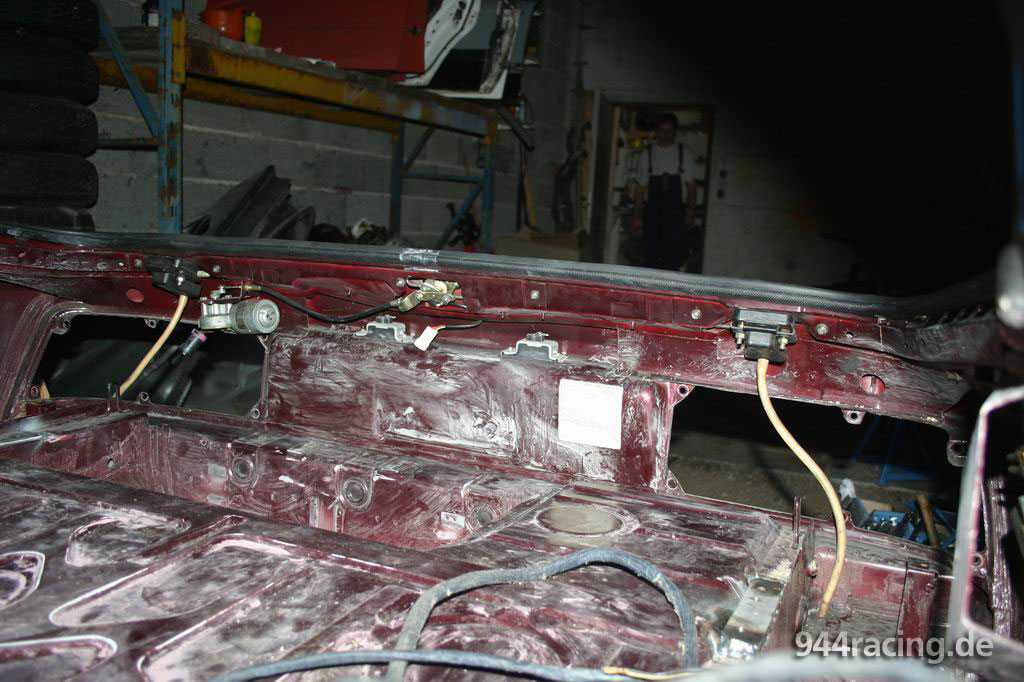
Makus removes the glove compartment and the dash bord trim. |
If the glove compartment is finally out, the access to the various cables is good. Above all we wanted to remove cleanly the telephone hands free kit. |
 |
 |
Despite sceptical view I have then successfully... |
cut off various useless cables. We isolated the cut off cables in the car with Shrunk-on hose! |
 |
 |
Well... what have I to write... Rainer still paints untiringly (thanks Rainer!!!)... |
...and when it becomes too much for him, he cuts off a supernatant metal part as alternation... |
 |
 |
...and afterwards it in the left rear... |
then he continues painting with Nitro. |
 |
 |
And as one sees, the troubles was worthwhile. |
The interior is now in the front... |
 |
 |
and in the back flash bright. Isn't it? |
Rainer and Makus still looked sceptically?! |
 |
 |
Rainers critical view has discovered a few remainders... |
...which has to be removed with strive. |
 |
 |
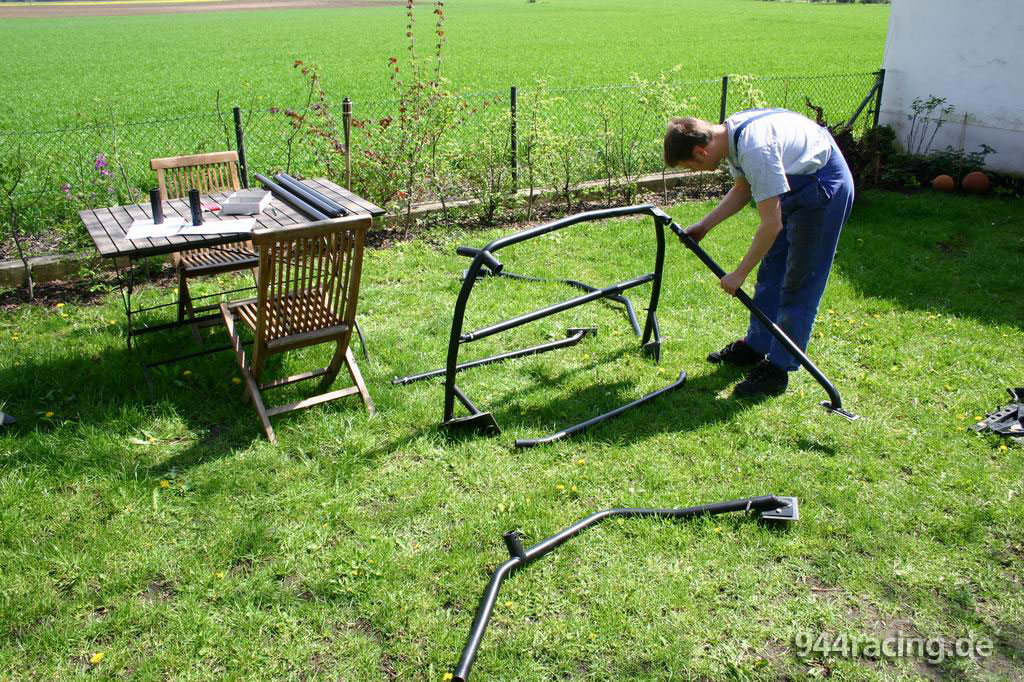
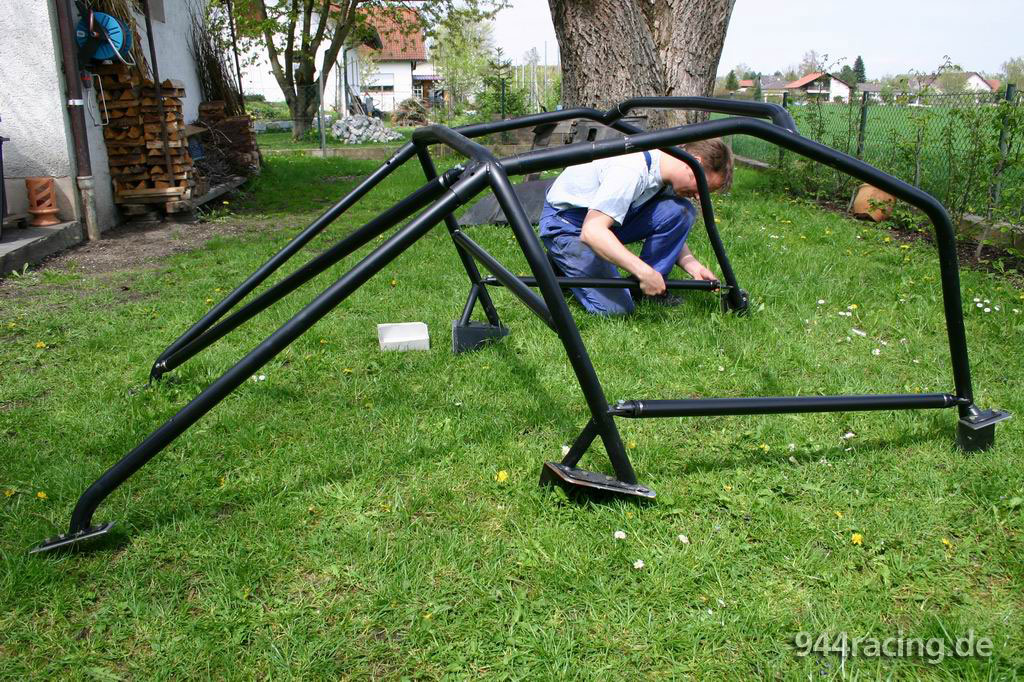
Makus and I plug now the roll cage together. |
So far everything fits very well. |
 |
 |
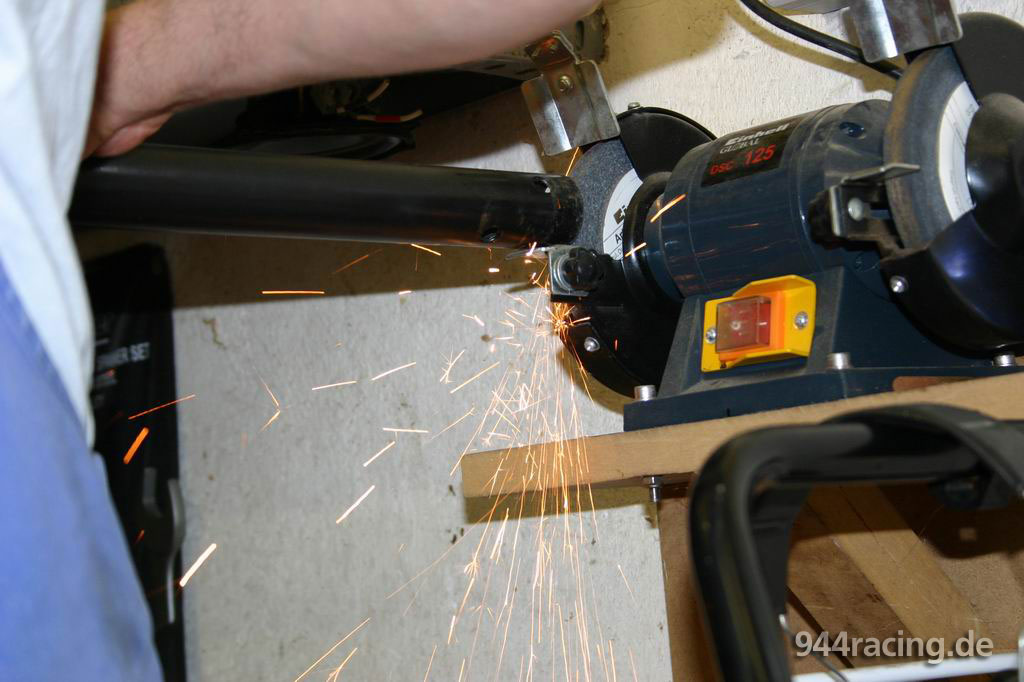
But a few corrections are always demanded during the cage installation. A pipe is longer and has to be shortened. |
The Heigo cage also appears good in the detail. Who purchases a new cage: Heigo is the first choice! |
 |
 |
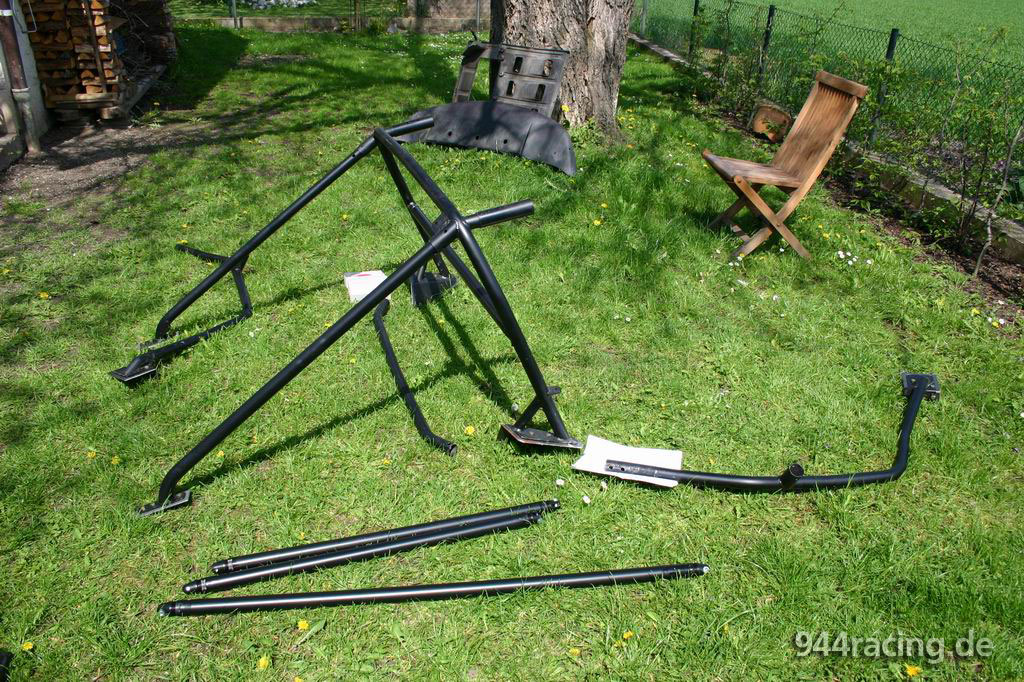
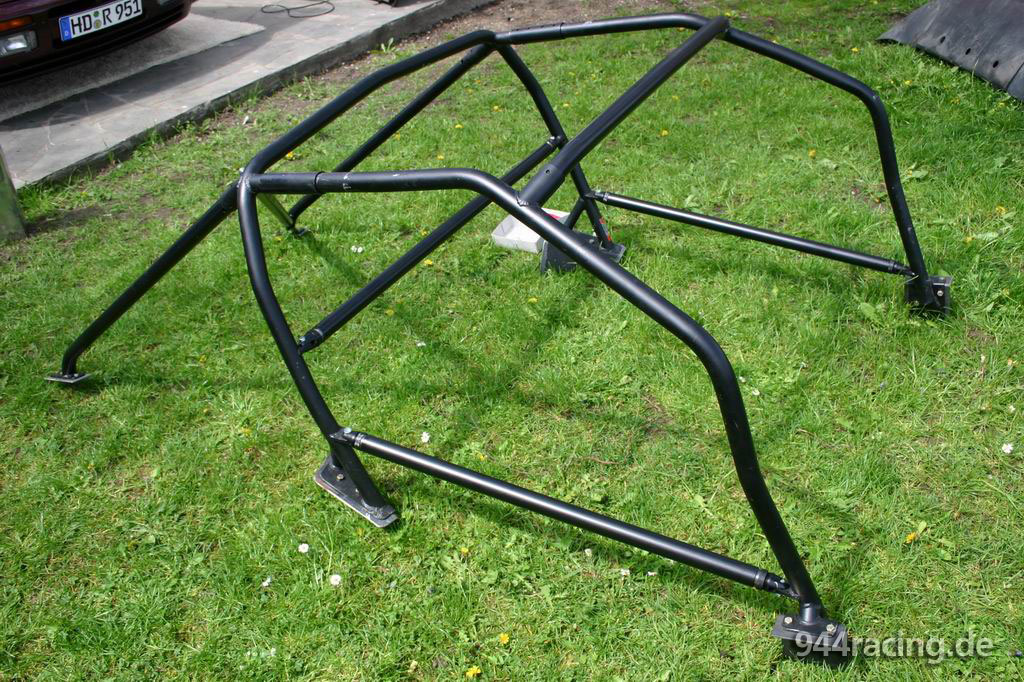
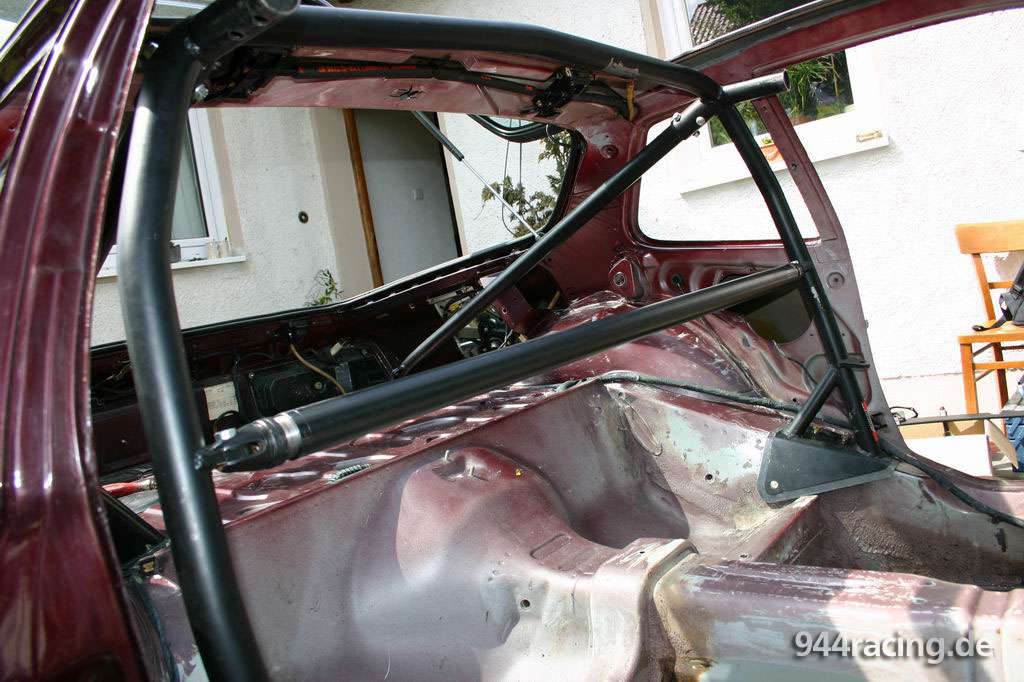
Finally completing the side protection... |
and the roll cage finished. |
 |
 |
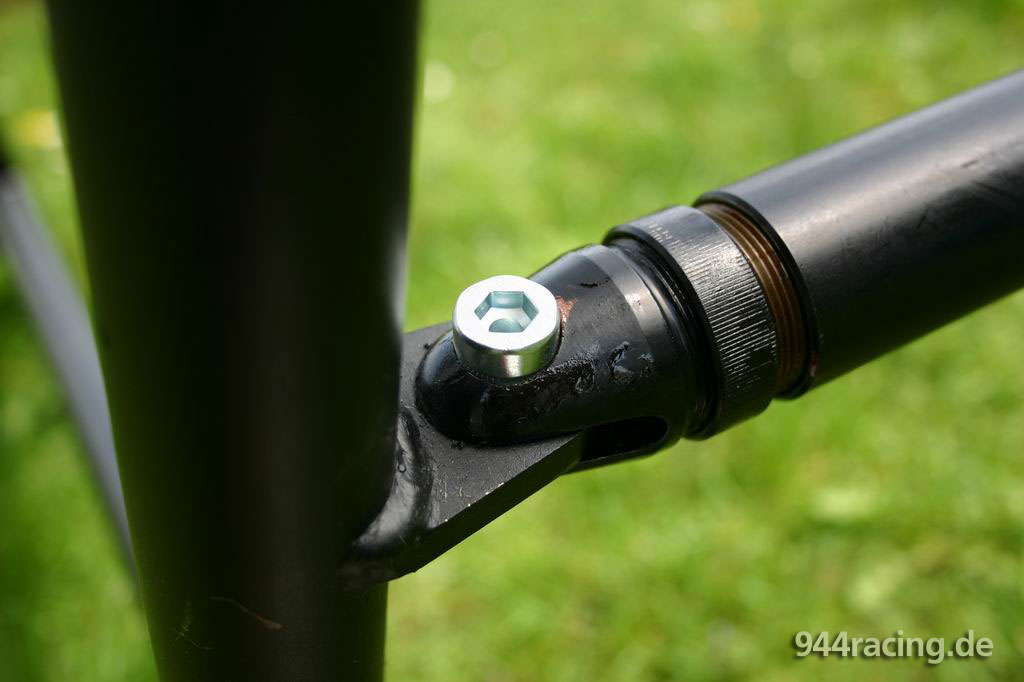
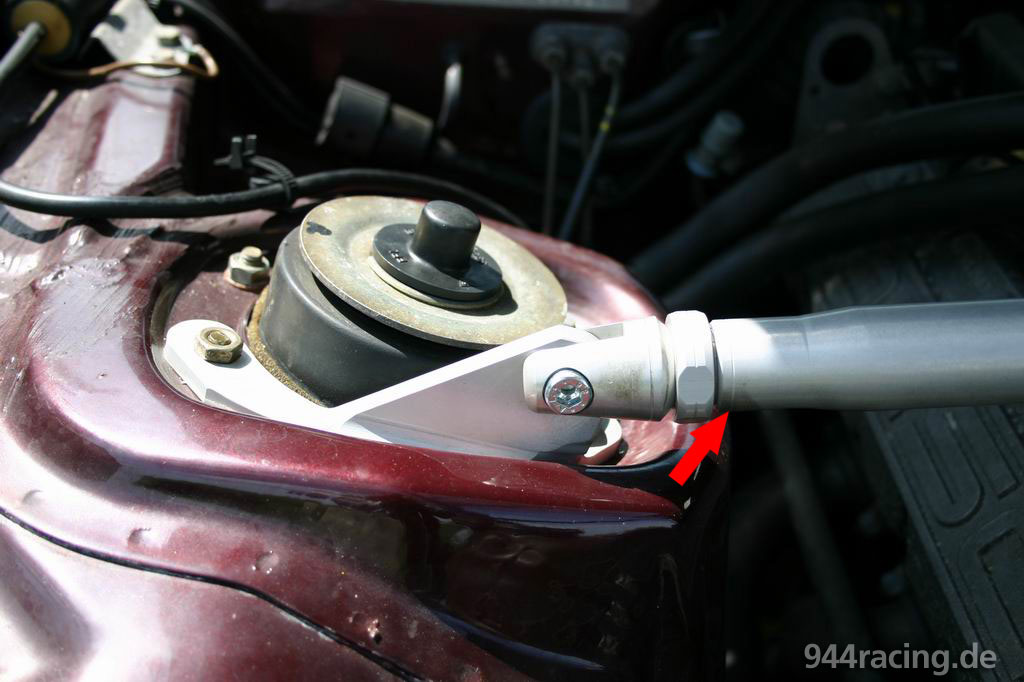
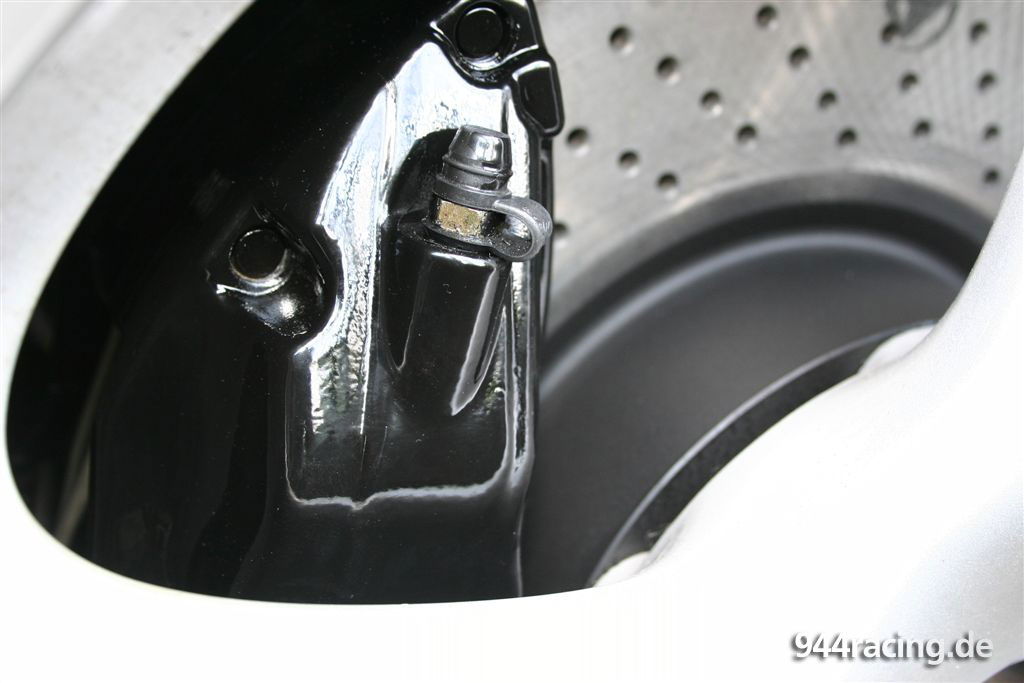
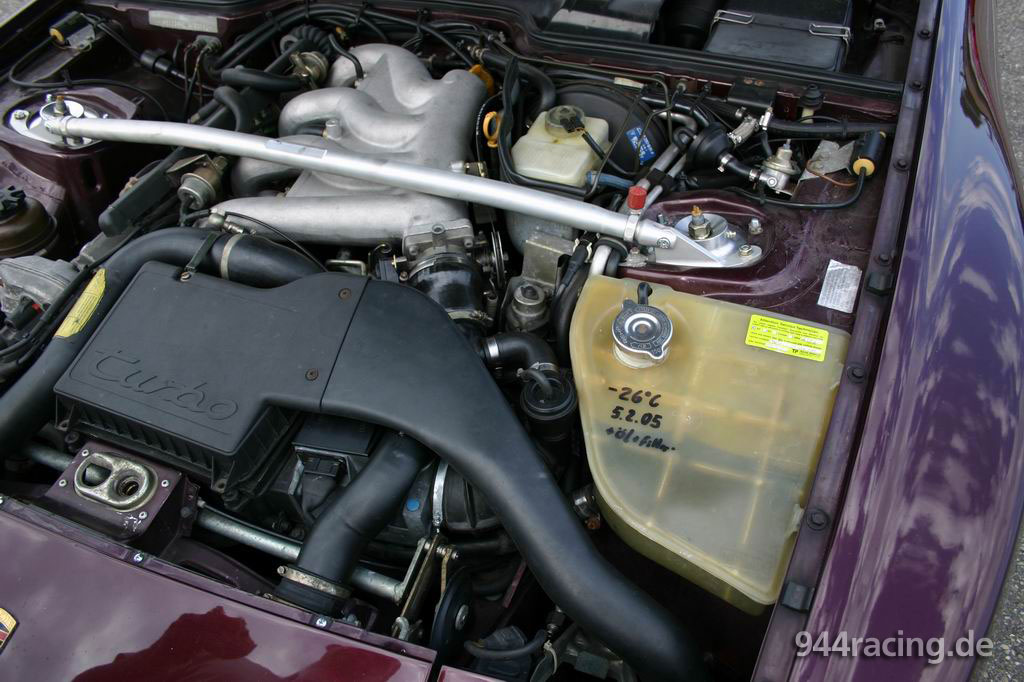
The front upper strut bar was meanwhile installed during
various repairs, but the right lock nut has not been installed, because
the bar was too long. |
|
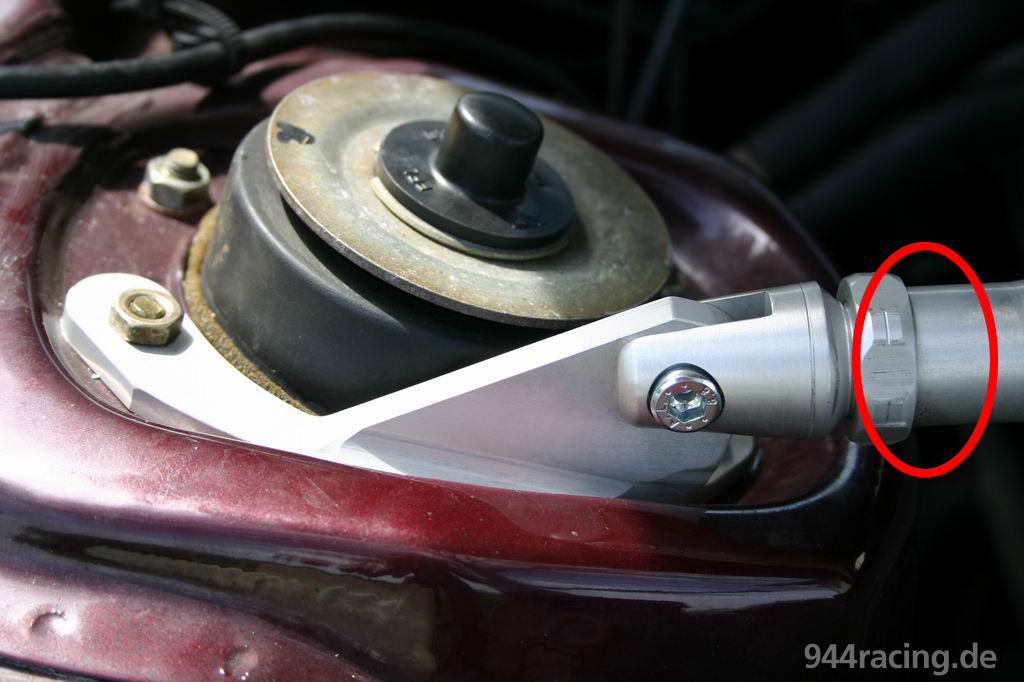
| Before |
Afterwards |
The lock nut did not fit because of a few mm between bar and mounting plate, because the bar was too long (see below). |
Afterwards it fit marvelously! |
 |
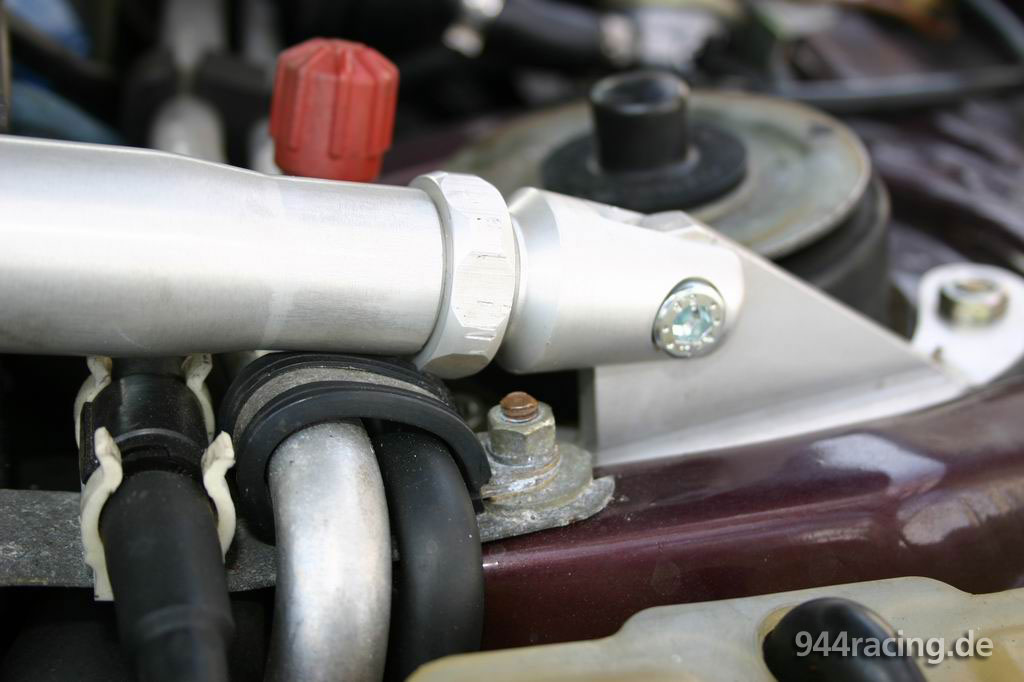 |
The bar was a few mm too long before (see groove right to the lock nut) |
Makus rasped the bar until the groove. |
 |
 |
Here the strut bar was not really fixed, since the lock nut was missing at the right side...The bar had a few space and has not been fixed with pull... |
Here now the lightly corrected bar with the tightened lock nuts... Fits perfectly now! |
 |
 |
Now we placed the cage into the car for a test to look that he matches or that installing causes problems. |
It matched really good, and we marked with a thick pencil the positions to weld the metal sheets. |
 |
 |
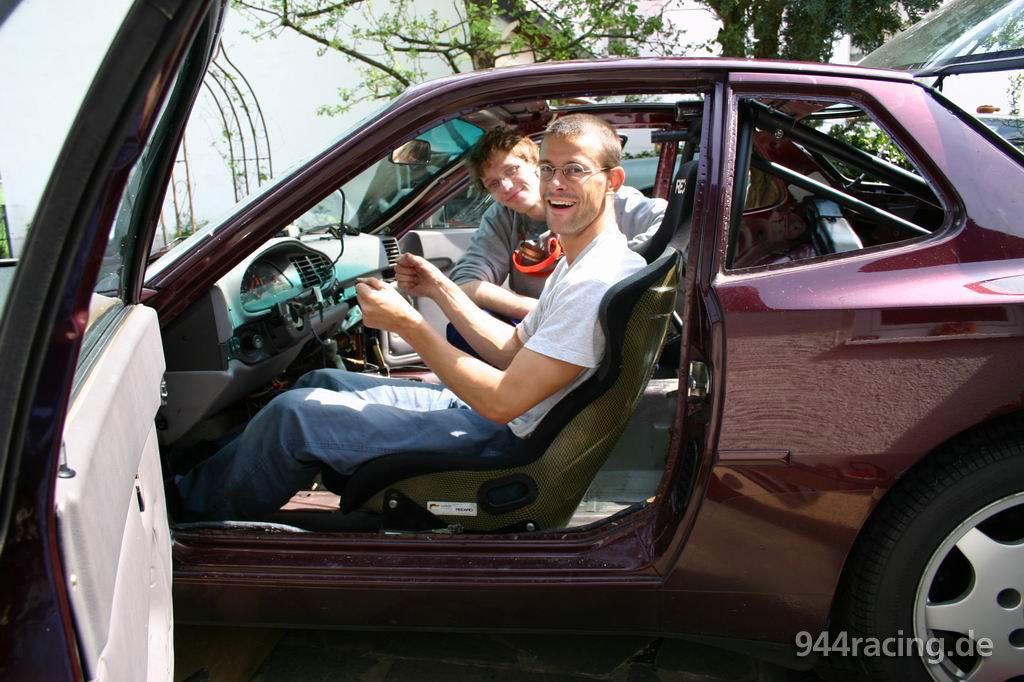
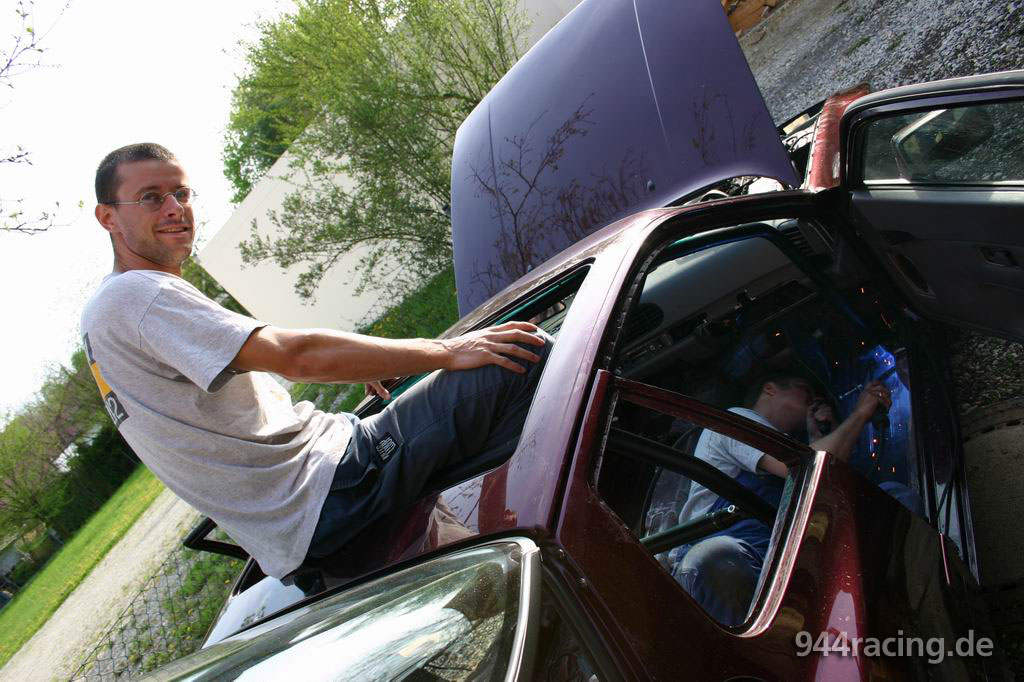
To test, I seated in the car to look that it matches. It matches well. |
Rainer and me are having outgrowths from Nitro thinner.. |
 |
 |
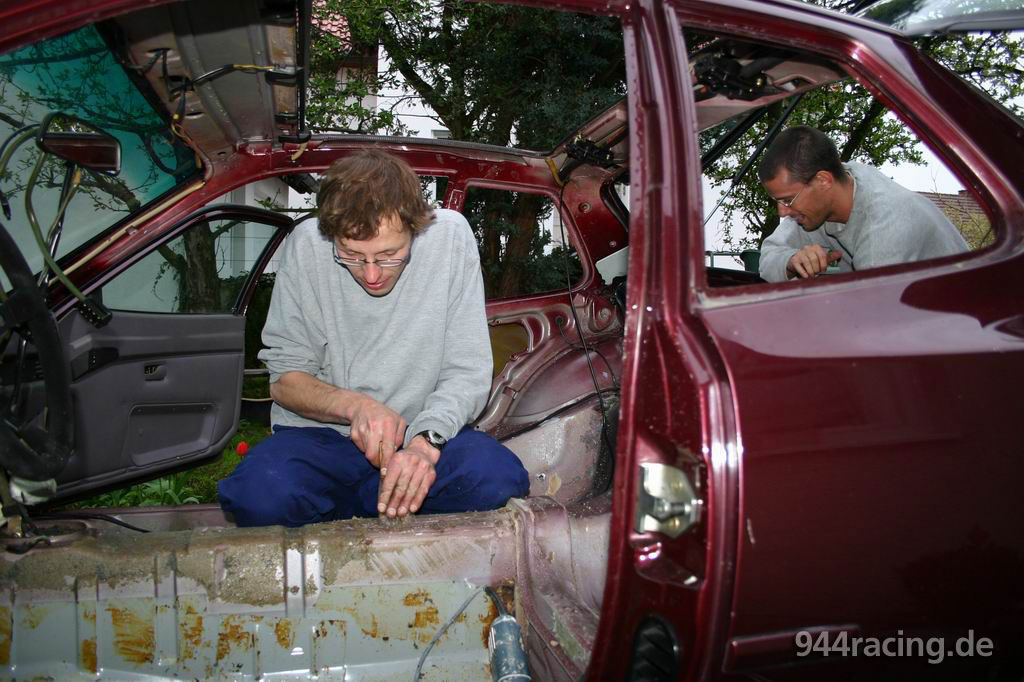
While i have not to write about Rainer's work, I started sanding with wet sand paper the whole interior... |
...or at least where Rainer already finished with the cleaning, so that the varnish adheres well. |
 |
 |
Slowly it becomes a sudorific affair... |
but nevertheless it still makes fun! |
 |
 |
The sanding proceed quickly and it is visible where I had sanded. |
Here the final result of Rainers Nitro battle... looks great! |
 |
 |
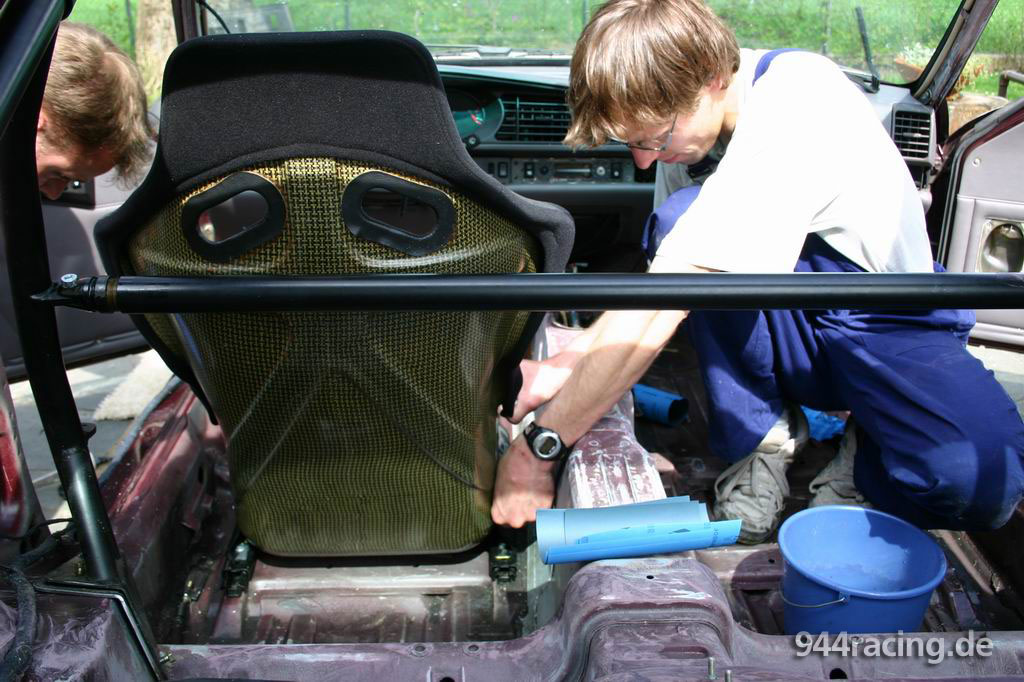
To fix the narrow seat Recaro Profi at the anchorage points of platform chassis, the seat slide rails of a manually 944 seat have to be modified. |
Makus simply extended the existing holes of the rails and welded nuts. |
 |
 |
Now the seat slide rails with the mounted consoles matches to the platform chassis. |
And the narrow seat matches perfectly to the console. |
 |
 |
After cage and seat were provisionally in the car, we drove to Rainer... |
...to weld the cage and/or the metal sheets and varnish black the interior. |
 |
 |
The cage already looks good... |
but so far he is not fixed in the car. |
 |
 |
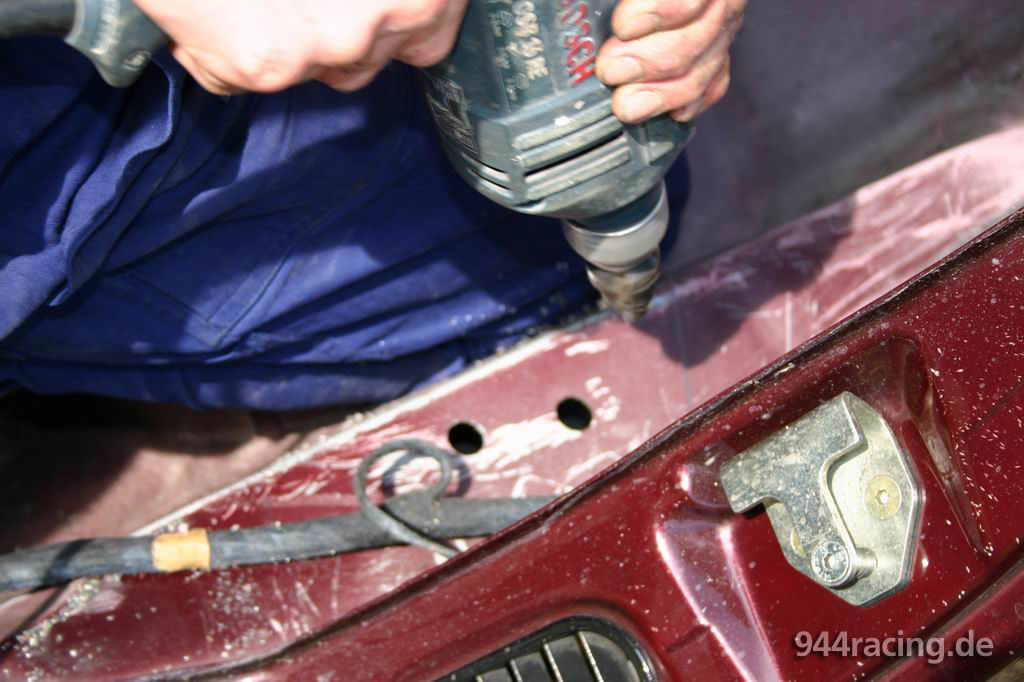
The cage was lifted out of the car and the welding sheet metals were screwed off the cage.We put these now at the marked places and marked the holes for the screw connection. |
Afterwards Rainer drilled these holes with a diameter of approximate 2mm. In addition the latter welding points were sanded as bare metal. |
 |
 |
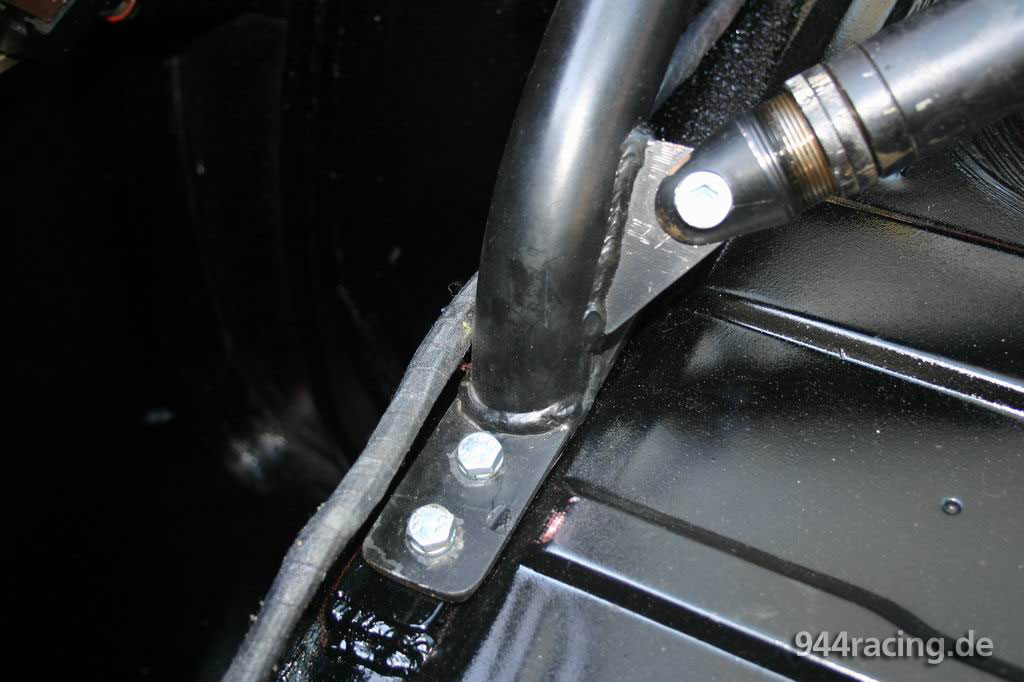
By the help of a wood slat we spanned the cage to weld the sheet metals. |
And with all my kilos I seated on the upper bar to press the cage down. |
 |
 |
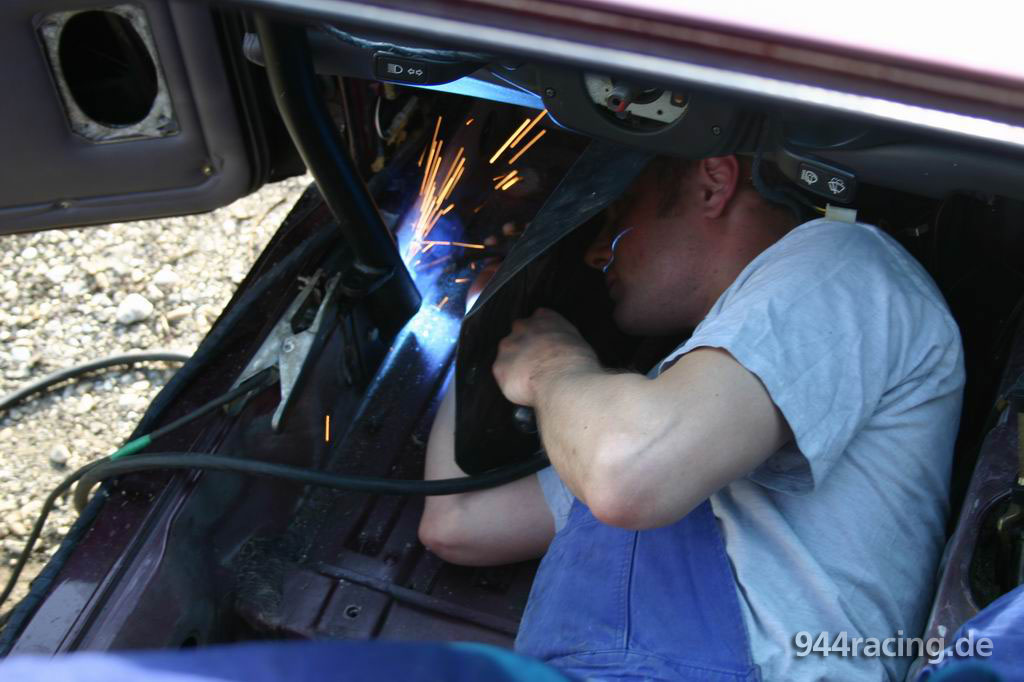
Porsche-Makus welded perfectly the sheet metals. |
You do not have to weld all around the sheet metals, but you have to pay attention that the underbody corrosion protection does not burn. |
 |
 |
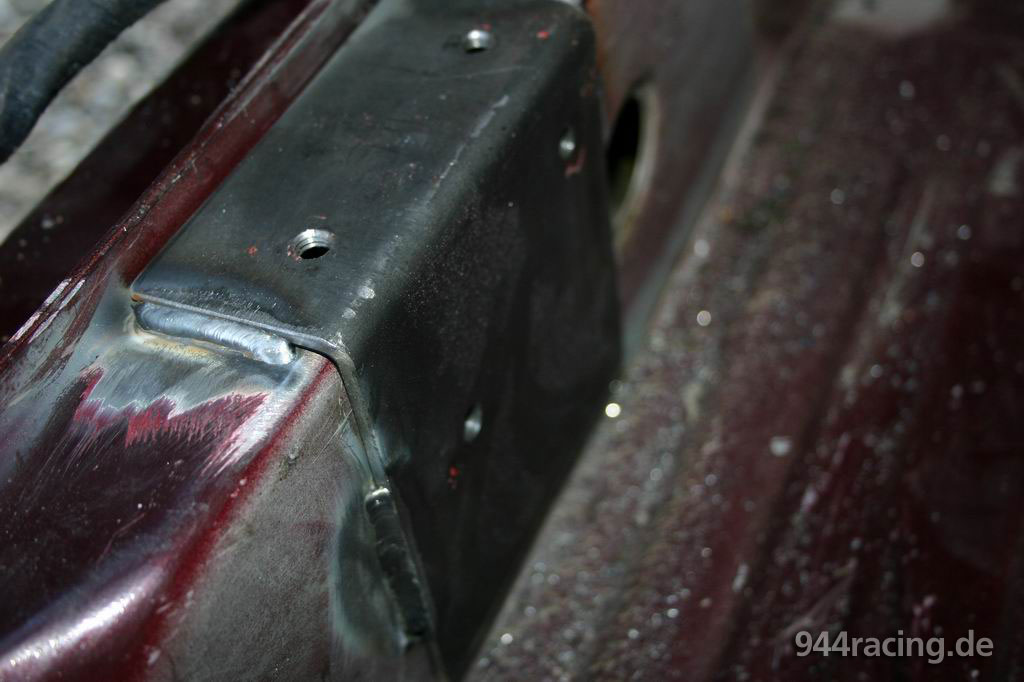
The perfect results: Perfectly welded sheet metals with accuracy in fitting... |
onto those the cage now can be screwed very easy, since the sheet metals were welded with installed cage. |
|
|
And here the holes were drilled for later seat belts mounting. |
The right hole was too far in front position, since the way was blocked. The left hole exposed as correct place. |
 |
 |
Now at later hour the last paint preparations were arranged. |
The taillights und the motor to open the luggage compartment lid were removed. |
 |
 |
The Cutout for tank level indicator was covered cleanly... |
..and the cables were tied up into the air as well as possible. |
 |
 |
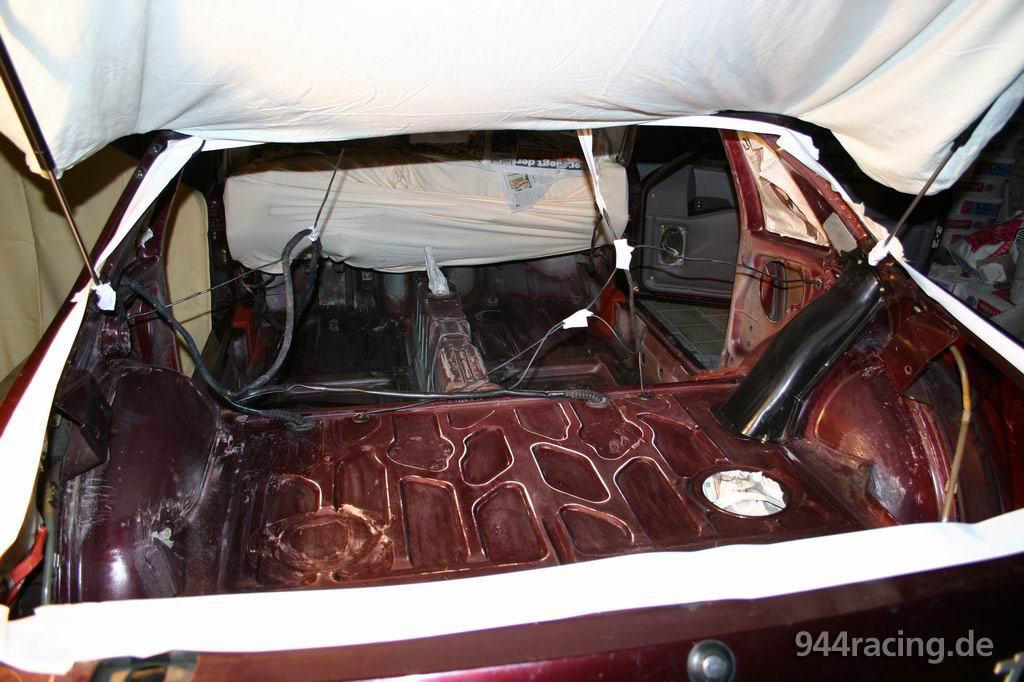
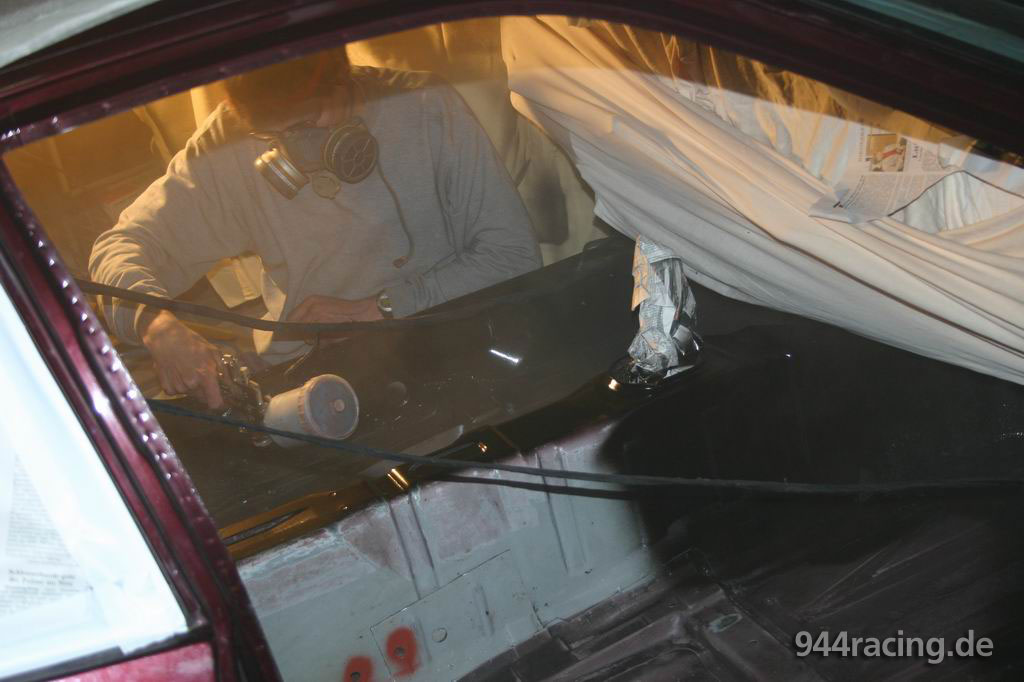
Now the interior was cleaned of sanding dust and small impurities with silicone remover... |
...and dashboard, windows and doors were covered with bed sheet, blanket and newspapers. |
 |
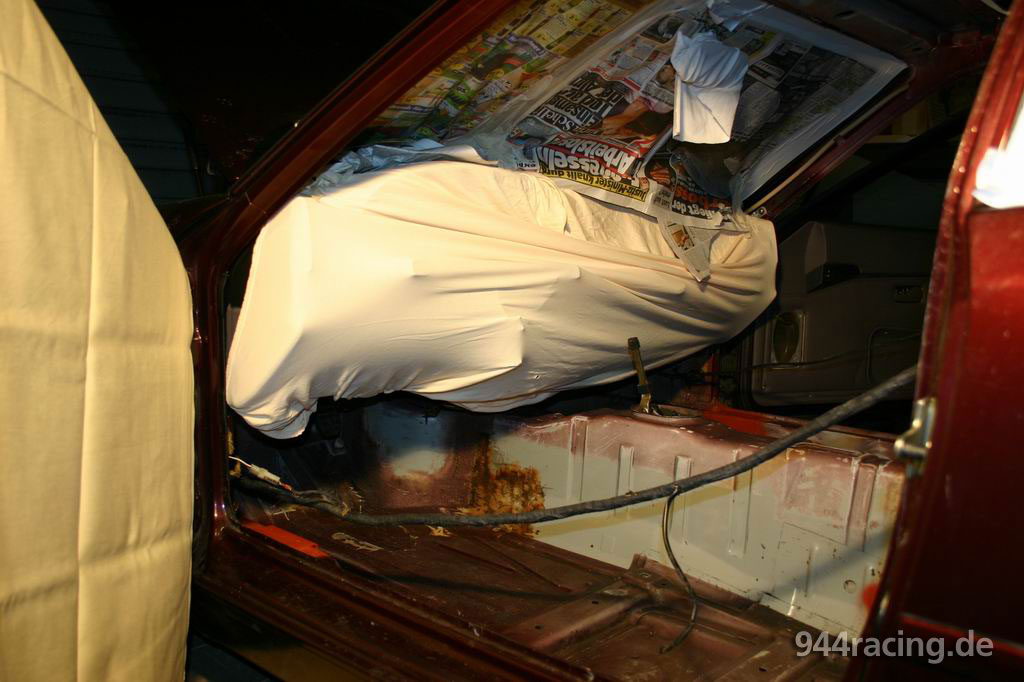 |
Also the luggage compartment lid was masked carefully and the window
covered with a bed sheet. |
And with this masquerade he was ready for varnishing. |
 |
 |
Rainer is mixing the varnish (black)... |
...and let circle the spray gun. |
 |
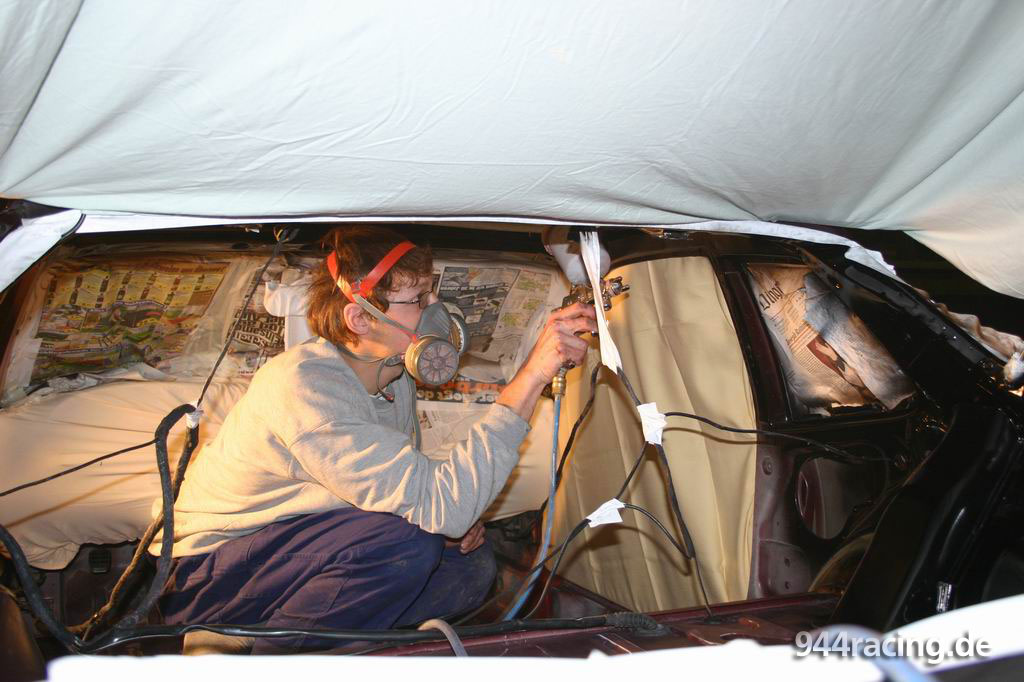 |
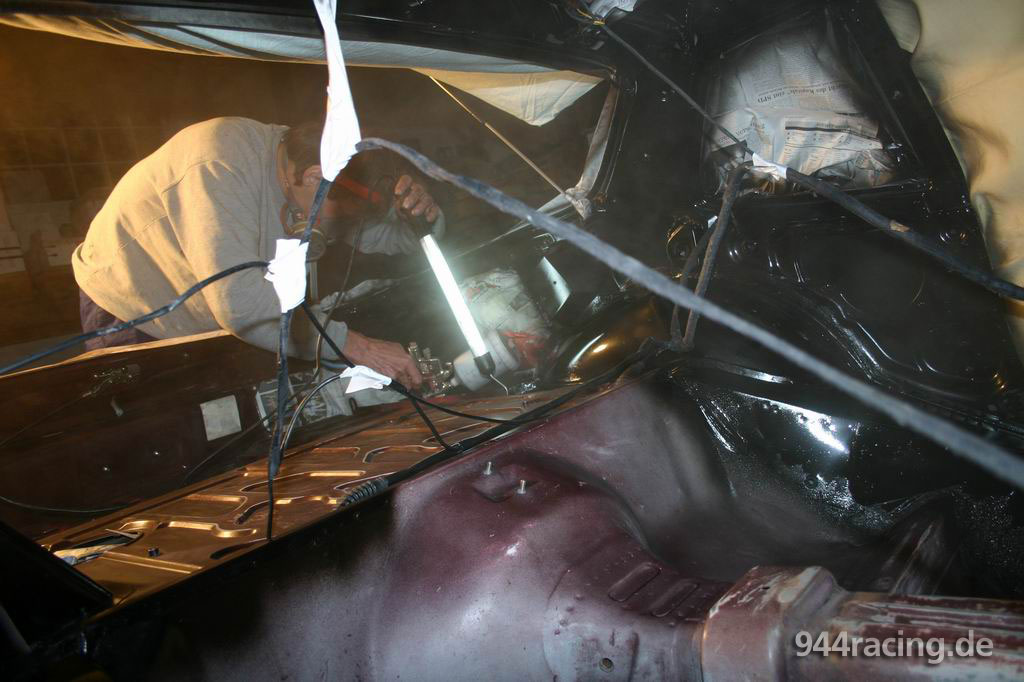
At daylight it will be easier, but at 2 o'clock in the night a neon lamp has to help. |
Rainer inside the spray fog. |
 |
 |
It becomes... |
Ready ;-) |
 |
 |
At the next morning we installed first (and now for the last time) the cage. |
The perfectly matching welding sheet metals (done before by Flex) are not visible after varnishing. |
 |
 |
Everything black! |
Porsche-Makus re-installs the controllers. |
 |
 |
While Rainer installs the attaching parts of targa roof and the interior lighting, Porsche-Makus installs the glove compartment. |
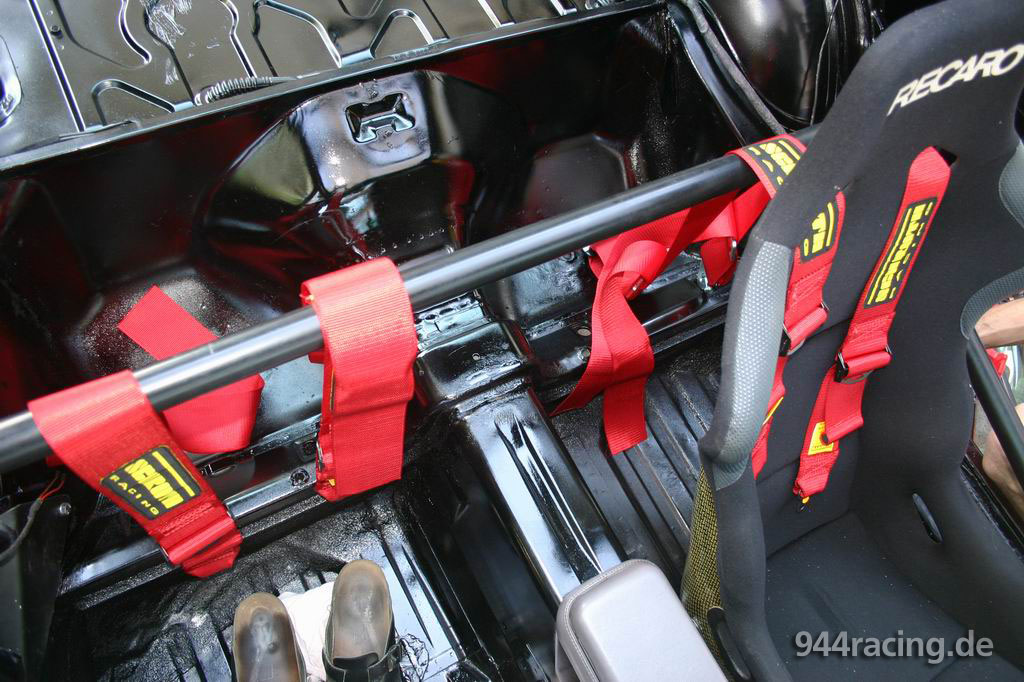
I look after the seat belts. The rear anchorage point of back seats can be used. The seat belt will be fixed outside at the lower 3 point thread. |
 |
 |
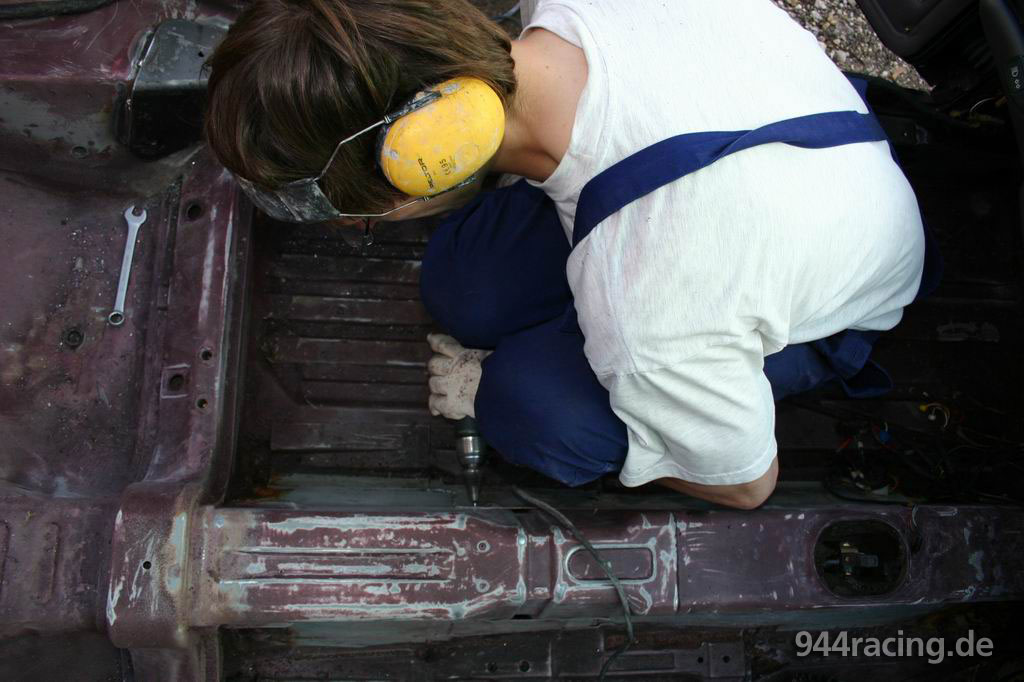
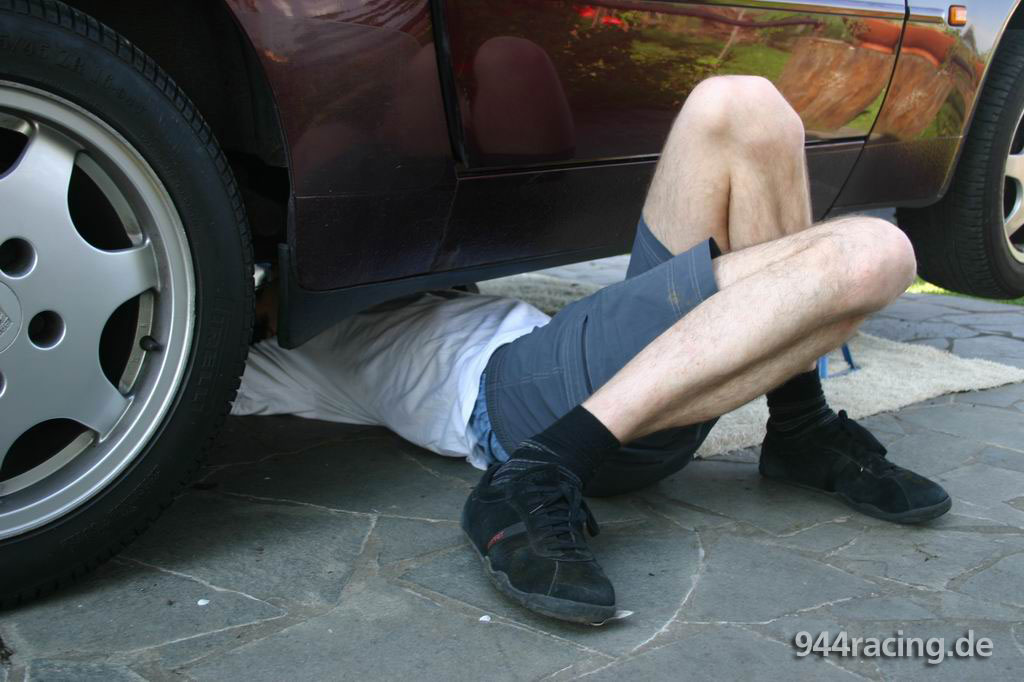
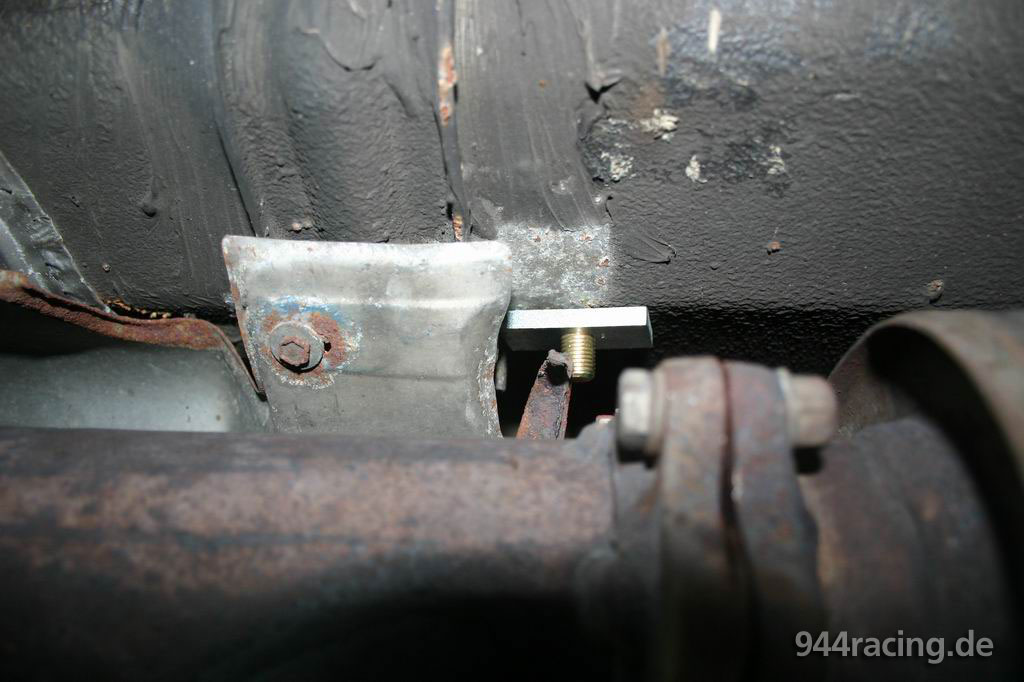
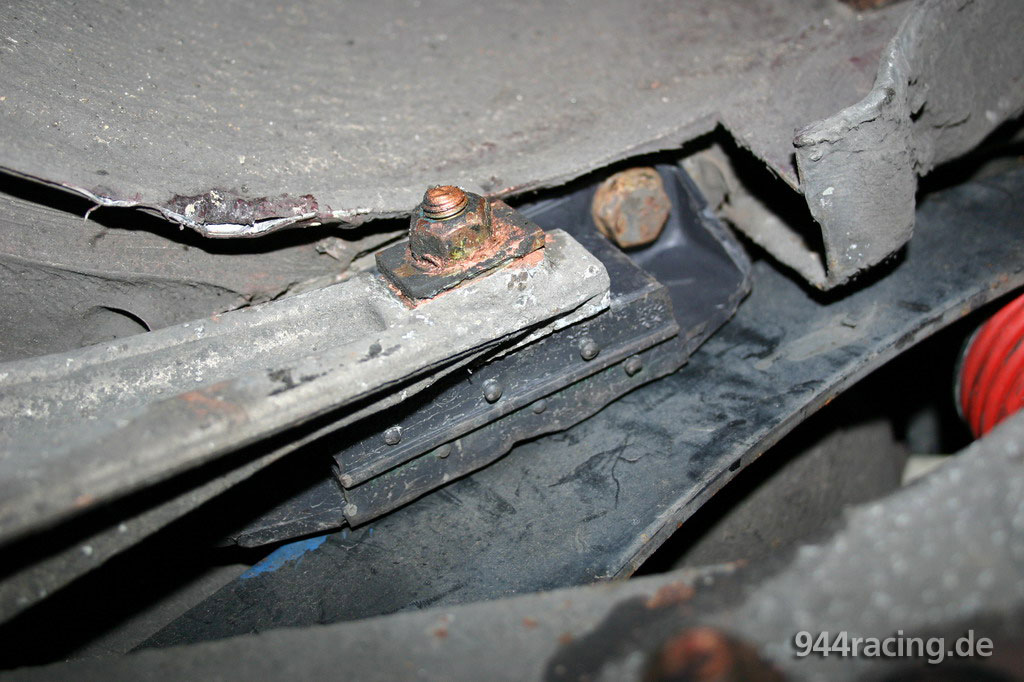
At the gearbox tunnel we drilled the holes yesterday... |
...and now Rainer screws on the mounting plates from underbody. |
 |
 |
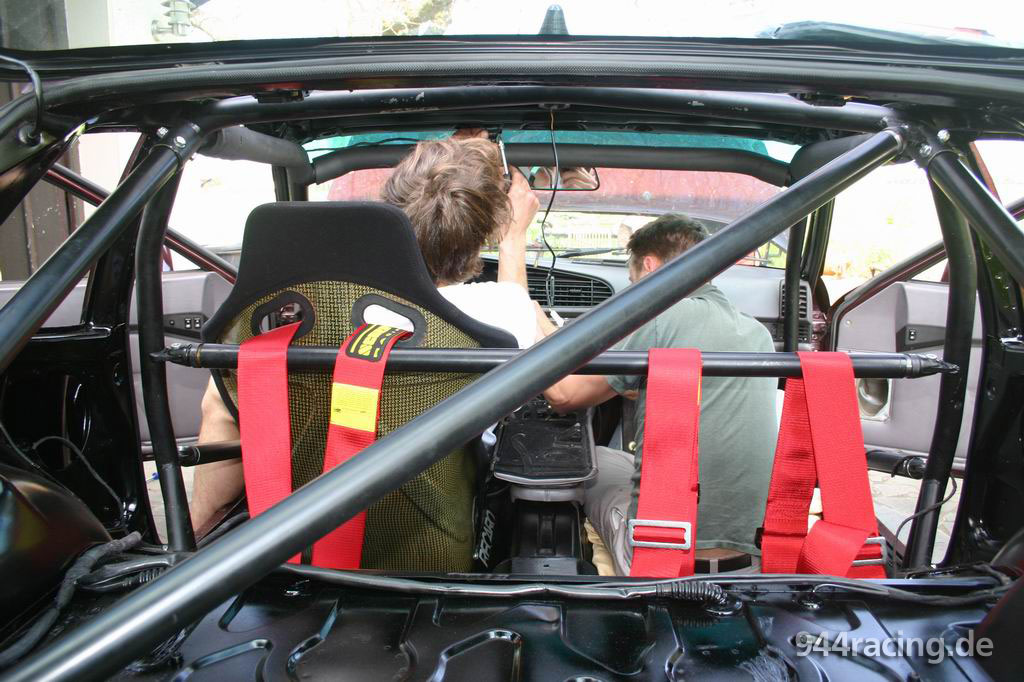
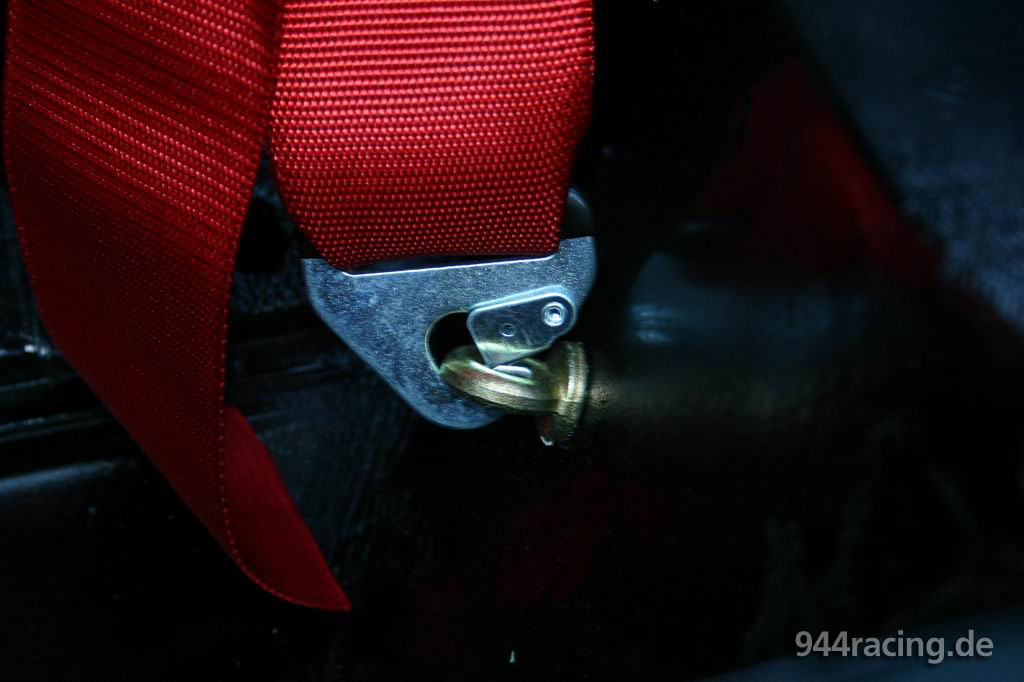
The belts are hooked to the respective eye hooks... |
...and the belt webbings were guided over the belt bar into the seat. |
 |
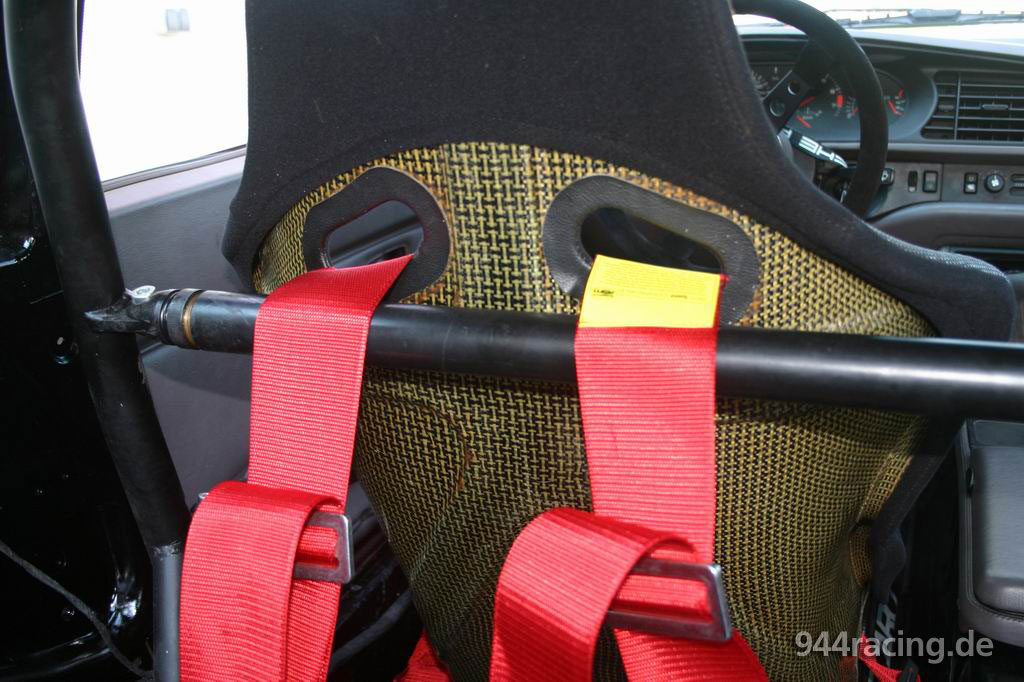 |
And a clean 4 point seat belt solution is ready for driver and co-driver. |
The extension to a 6 point seat belt will be made in future. |
 |
 |
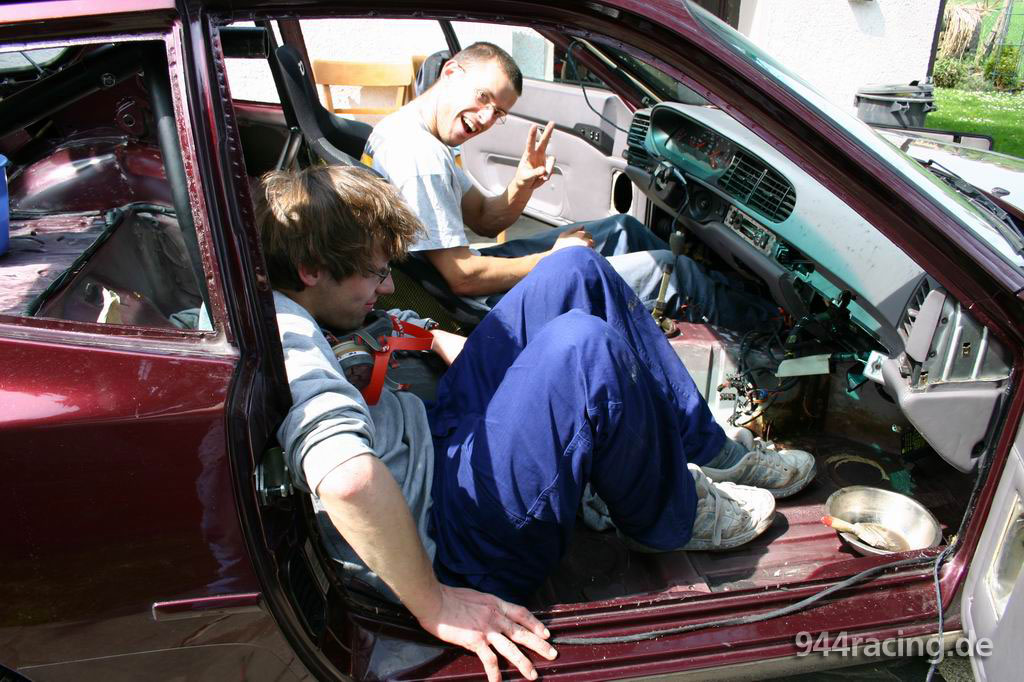
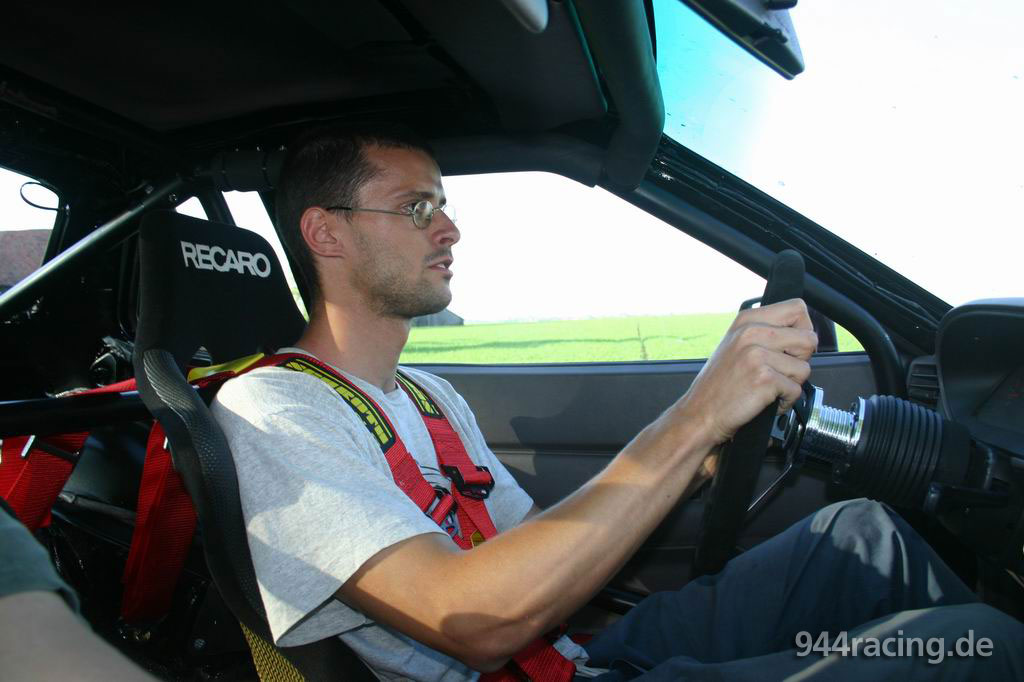
Sits, fits... |
..and there is also still sufficient space in the head area for the helmet! |
 |
 |
Also the first driving impression was super. |
The background noise inside the car was how I wanted... it sounds like a racing car...you hear the car working...each hit, each cracking...nothing is attenuated. |
 |
 |
And on the wonderful highways of lower Bavaria... |
...we had little bit fun! |
 |
 |
A lot of thanks at this place to Rainer and Porsche-Makus for the
invitation, the super work and the super help! |
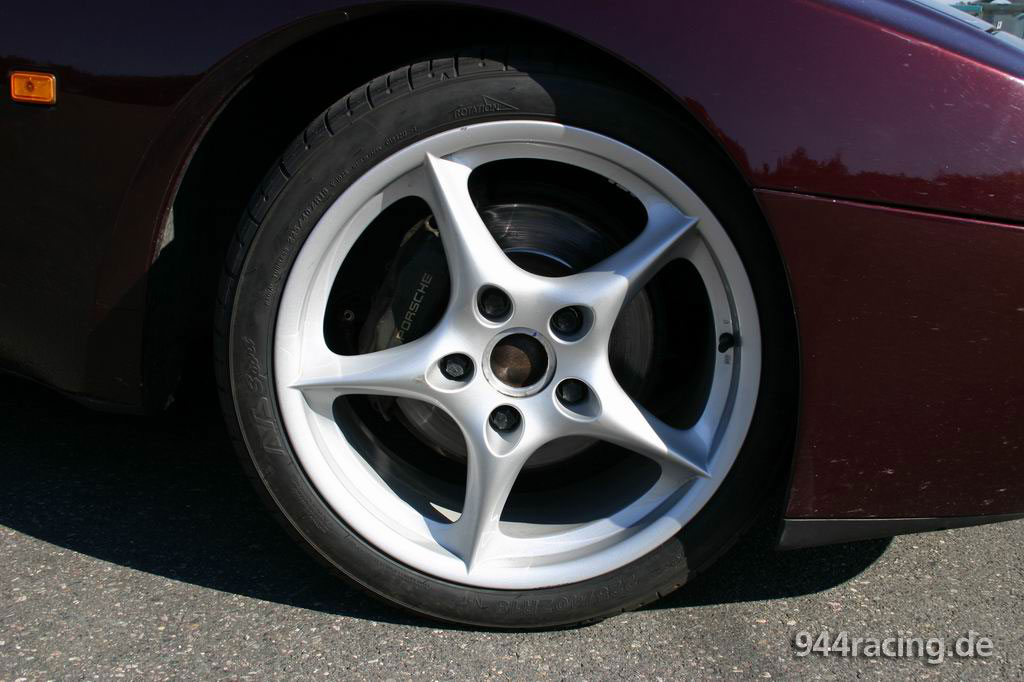
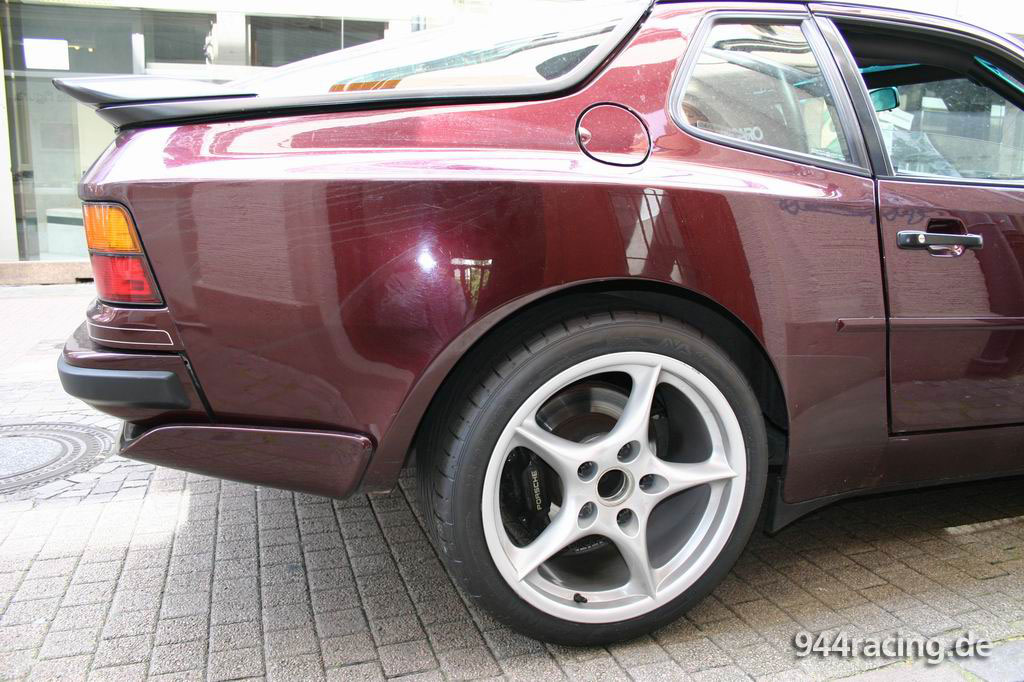
After long search I found finally a set of very light rims in 18" with suitable rim offset. |
The choice fell onto a original set of Rims Porsche "Carrera" in 8Jx18 Offset50 in the front and 10Jx18 Offset 65 in the back. |
 |
 |
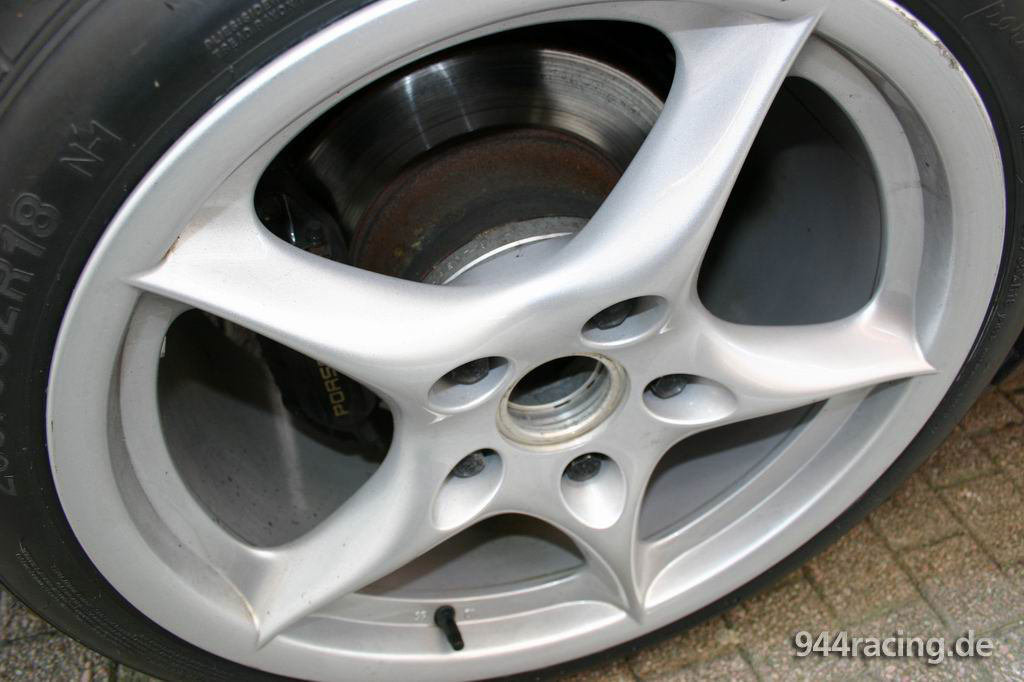
Inside the back side the parking-brake cable is slipping, therefore I will install 18mm distance discs. |
"Yokohama AVS Sport N1" with 225/40 and 265/35 are mounted as tyres. |
 |
 |
Unfortunately the rim was slipping on the park-brake cable at rear right side. Unfortunately I noticed it too late and the rubber sheating was little damaged. |
Since the flanged fender has sufficient space at outside, I solved
the problem with 18 mm distance discs at the rear axle. |
 |
 |
But the distance discs may not have been mm longer. |
Offset 65 with 18 mm distance discs corresponds to the identically rim with offset 47, which could be driven without distance discs. |
 |
 |
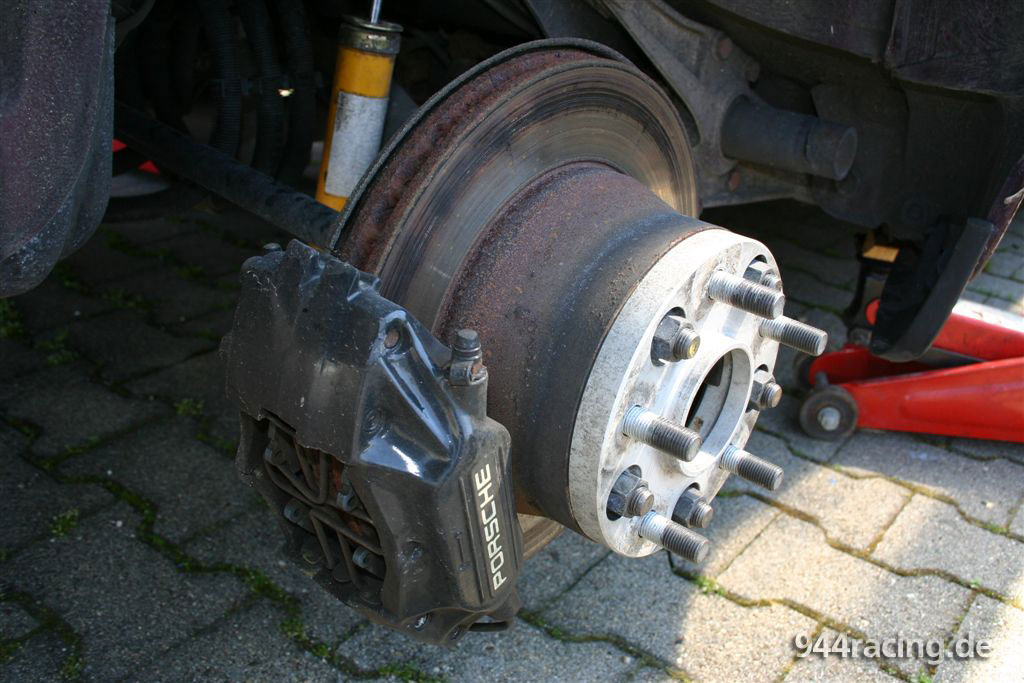
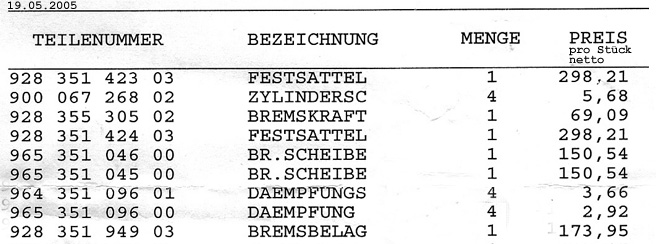
Unfortunately I already brought the standard 304mm brake assembly at Hockenheim after a few rounds to capitulation. |
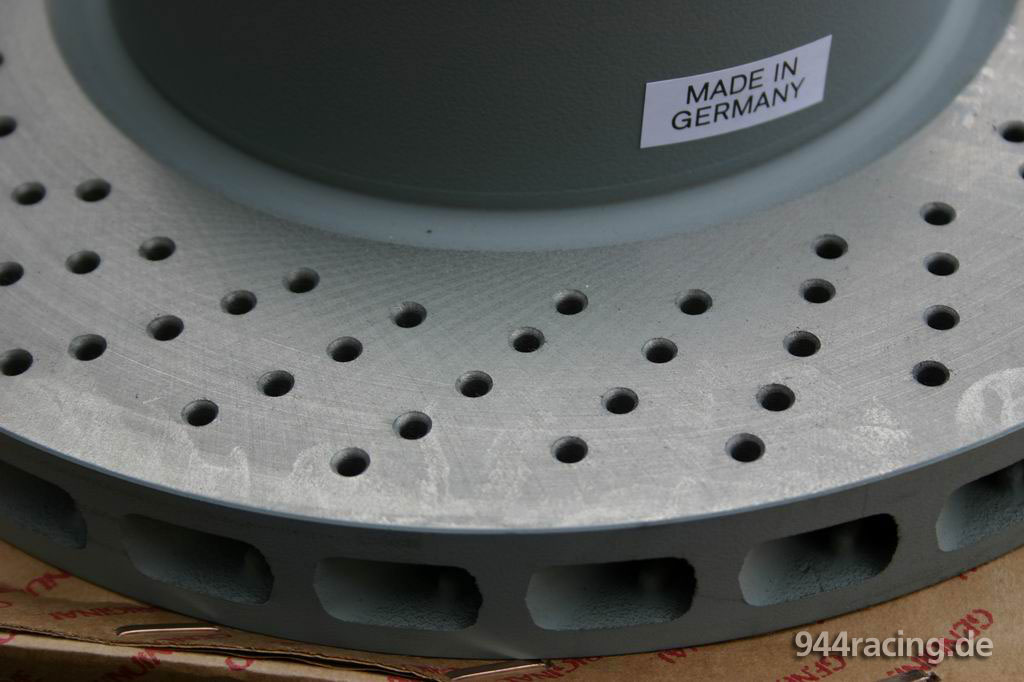
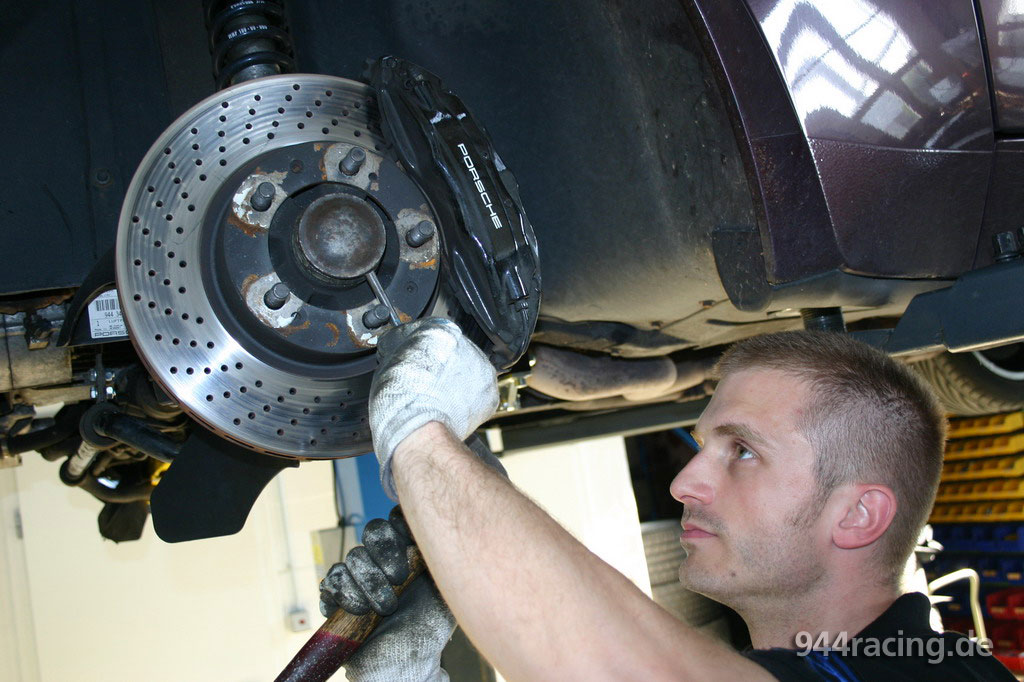
For a start a few pictures of the imposanten brake assembly parts: The brake disks with suitable pot depth come of 964 turbo. |
They are punched and ventilated. In the running employment it makes for in any case sense to fall back to original Porsche parts since these qualitative are superior to the accessories (even if the manufacturer is the same one). |
 |
 |
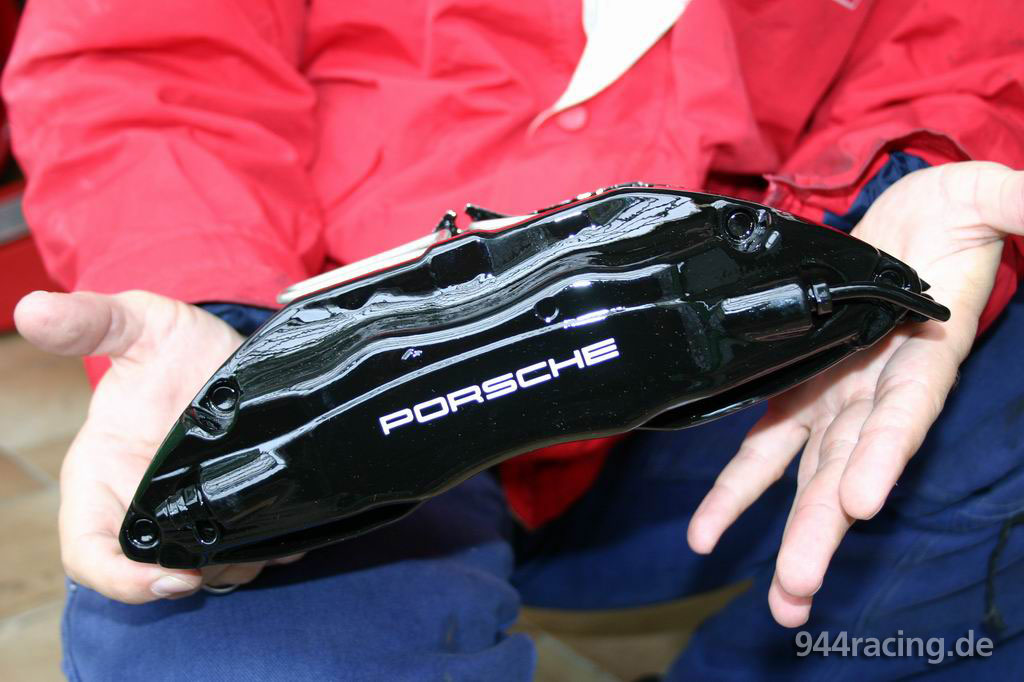
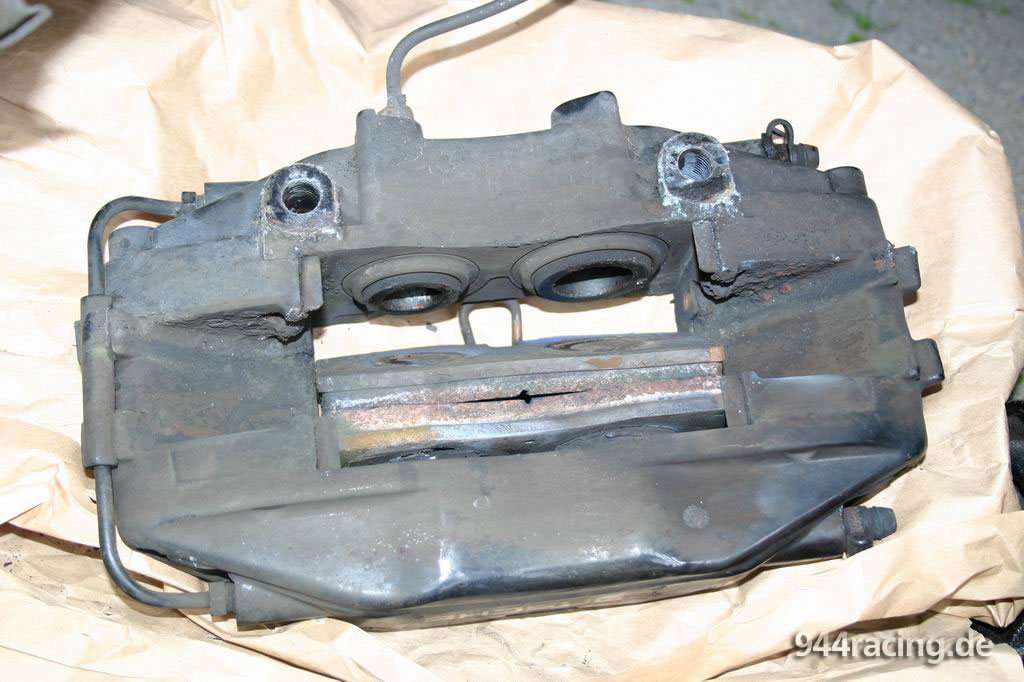
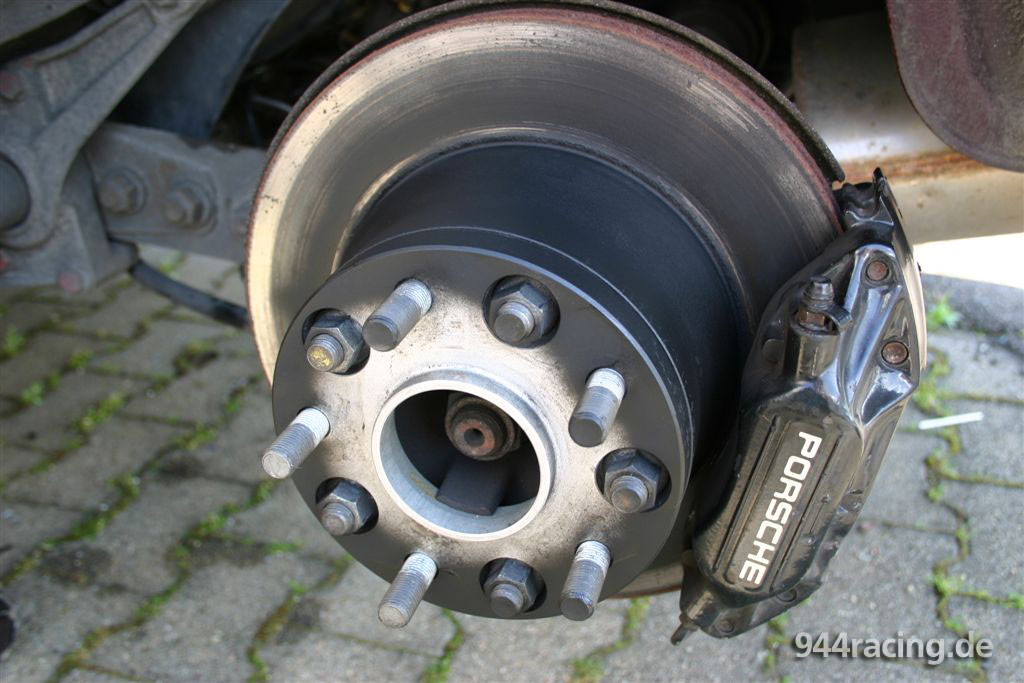
The brake calipers come from 928 GTS und are varnished in black. |
Brake calipers from 993 Turbo are of same construction, but the are varnished in red and they costs round about Euro 80 more. |
 |
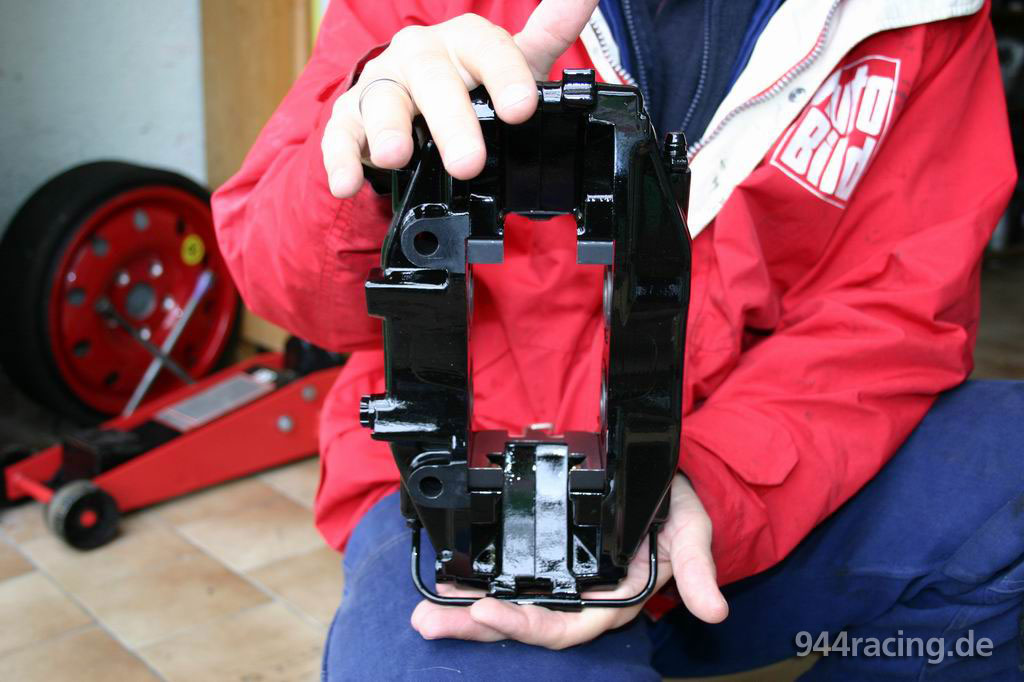 |
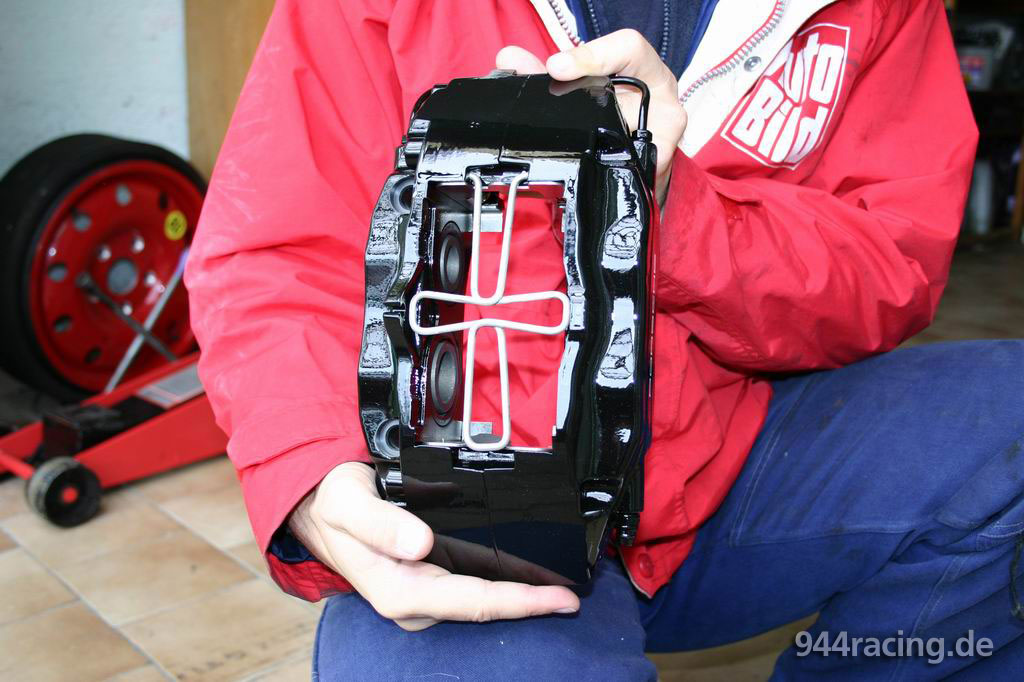
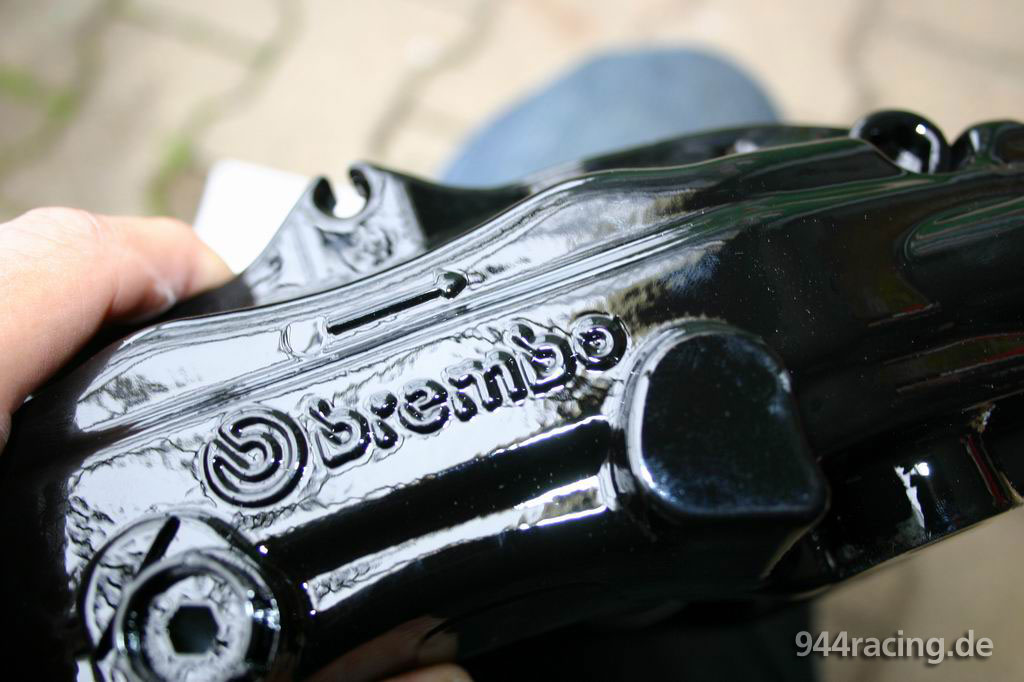
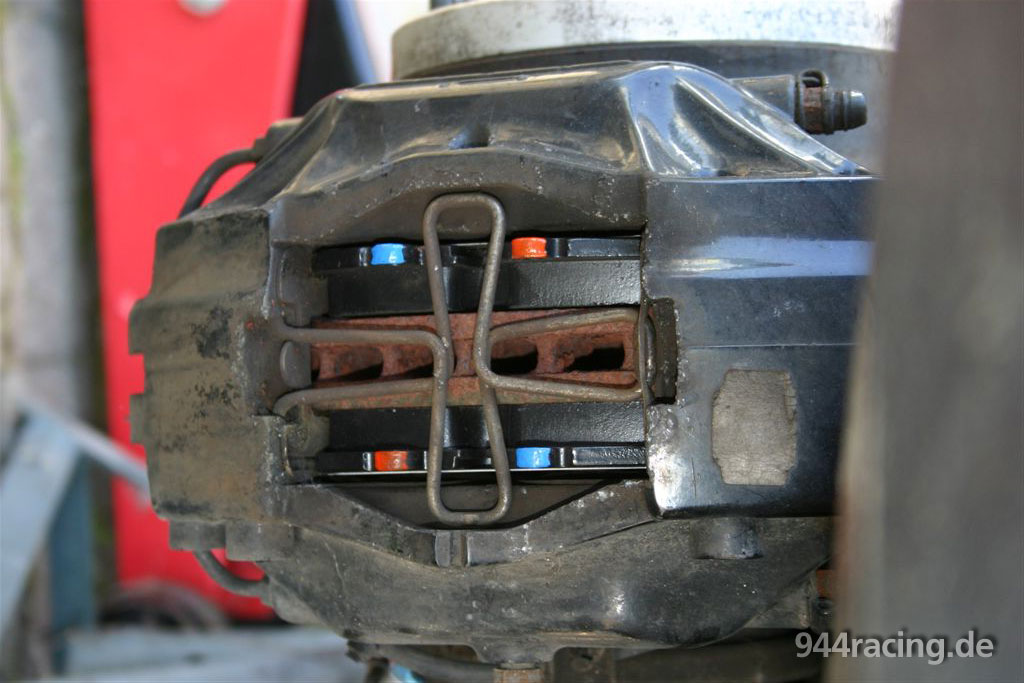
The brake calipers are strong boulders and unfortunately not light-weights. |
Porsche puts naturally on quality in brake assembly and therefore the calipers are from Brembo.The price for them is reasonable. |
 |
 |
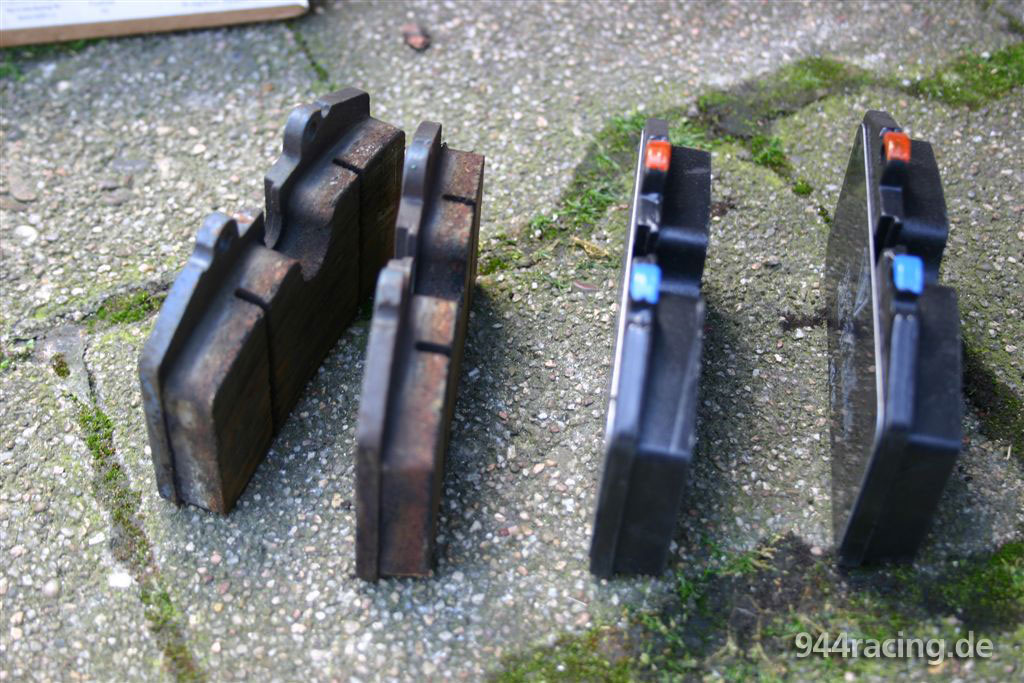
The standard brake linings are from Textar in the front.... |
...and from Pagid in the rear. But they will be displaced all around by racing brake linings from Pagid. |
 |
 |
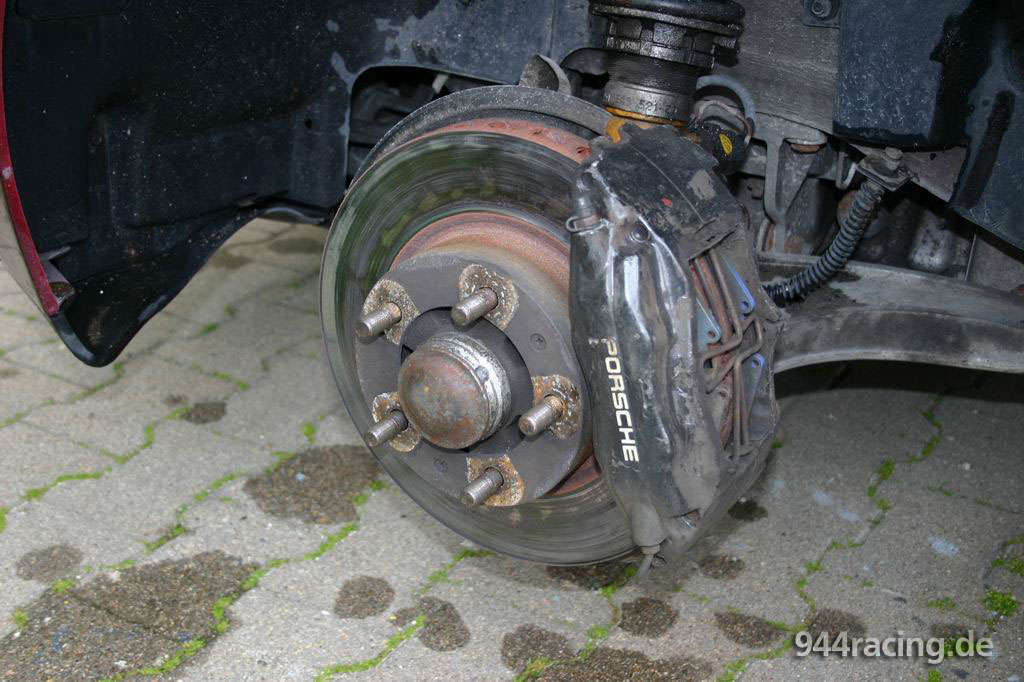
Here you see the old brake assembly, the discs are at their end. |
The caliper was screwed off. |
 |
 |
The old front brake caliper with the brake linngs Pagid RS 4-2. |
Here a dimensional comparision of the new linings: The rear axle can substantially convert less brack effect before blocking and therefore it uses relately smaller linings. |
 |
 |
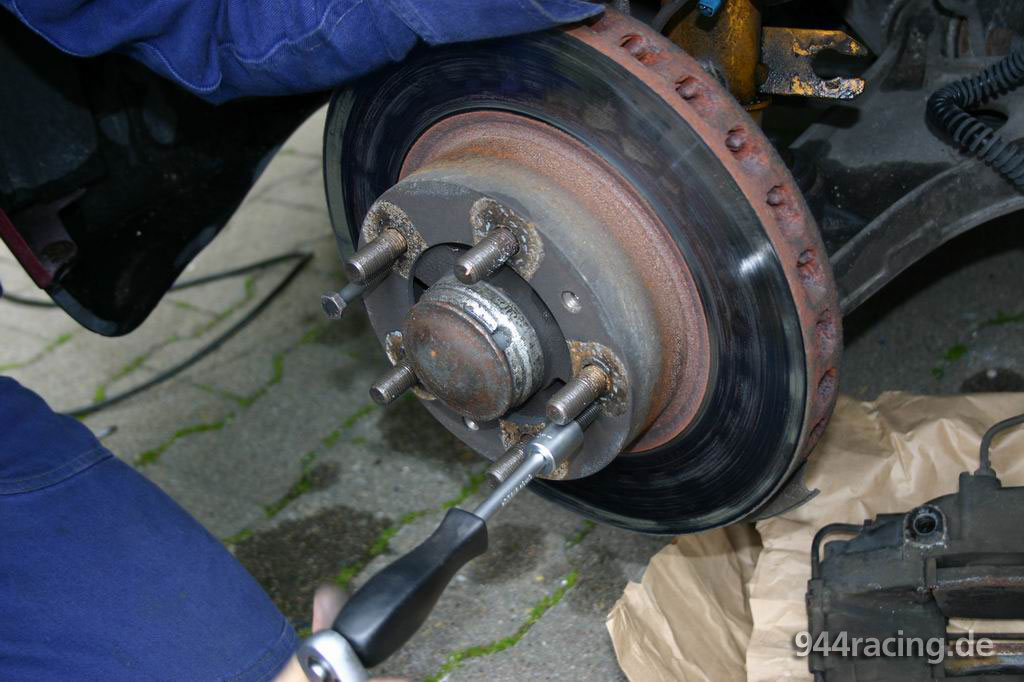
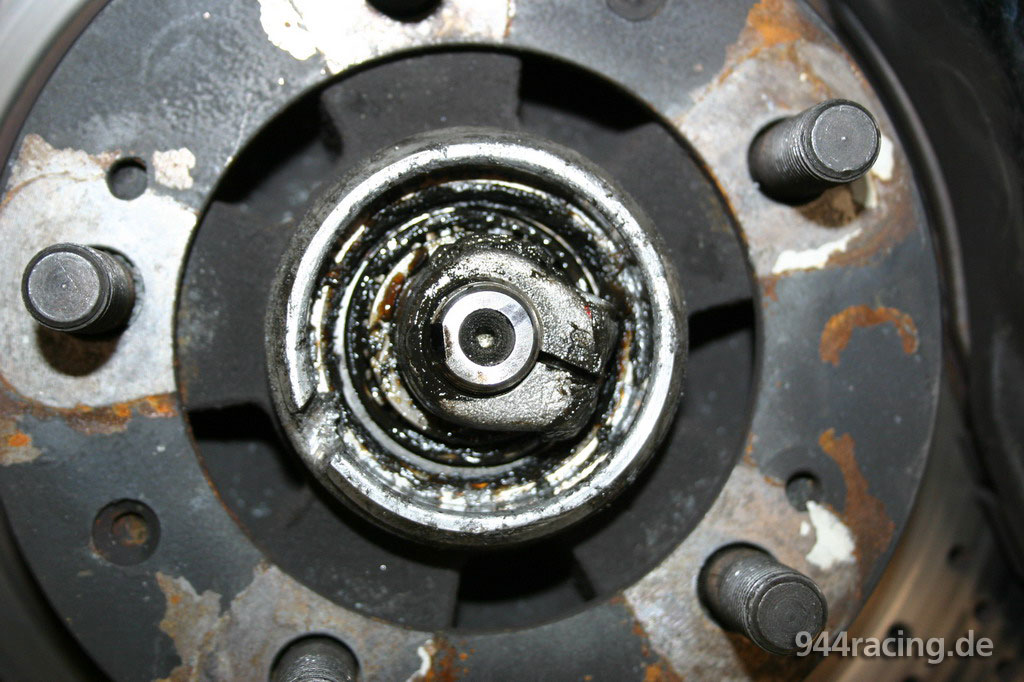
Stefan unlocks the small screws, who fixes the disc at the hub. |
One has to be drilled out. |
 |
 |
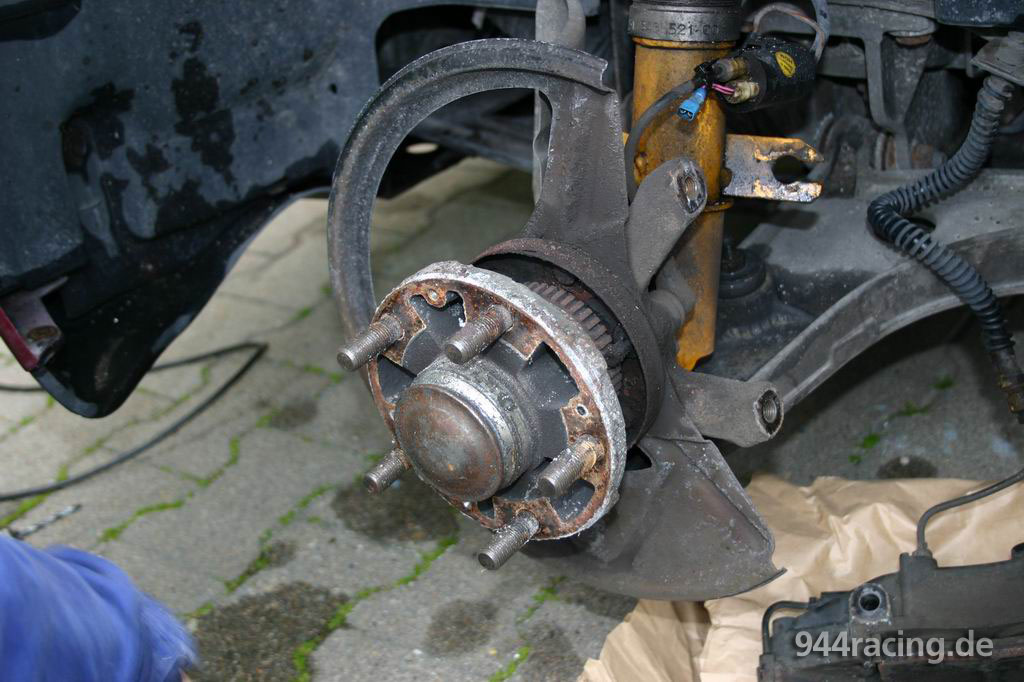
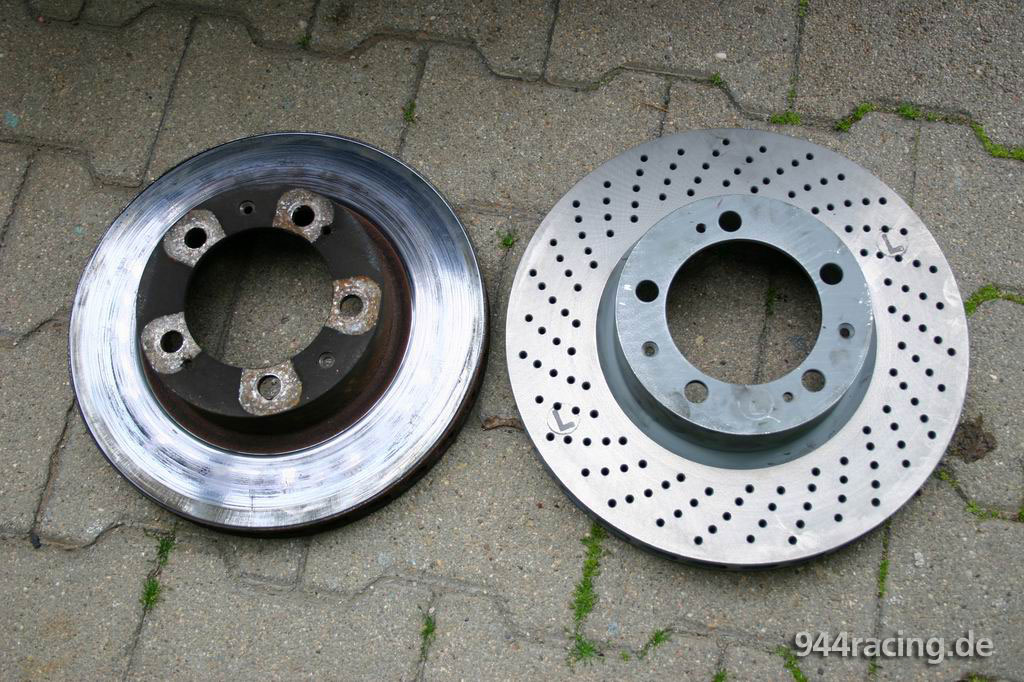
Done. The disc is unmounted. |
Here is a dimensional comparision between the old 304 mm disc and the new 322 mm disc. |
 |
 |
The brake disc shield plate has no sufficient space... |
..and has to be cut off. |
 |
 |
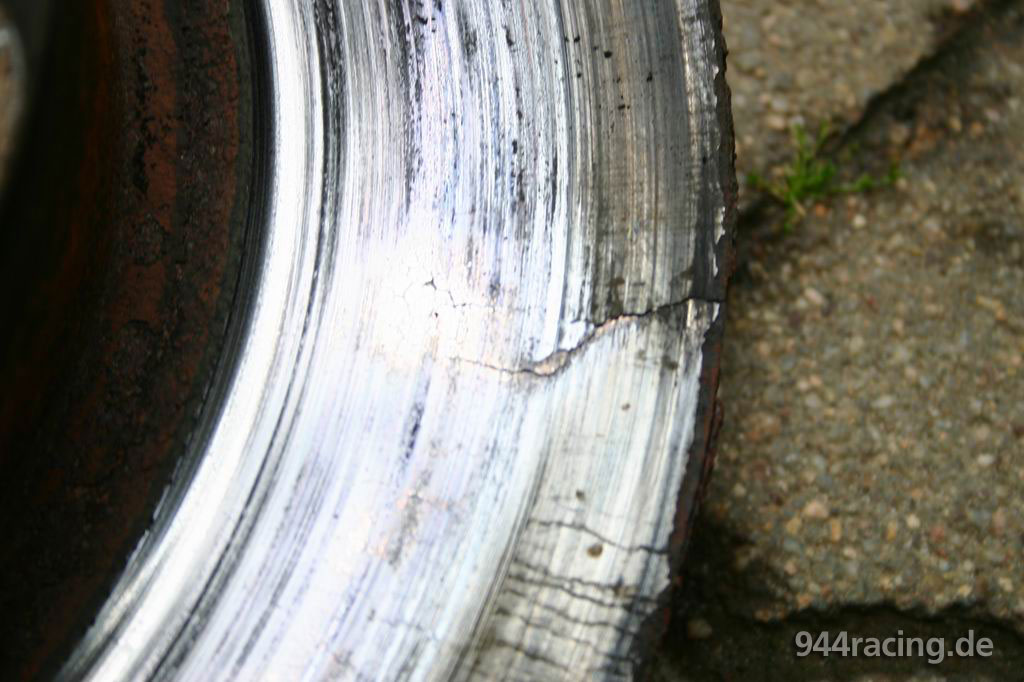
The three following pictures are demonstrating, how aggressively the racing brake linings are for the disc. |
The "Pagid Blue" is to aggressively for the disc at Hockenheim. |
 |
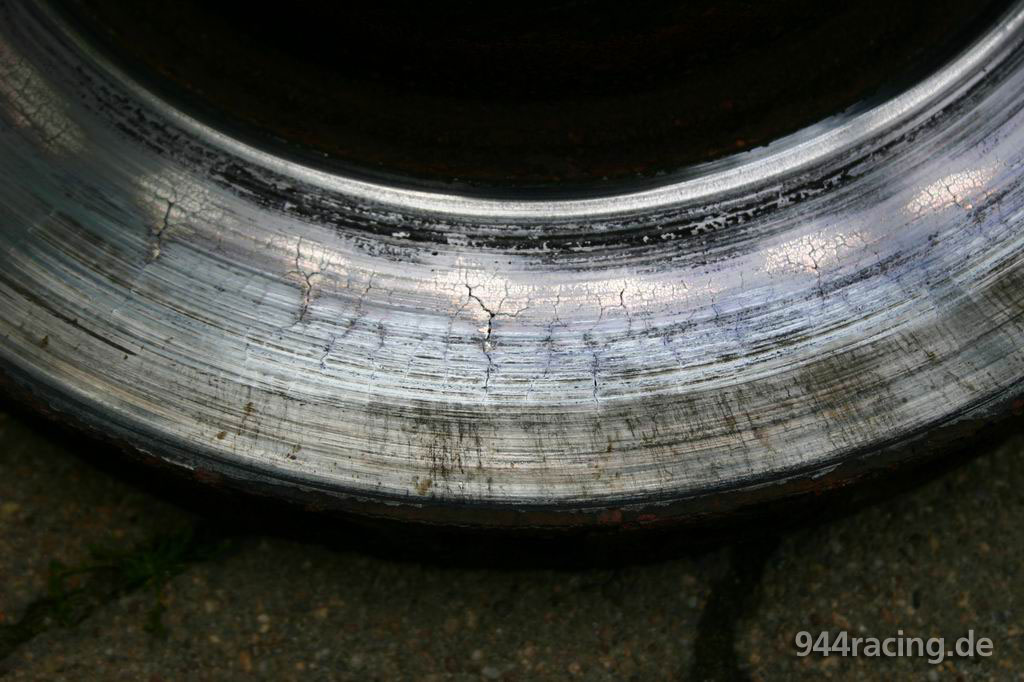 |
A crack from inside to outside. |
Here the mounted 322 mm disc... still without caliper. |
 |
 |
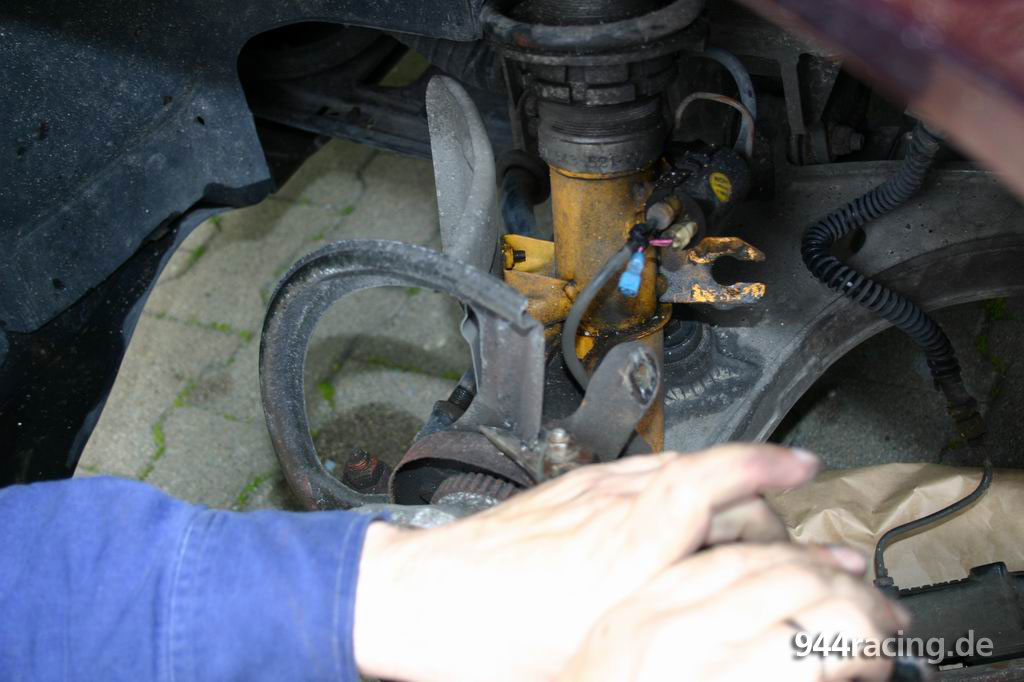
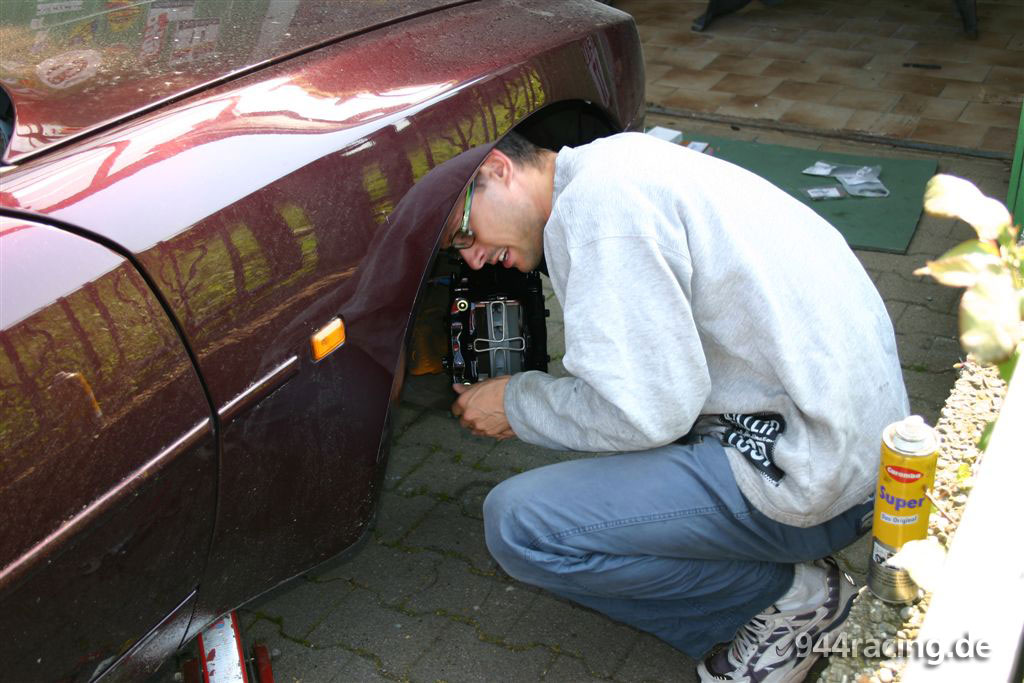
In order to be able to install the new braking force regulating valve, the interior fender must be removed right in front. |
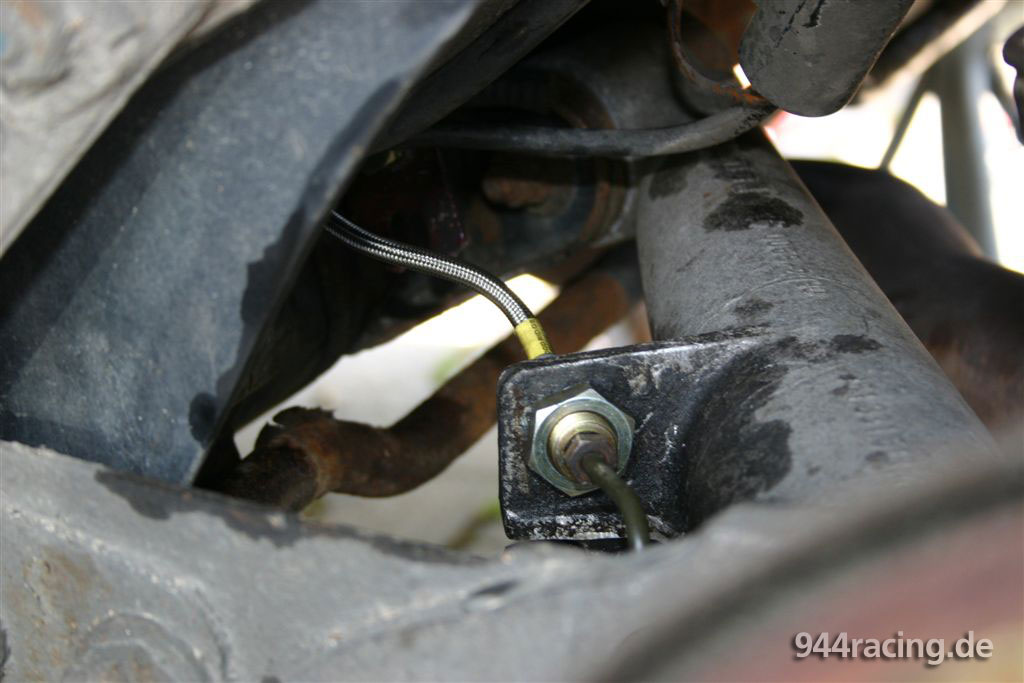
Here the new brake power valve, which controls the brake power balance between front and rear. Since the new brake assembly in the front, it can be given more pressure to the rear axle, then the old valve allowed. |
 |
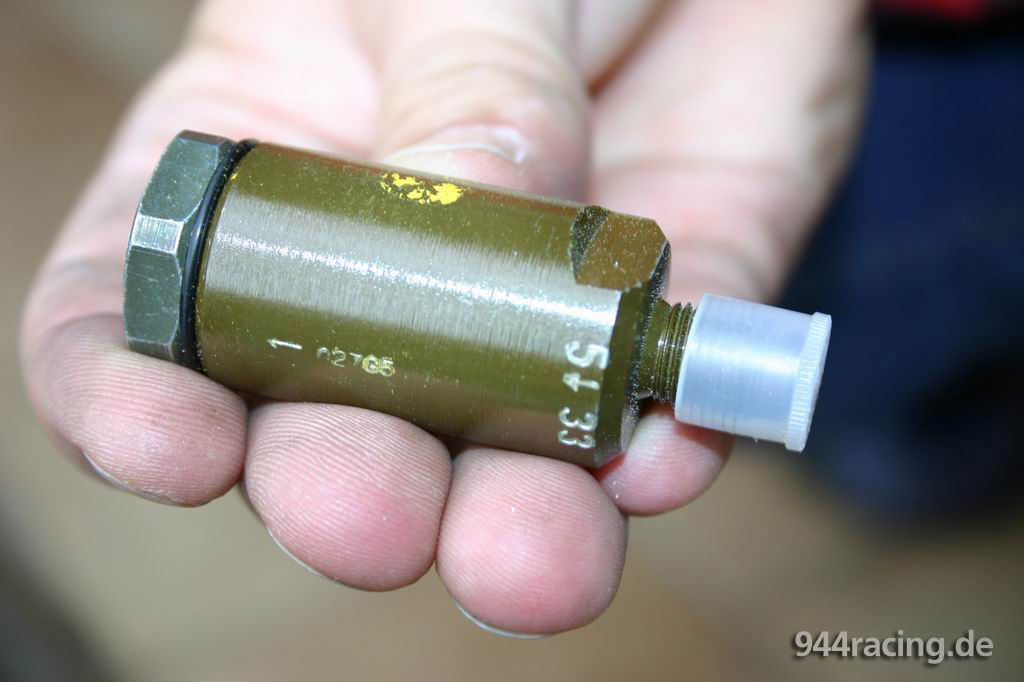 |
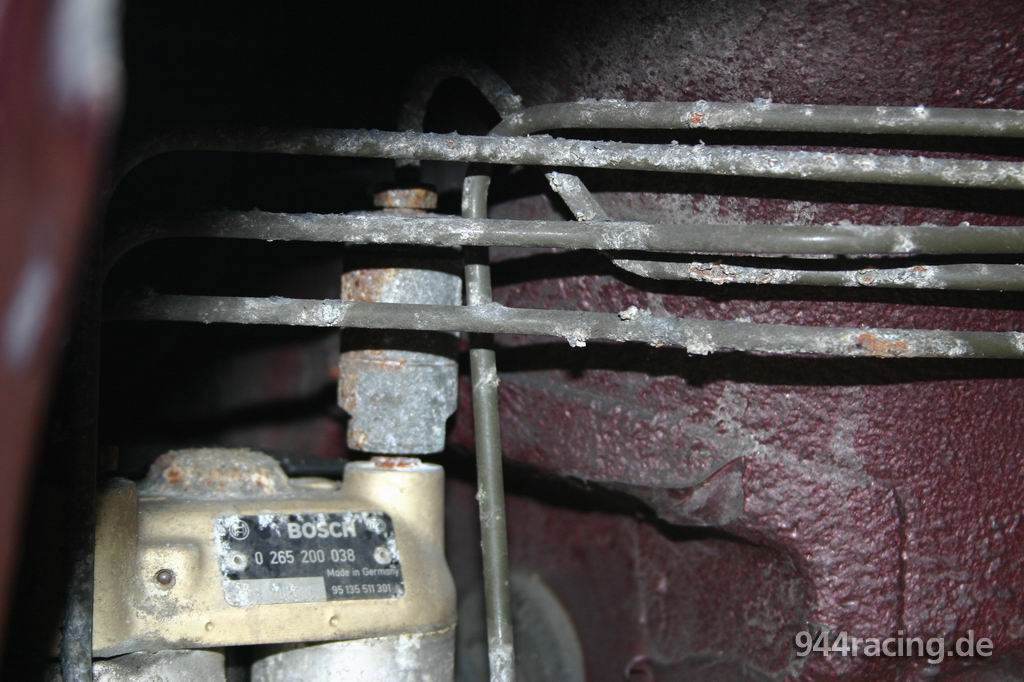
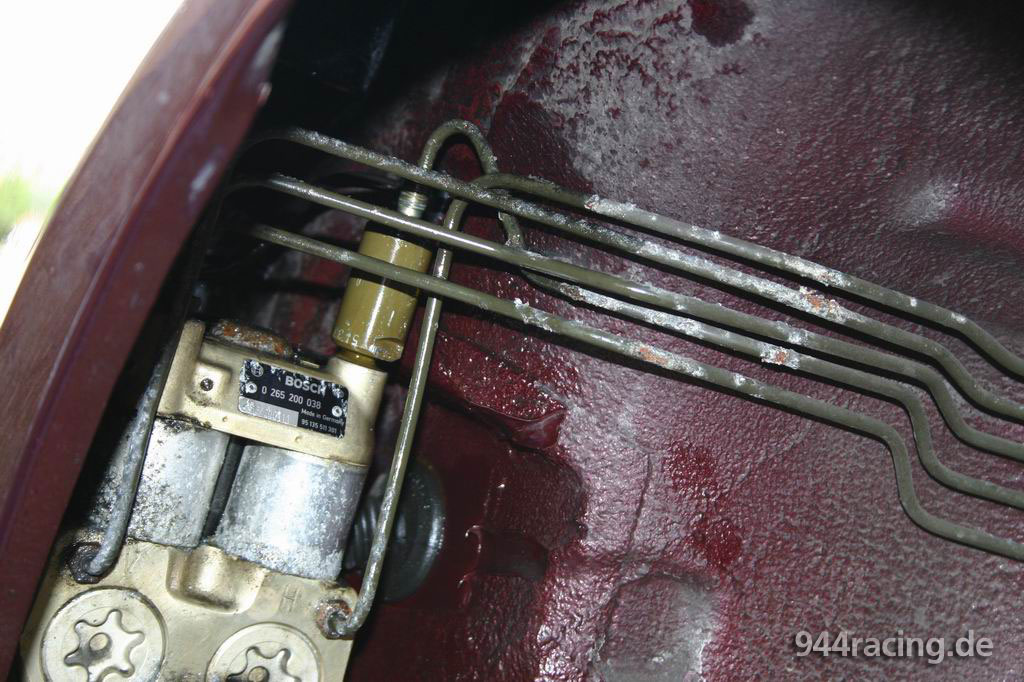
Here is the old brake power valve... |
...replaced by the new one. |
 |
 |
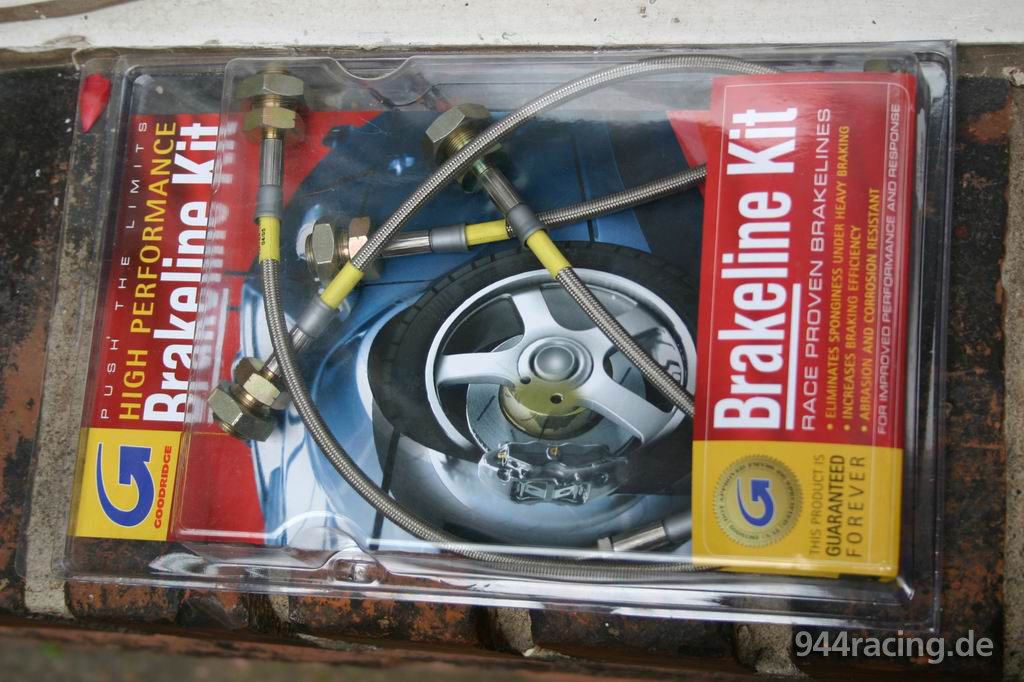
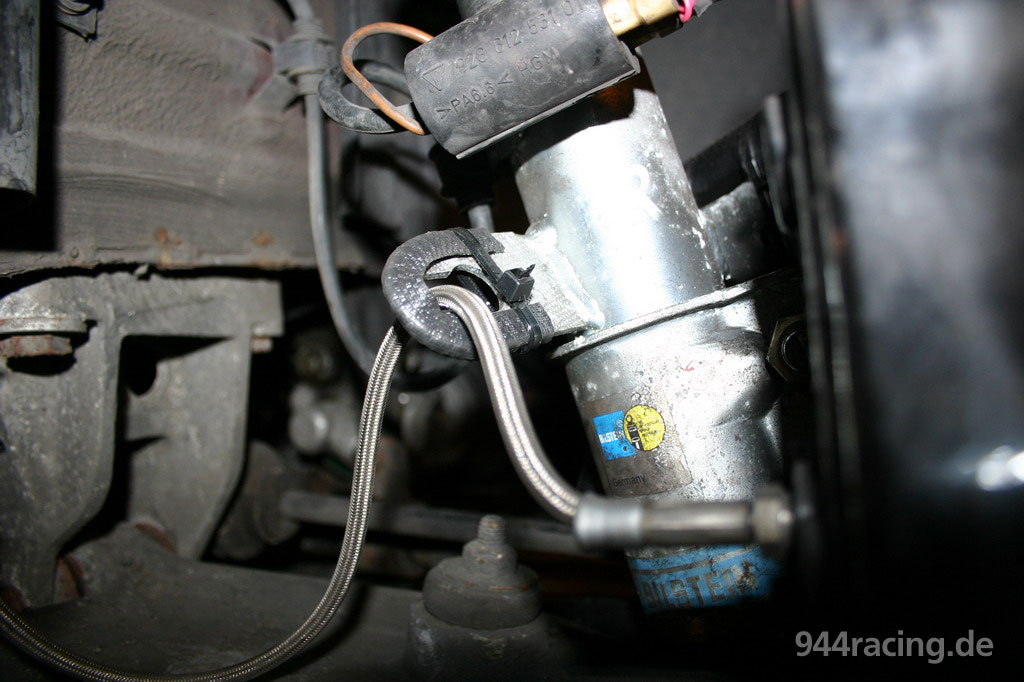
Unfortunately the nuts between the brake calipers and the brake lines were seized up, so we can not unmount them. Now we are waiting for the planed brake lines "Stahl-Flex", before we install the new calipers at the brake lines and refill the brake fluid circulation with Castrol SRF racing brake fluid. |
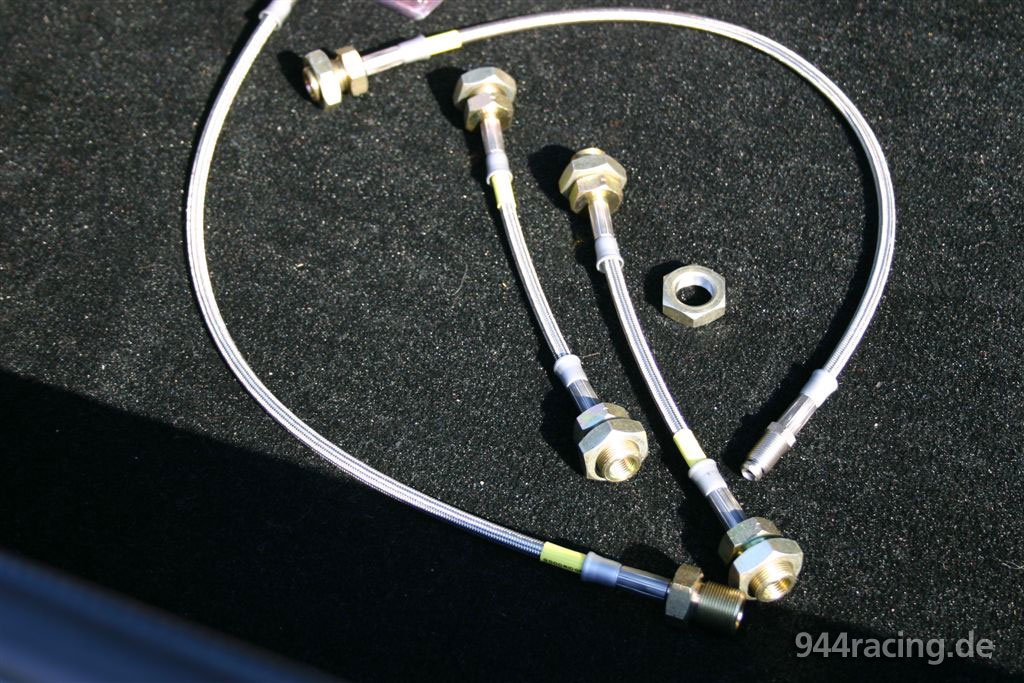
After receiving the stainless steel brake lines... |
...the modification could to be continued. |
 |
 |
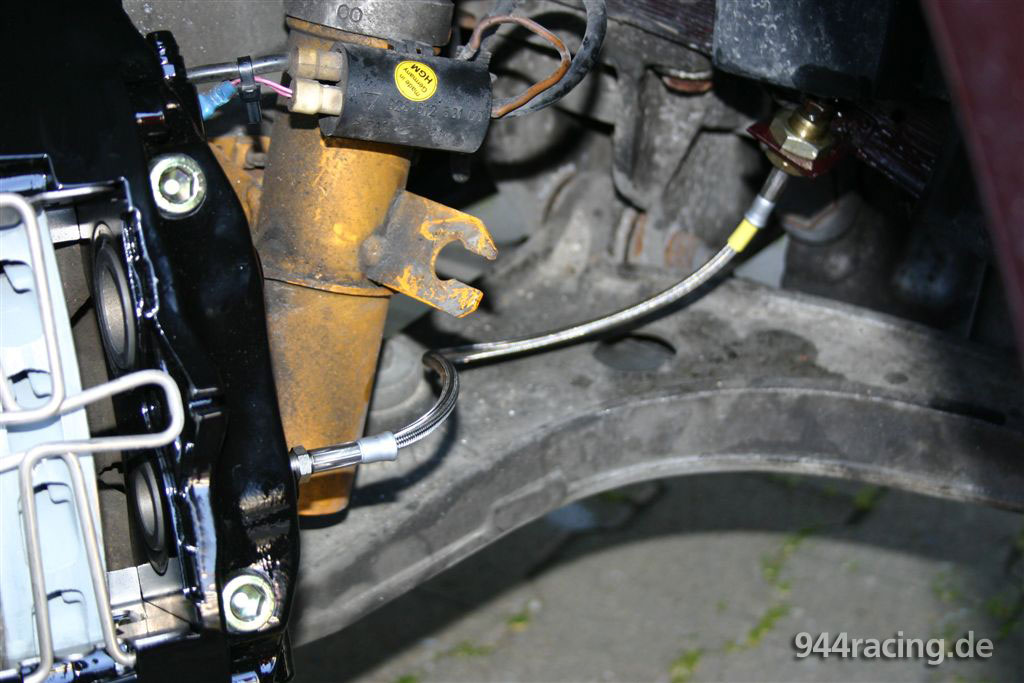
In the front the calipers with the lines were demounted and the installation of the steel brake lines was fast done. |
By installation of the lines keep care, that they could be buckling in the right direction with the steering wheel angle. |
 |
 |
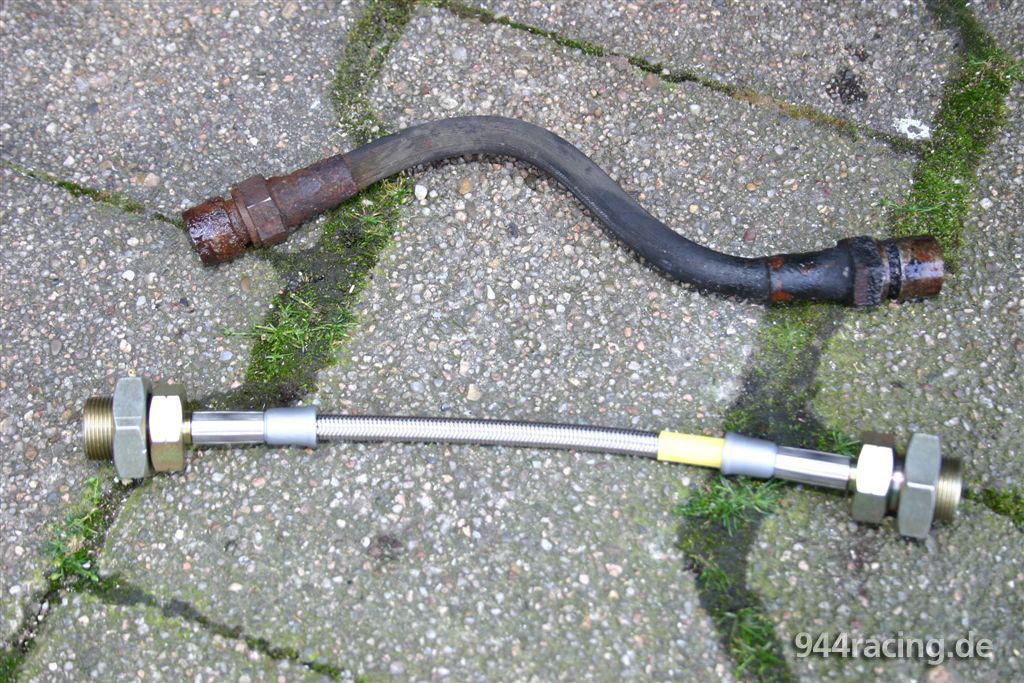
Here a comparison of the rear side brake lines: the old rubber line and under it the new stainless steel line. |
You learn to love rust removers and penetrating oils for screwing at the old brake lines. |
 |
 |
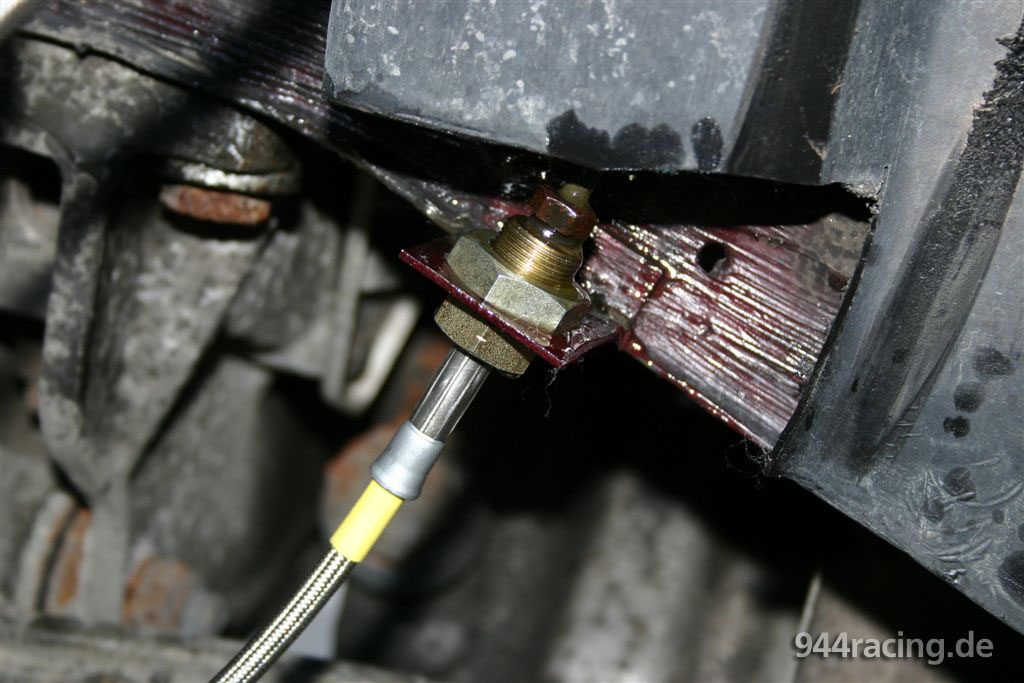
Now the rears are also installed... |
...and the stainless steel lines and the anti-lock wheel sensor cable are cleanly installed. |
 |
 |
Now the brake bleeding can be done. |
The brake fluid Castrol SRF is really expensive, but it has a higher boiling point in comparison with ATE and Co. |
 |
 |
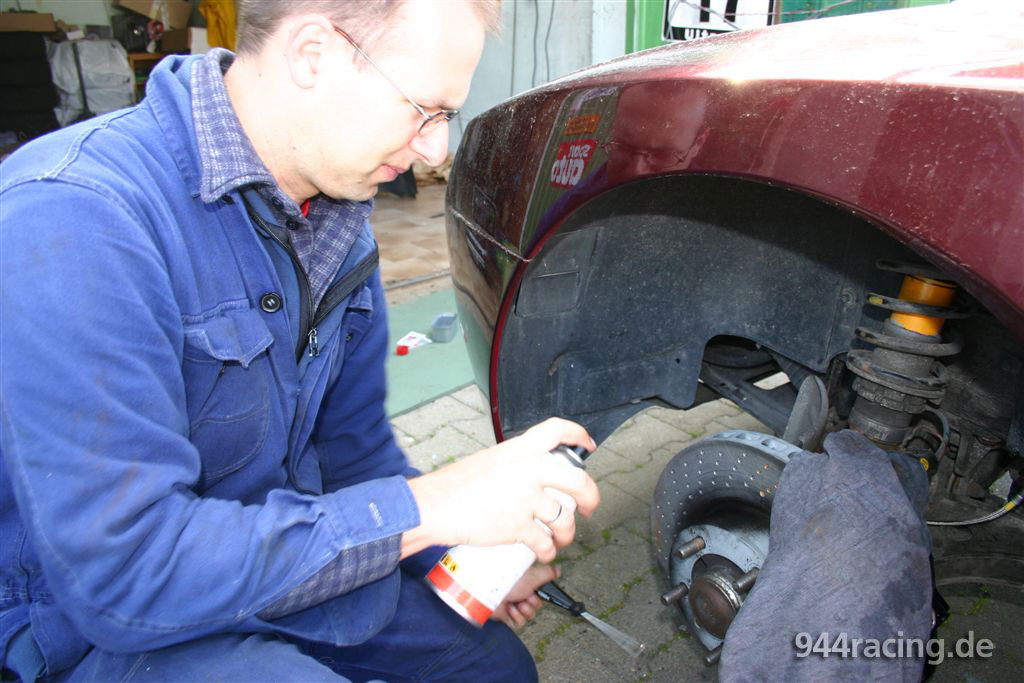
Stefan sprays with heat-resistant colour the disk chamber in matt black. |
It looks better than a grey disk chamber (and/or soon rusting). |
 |
 |
Also the rear side disk chambers were first cleaned with a wire brush ... |
...and afterwards varnished completely with the distance discs. |
 |
 |
The rear brake linings Pagid RS 4-2 were not really used. |
Nevertheless i wanted in accordance to the front serial linings also serial linings in the rear for a good brake balance. |
 |
 |
Here the comparison: left are the used Pagid RS 4-2 (blue), right the new serial brake linings from Pagid. |
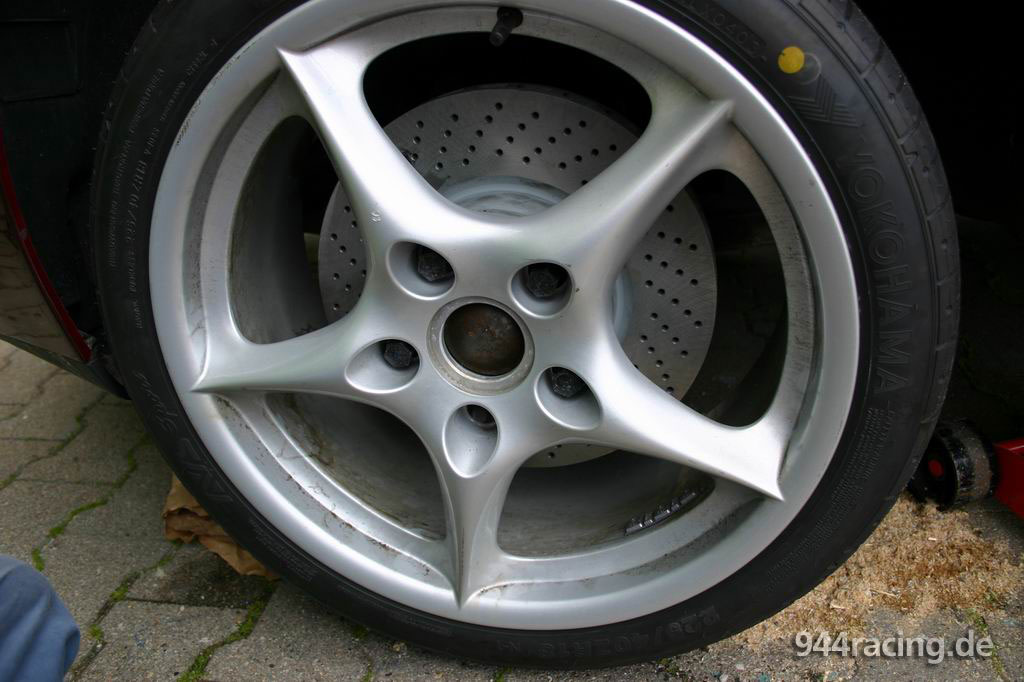
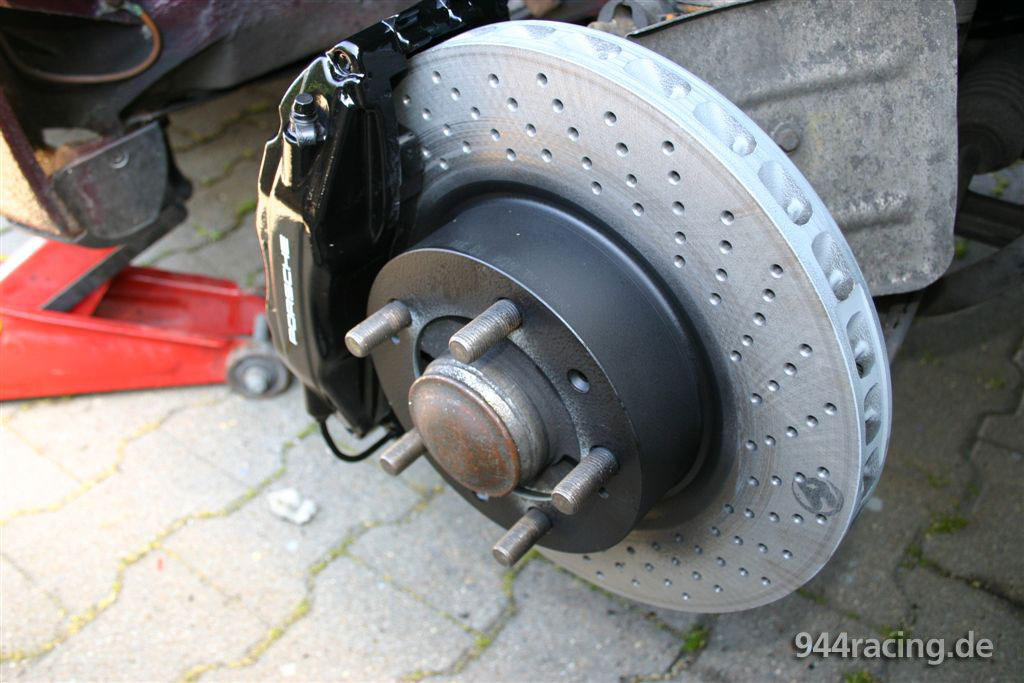
Also a picture of the front brake disc with black varnished disk chamber and mounted rim. |
 |
 |
Stefan has welded a belt bar into his roll cage for his 968 CS. |
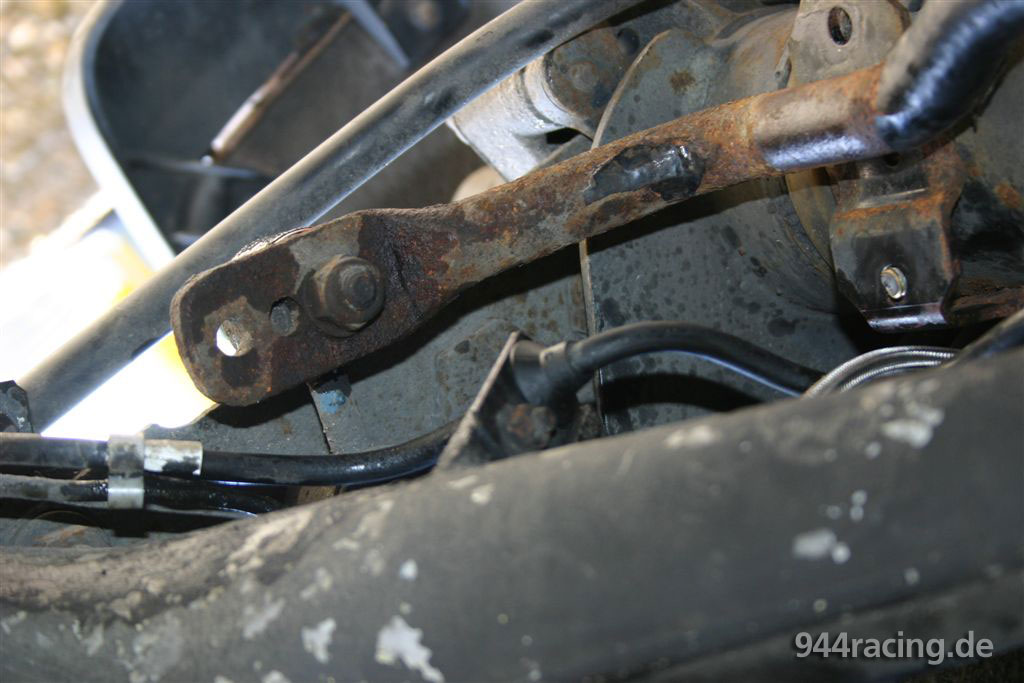
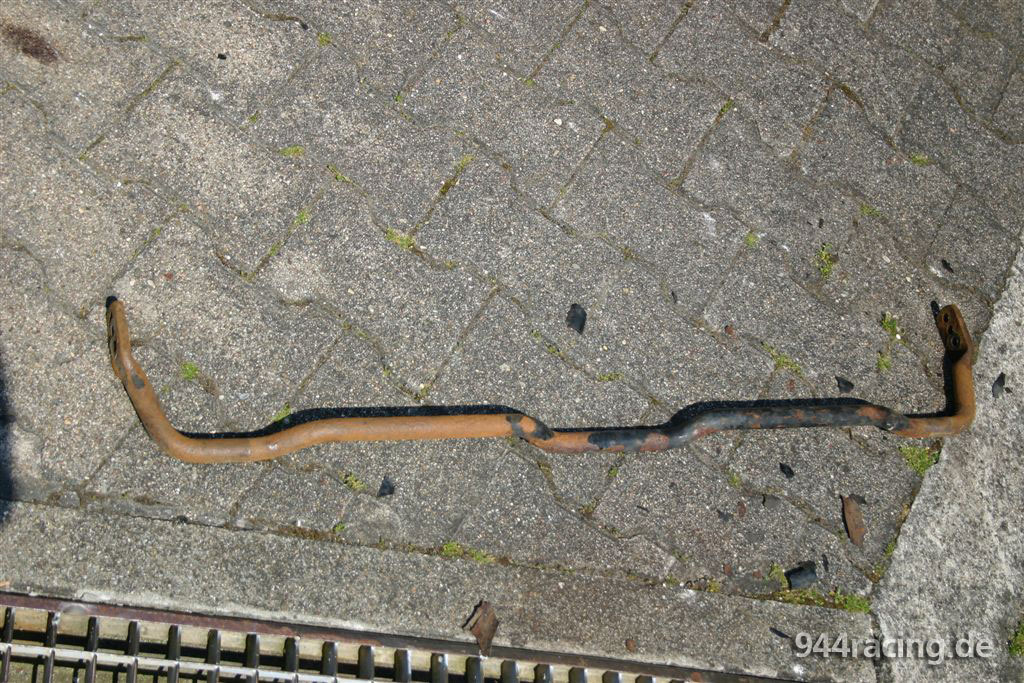
At the end we demounted the rear stabiliser, |
 |
 |
since the rubber at one side was missing and at the other side was totally exhausted. |
Also the stabiliser was cleaned with the wire brush. As soon as i have the new rubbers, he will be installed. |
 |
 |
Thanks Stefan für your Know How and help at the brake modification. Fortunately you have not lost your patience and now all is how i planned, although the srews proved hard our patience. |
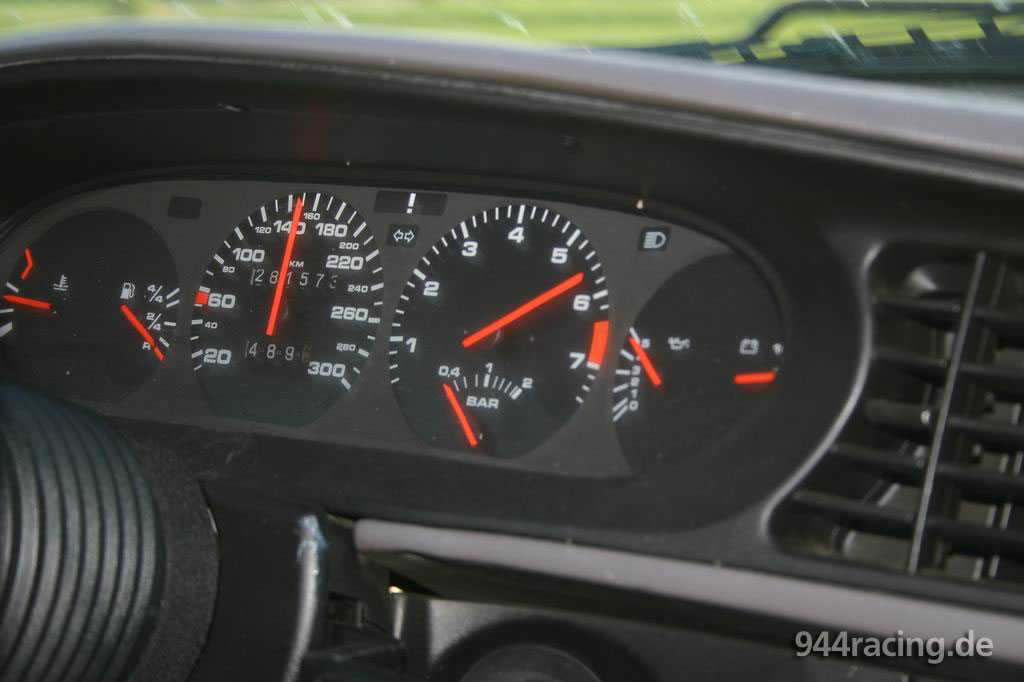
At the 13.6. it started with a new setup at the Course Club at the Hockenheim Way. The car weights filled up 1340 kg (700 kg at front axle/ 640 kg at rear axle...corresponds 52% FA / 48% RA). |
The missing rear stabiliser (I had problems with the installation, since the diameter of the rubber was too narrow)was noticed through extremely understeering. |
 |
 |
In addition the car wasrelatively warm with full load and the oil pressure sanks at full load below 4 bar. The cooling has to be optimized. |
Filled up and without a co-driver the laptimer showed a 2:12.99. |
 |
 |
All the 4 pictures are from Alexander Neurohr... thank you! |
In dependence to the necessary MOT registration I brought the car to Reiner Telkamp (Sportscar Service).... |
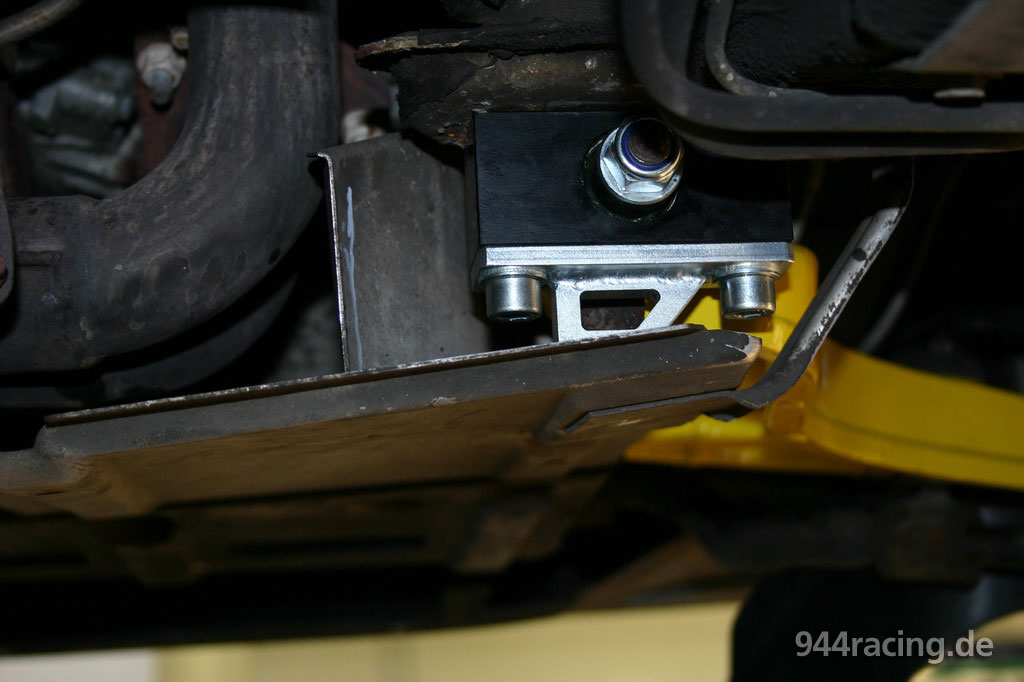
...who installed not only the rear 21mm stabilizer but also the uniball front suspension top mount,which were designed by him. |
 |
 |
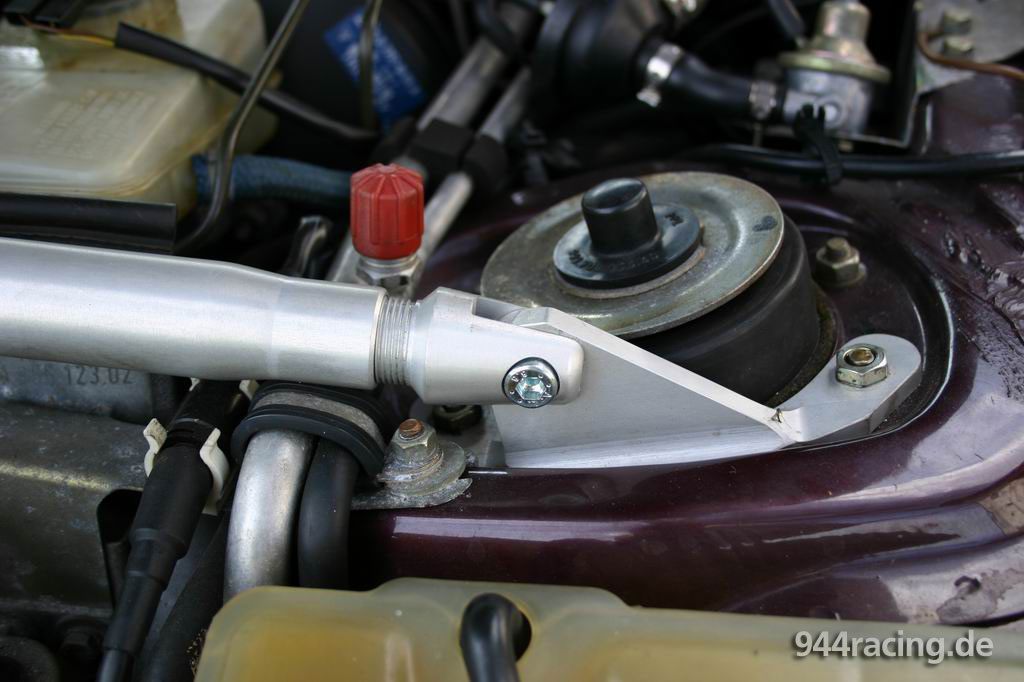
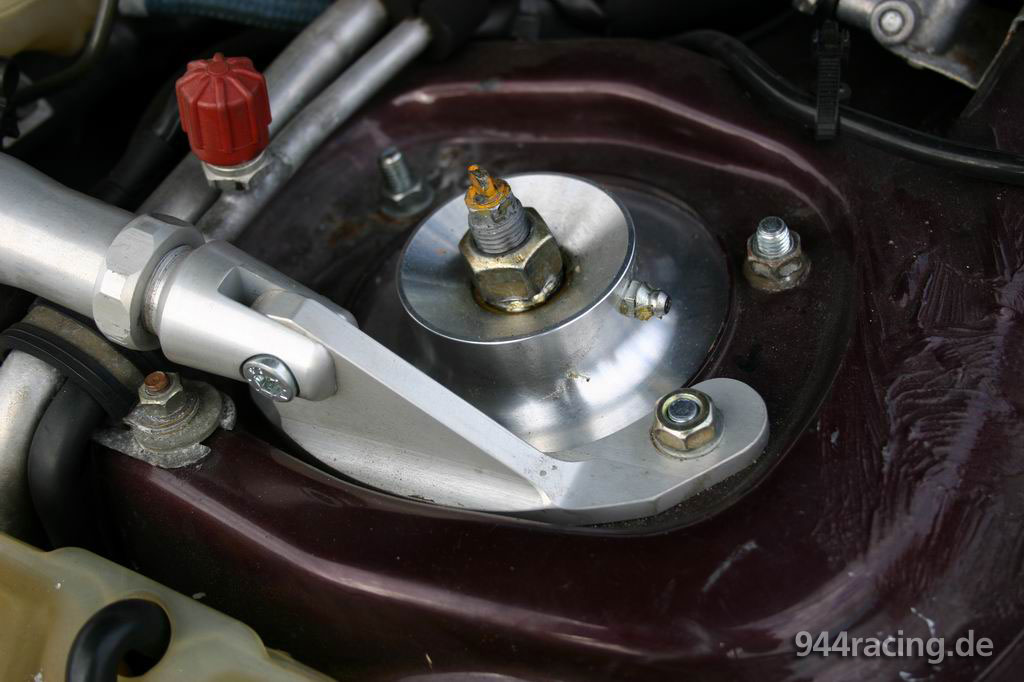
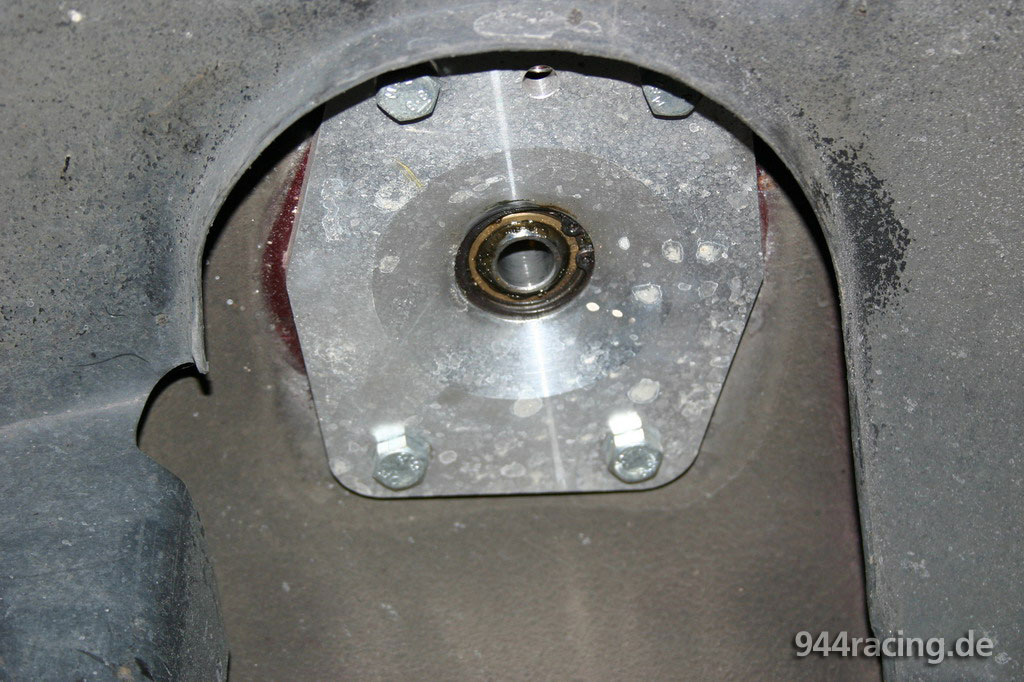
The front suspension top mounts possess a practical lubrication fitting and are produced very solidly with high quality. |
The yellow screw inside the top the front suspension top mount ist the adjusting screw from the Koni thread damper. |
 |
 |
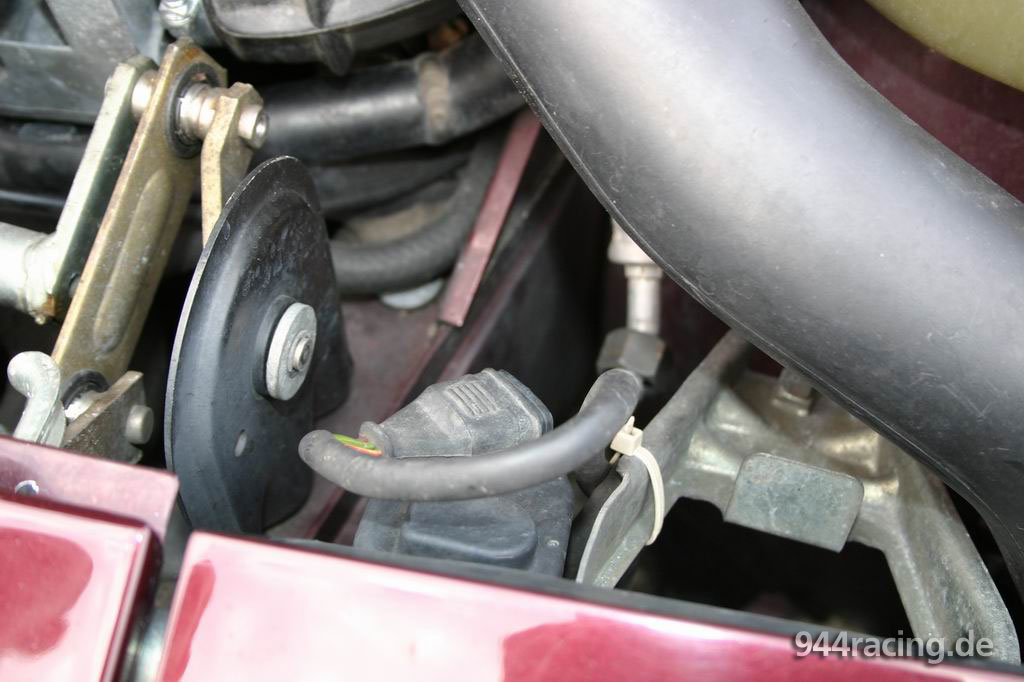
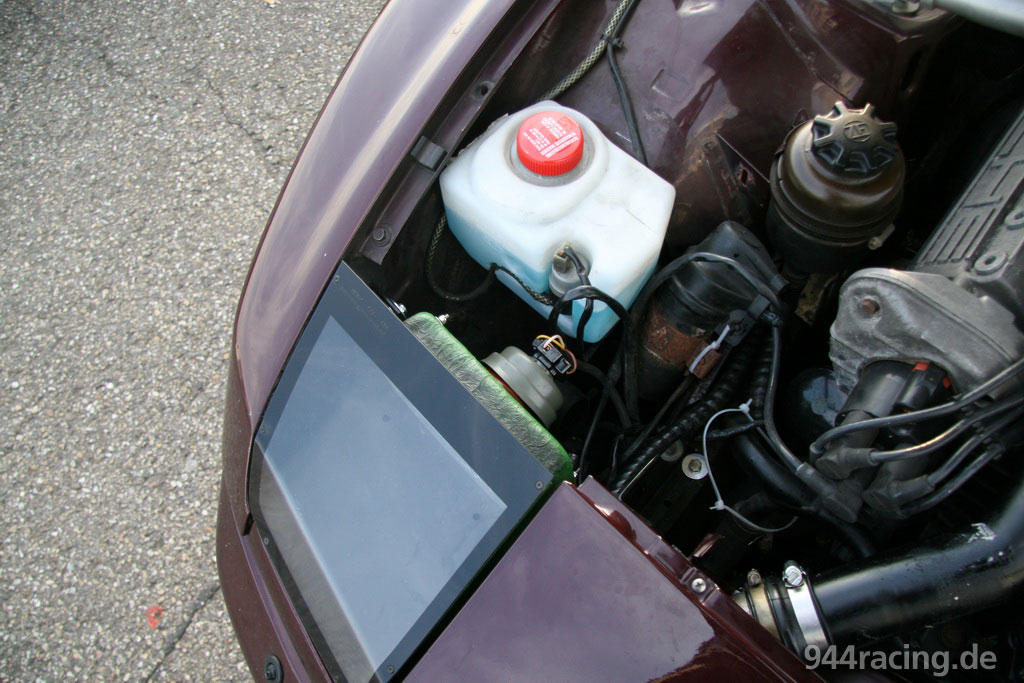
Since the car became quite hot when long driving in the running speed at the track and the oil pressure sank below 4 bar at full load, Reiner suggested me to remove the air conditioning cooler, which is in front of the water cooler and so reduces the air cooling. |
Since the air conditioning system does not work without the cooler,
I decided due to weight reasons to remove the air conditioning compressor. |
 |
 |
Thanks to Reiner Telkamp for the reliable and perfect work and the many helpful and competent hints and ideas! |
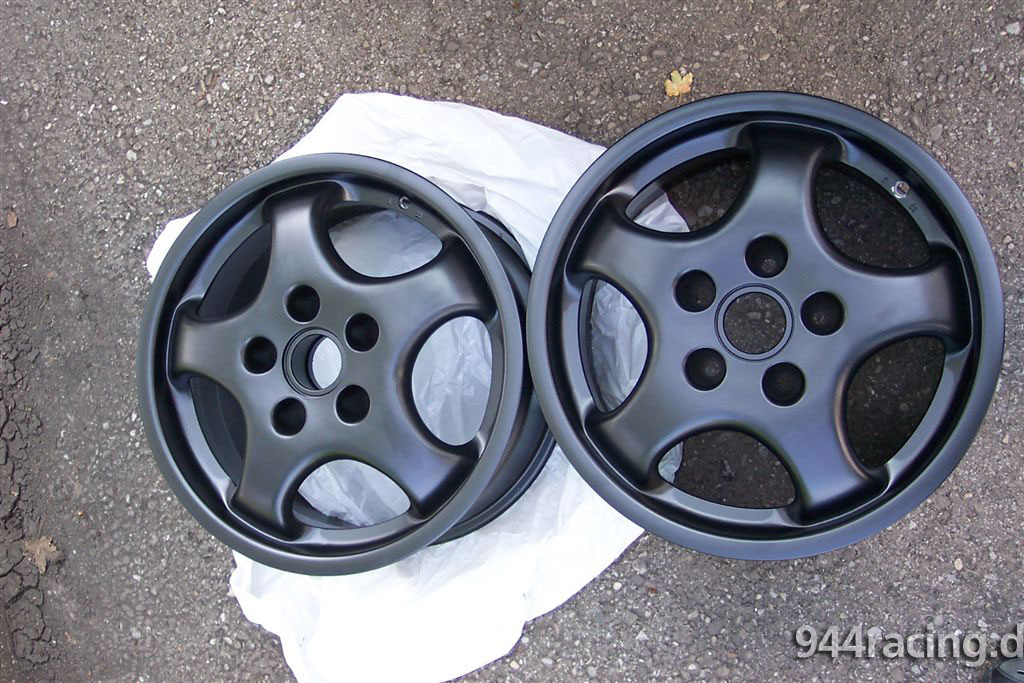
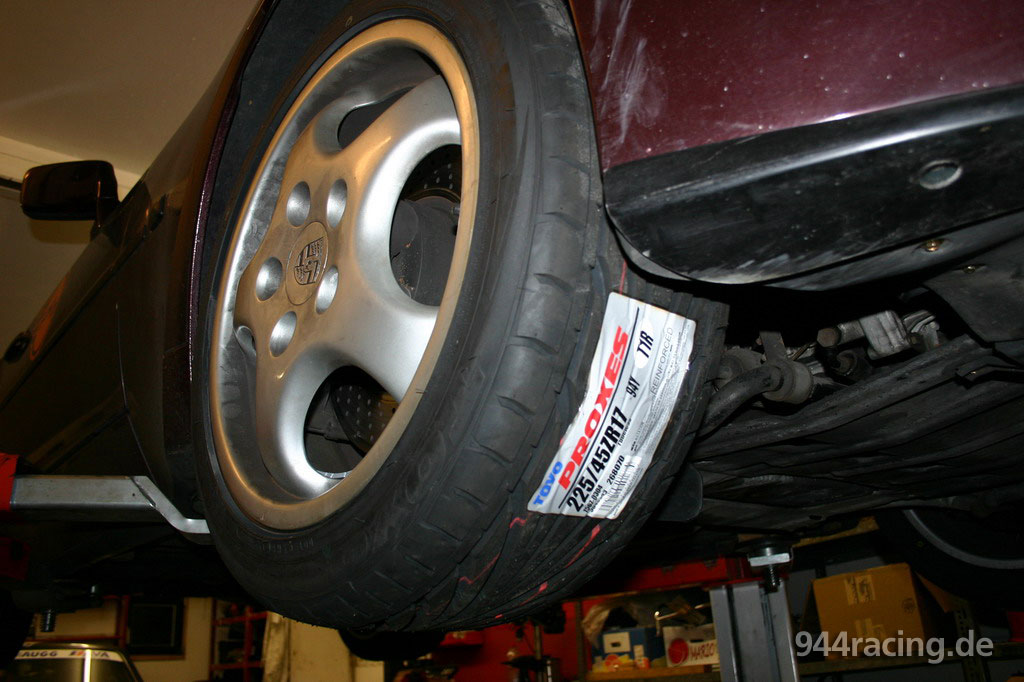
The 18" Rims and specially the wide rear tyre were extremely in combination
with the M030 suspension kit. Therefore i decided to use 17" semi slicks,
because i think, that this is the best compromise, results between acceleration
and cornering stability |
I use originally Porsche Cup Rims. They are not really light-weighted,
but I have never (even more lighter) found a set with Cup 2 Rims in dimensions
of 7.5" and 9". |
 |
 |
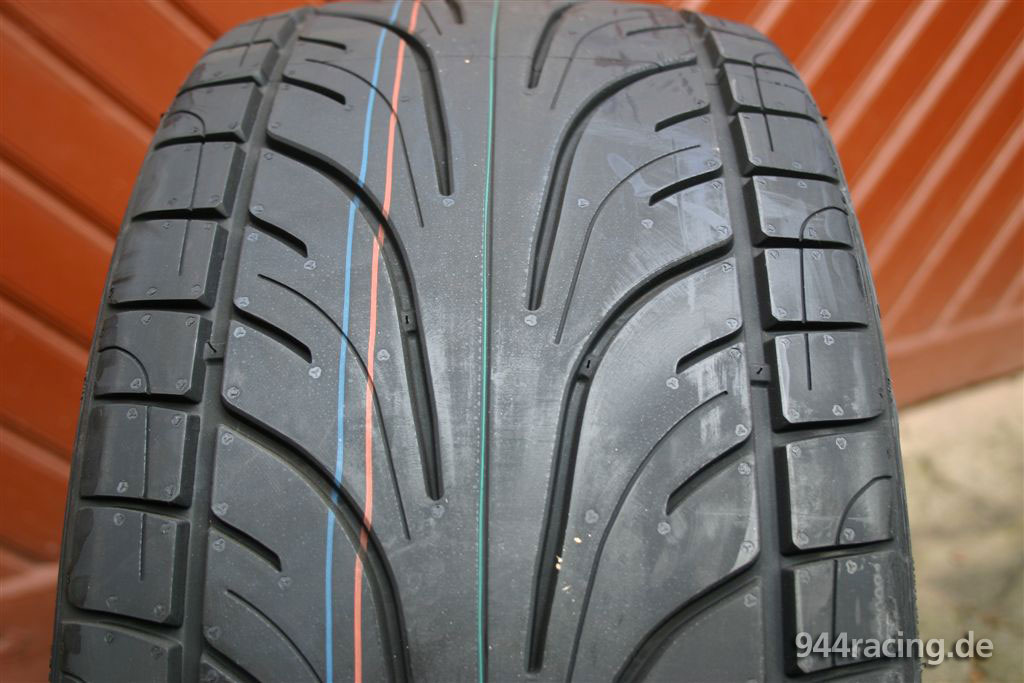
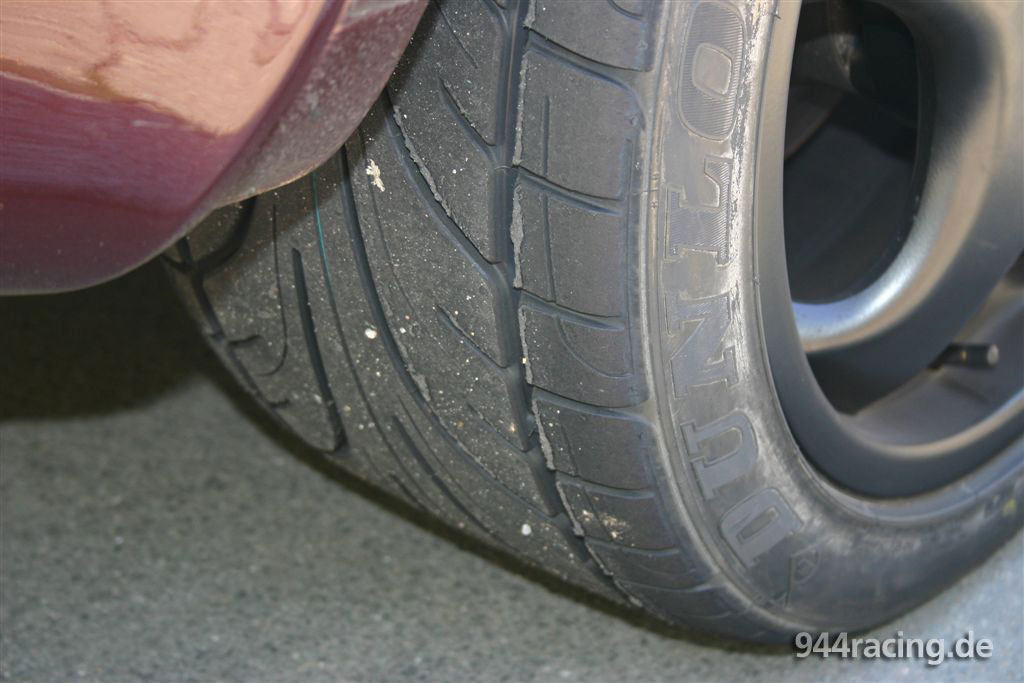
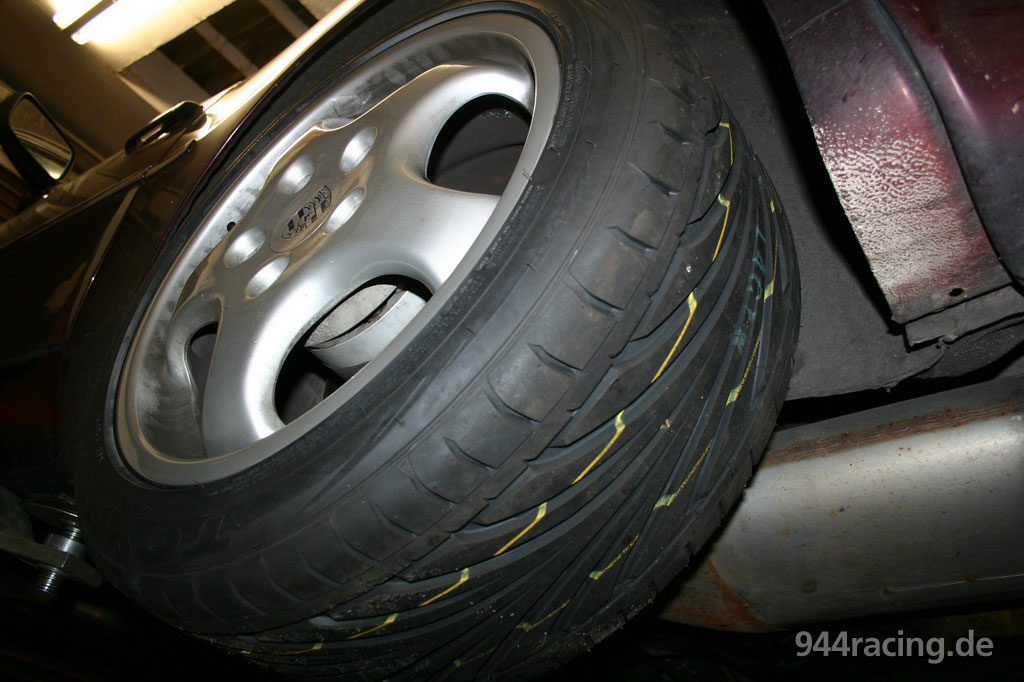
The vehicle handling improved noticeably due to the Semi Slicks "Dunlop SP Supersport Race". Their profile looks like the road tyre "SP Sport Maxx", but they have a totally different rubber sheating compound. |
The traction of these tyres is really fascinating and the vehicle
handling is a little bit more neutrally than with the wide 18" in 265. |
 |
 |
I am not really satisfied, since the car has a little under-steering
but the rear axle seems like nailed on. With the presently setup the
car is ridable without problems. |
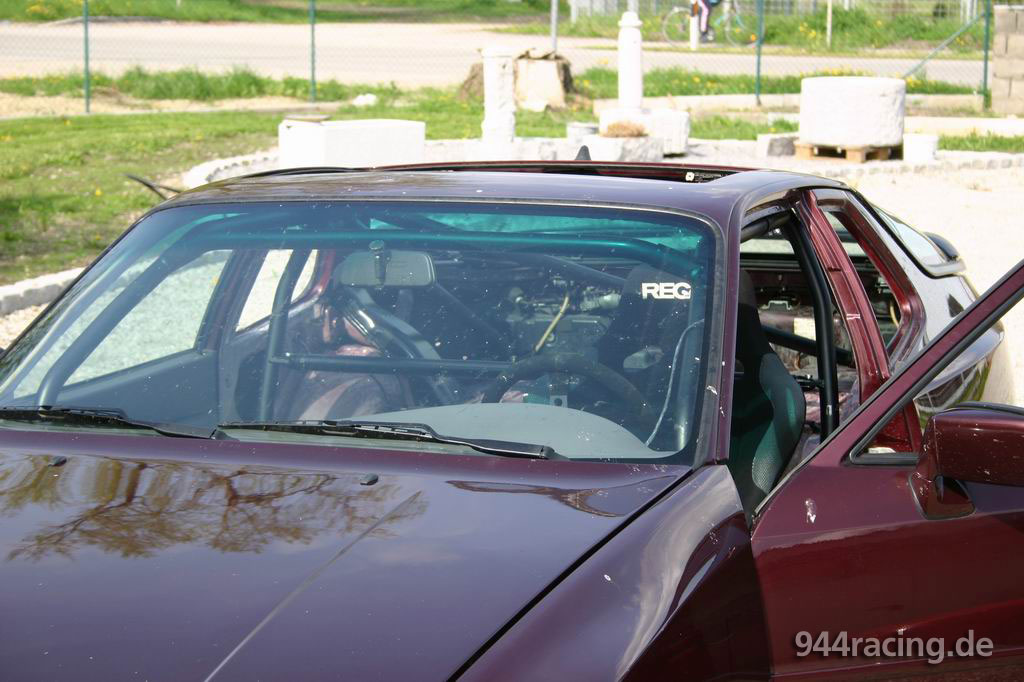
Finally I installed a black anti-dazzle tape at the windscreen.It close the gap between upper bar and end of the windscreen,where the light dazzled sometimes through. |
 |
 |
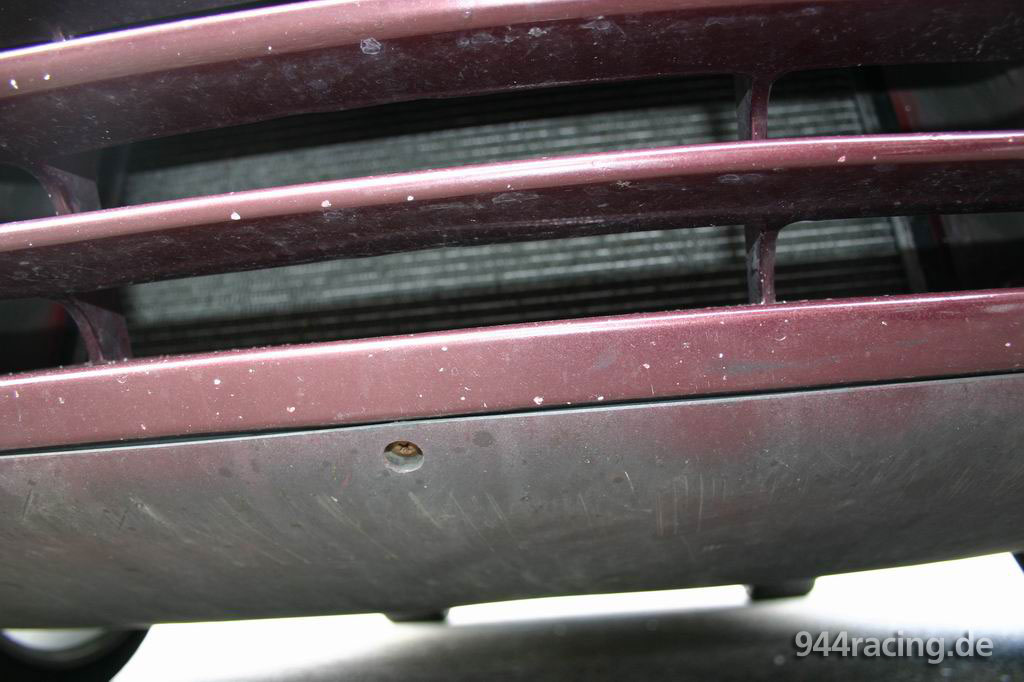
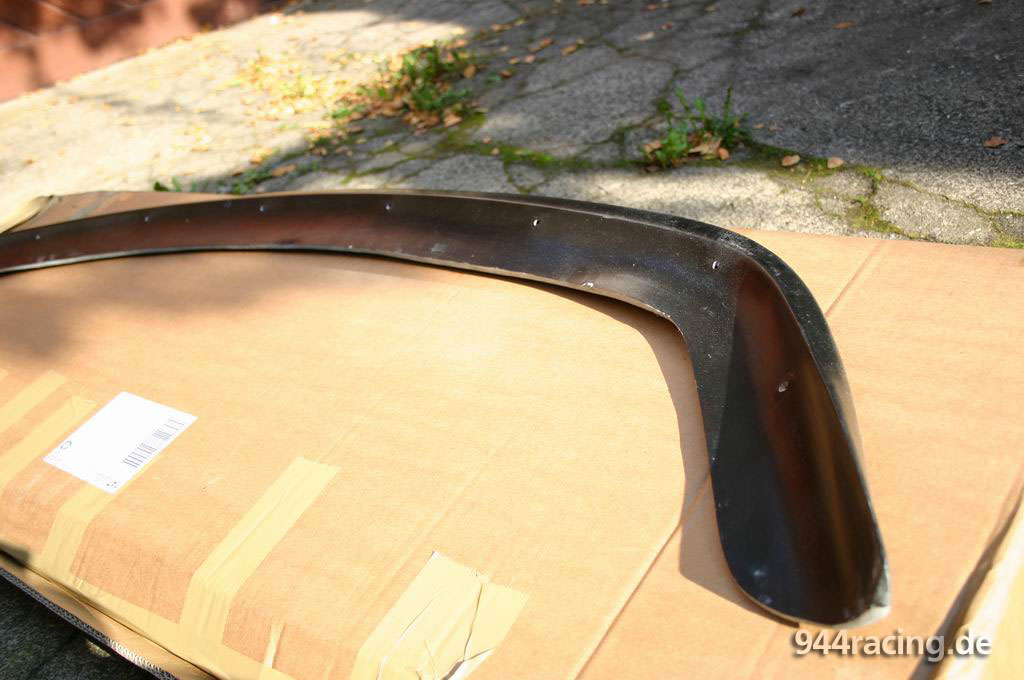
Today I mounted a new GRP front spoiler lip. |
This thing is produced with accuracy in fitting and the installation is really easy and without problems. |
 |
 |
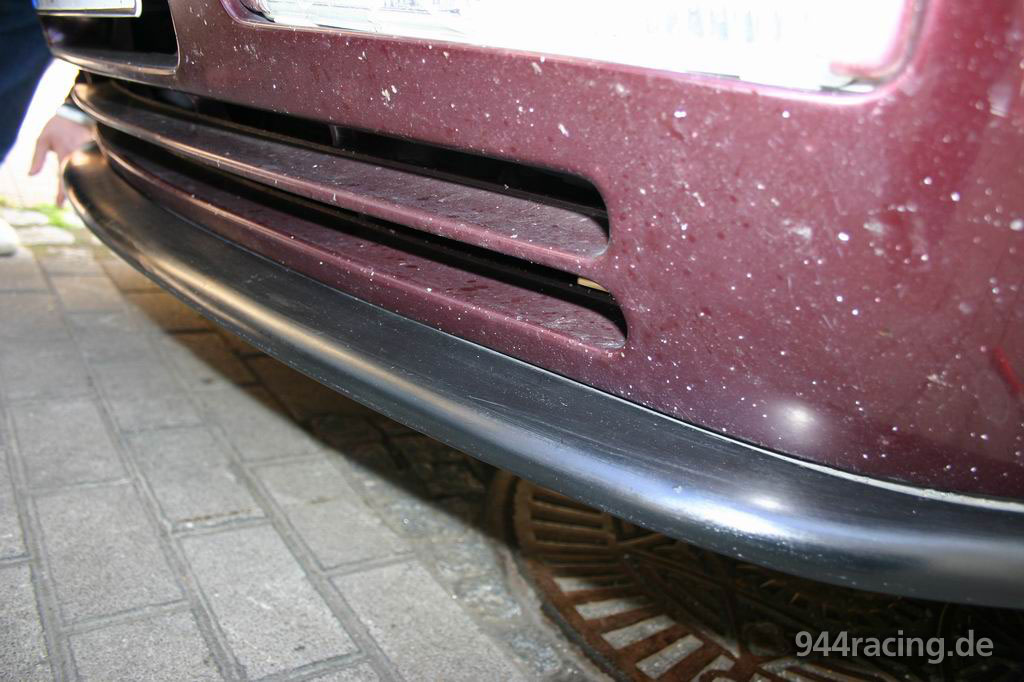
The originally short crews of the rubber underbody corrosion protection have to be removed and replaced with longer screws (3-4 cm). |
No drilling or customizing is needed. Fits at first attempt. |
 |
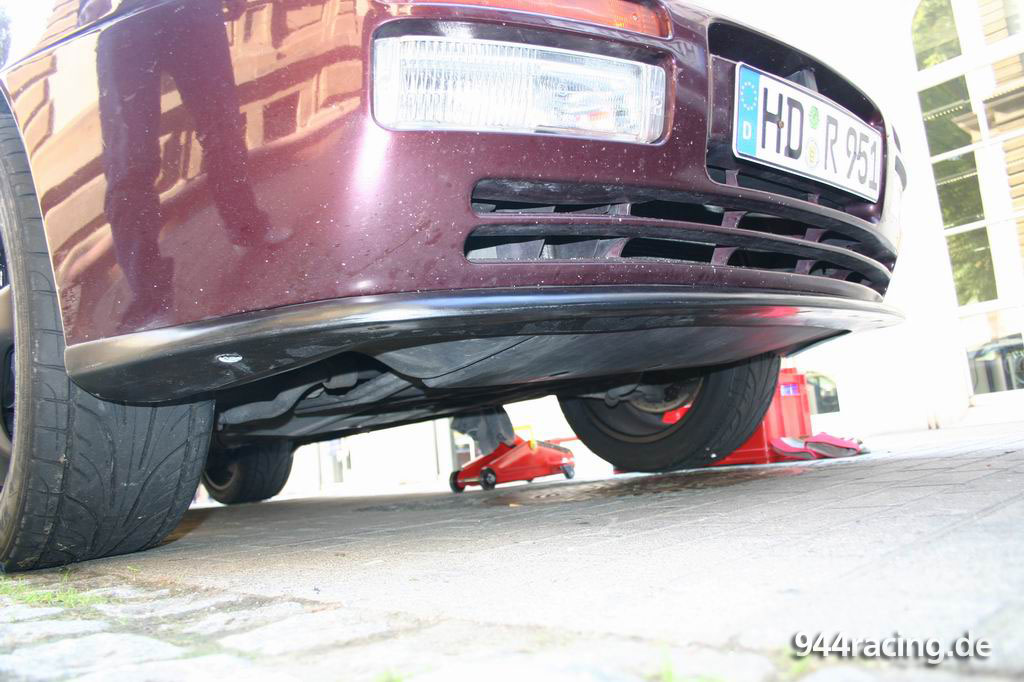 |
Optically very pretty and it produce down-force at the front axle. |
The question is, whether this additional down-force is noticeably or only theoretical nature. |
 |
 |
This spoiler lip is purchasable at Robby from the PFF. Thanks him for fast delivering and patiently answering all my questions. |
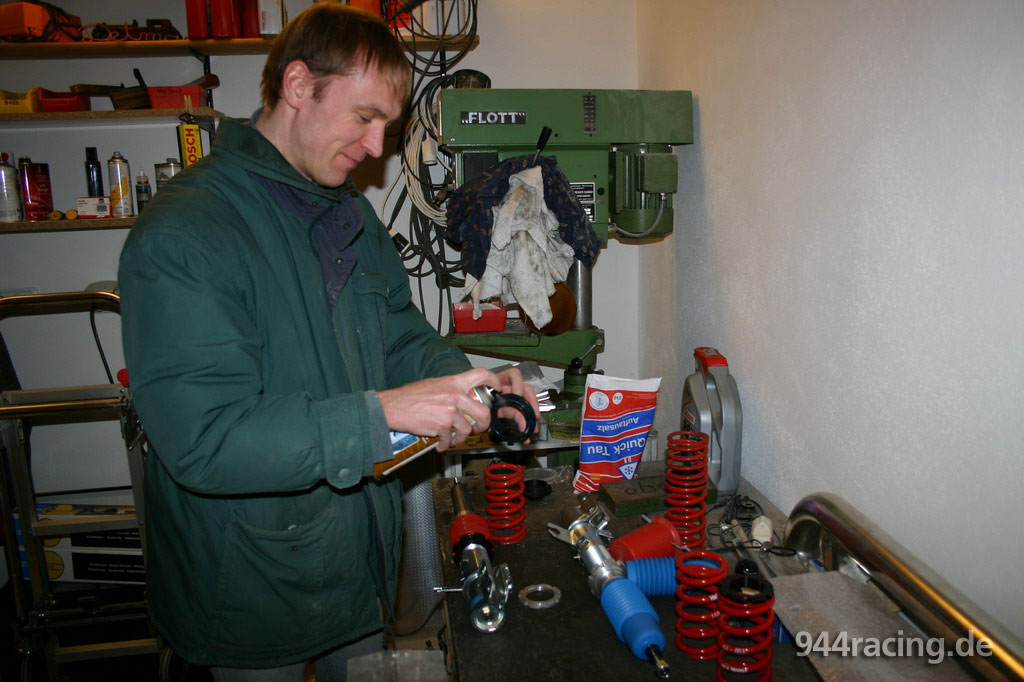
Heute ging es endlich dem Fahrwerk an den Kragen. Die längst in der Garage auf ihren Einsatz wartenden Bilstein Cupdämpfer sollten verbaut werden. |
Dazu habe ich mich an Detmar Zosel gewandt, der diesen Umbau bereits in seinem 944 Rennwagen vollzogen hat! Die Gewinde werden hier im Bild großzügig mit Hohlraum-versiegelung eingesprüht, um dem Rost vorzubeugen. |
 |
 |
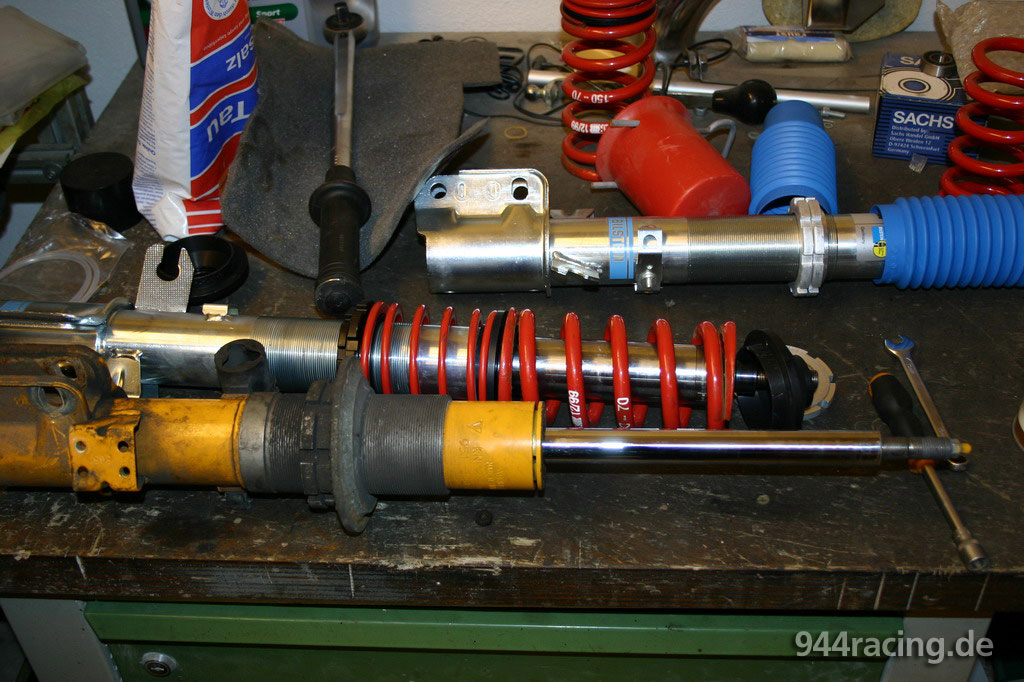
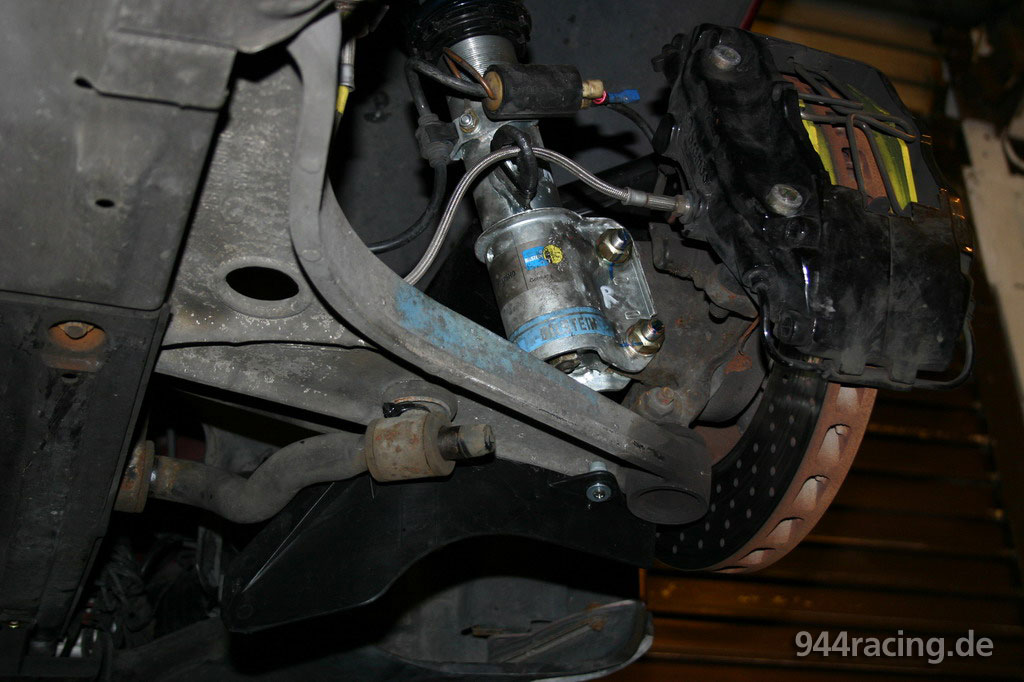
Die gelben Koni Gewindedämpfer (M030) wurden demontiert. |
Hier sieht man den alten Konidämpfer und den neuen Upside-Down Bilstein Cupdämpfer. (Die Haupt- und Zusatzfeder sind hier im Bild noch falsch herum montiert.) |
 |
 |
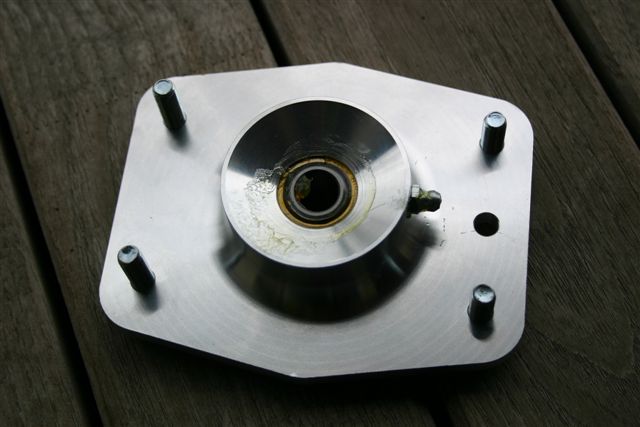
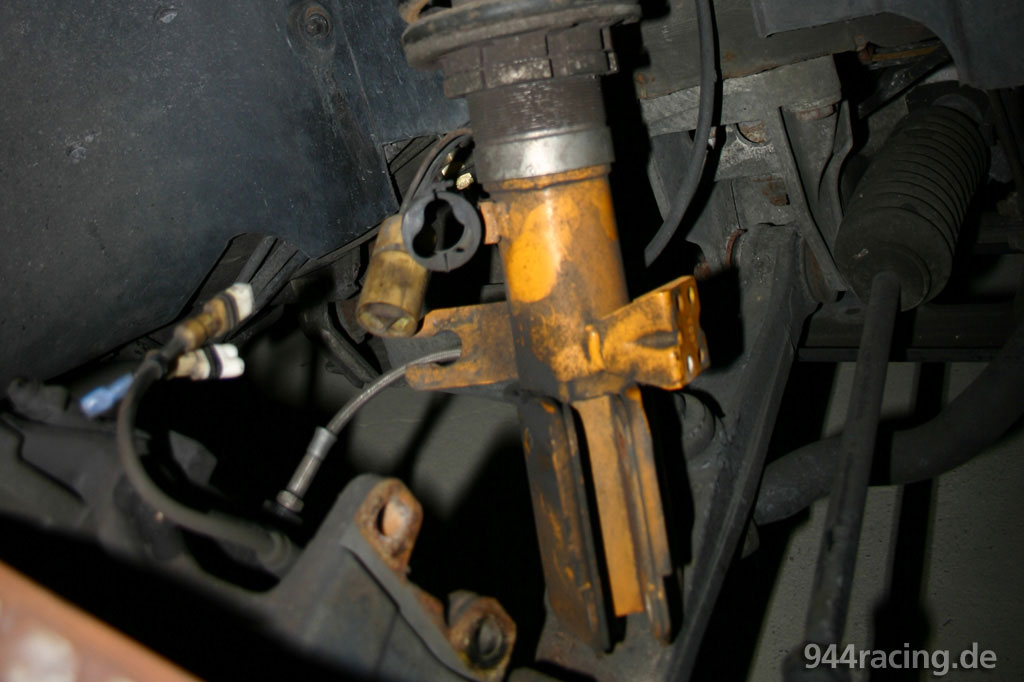
Hier ein Bild des Achsschenkels bei demontiertem Dämpfer... |
und des Unibal-Domlagers von unten! |
 |
 |
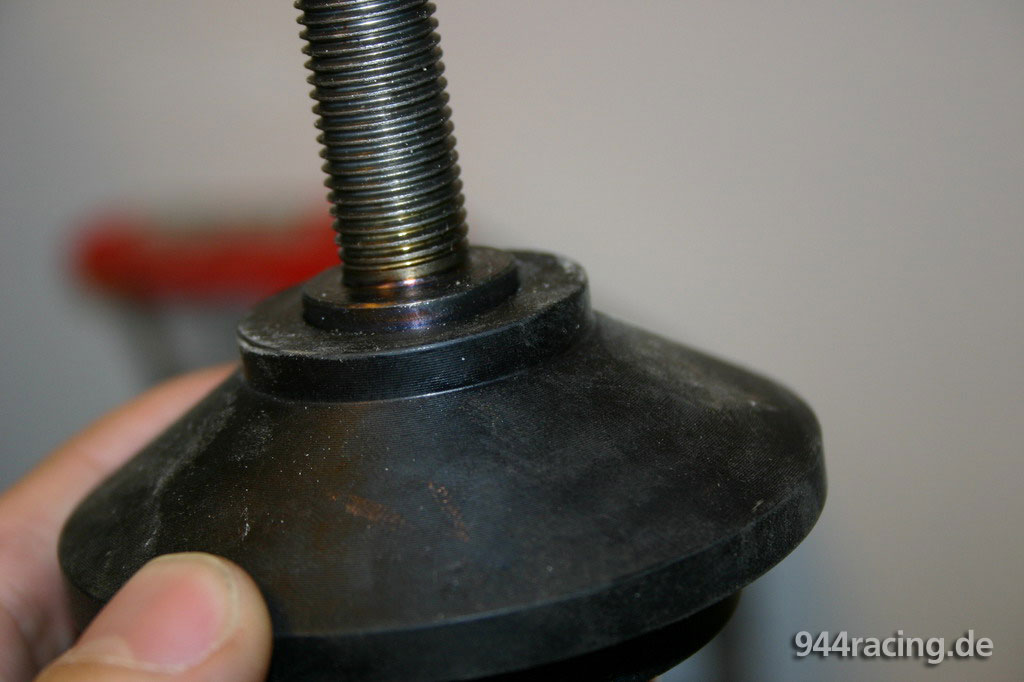
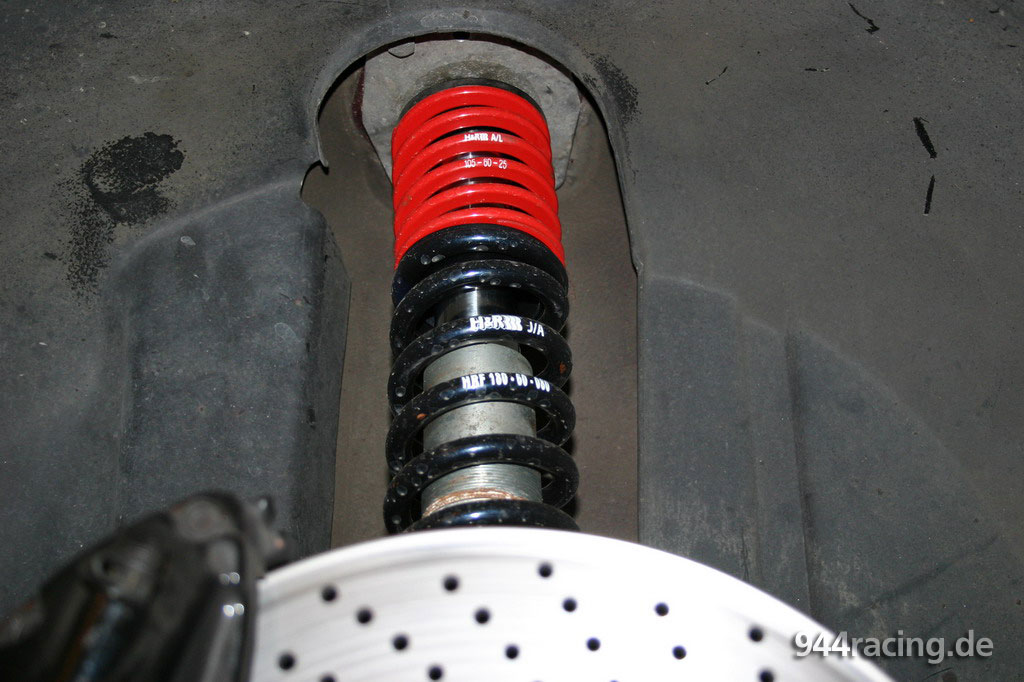
Leider passte der obere Federteller nicht ganz bündig... |
und so musste Detmar per modifizierter Beilagscheiben eine Workaround-Lösung basteln. |
 |
 |
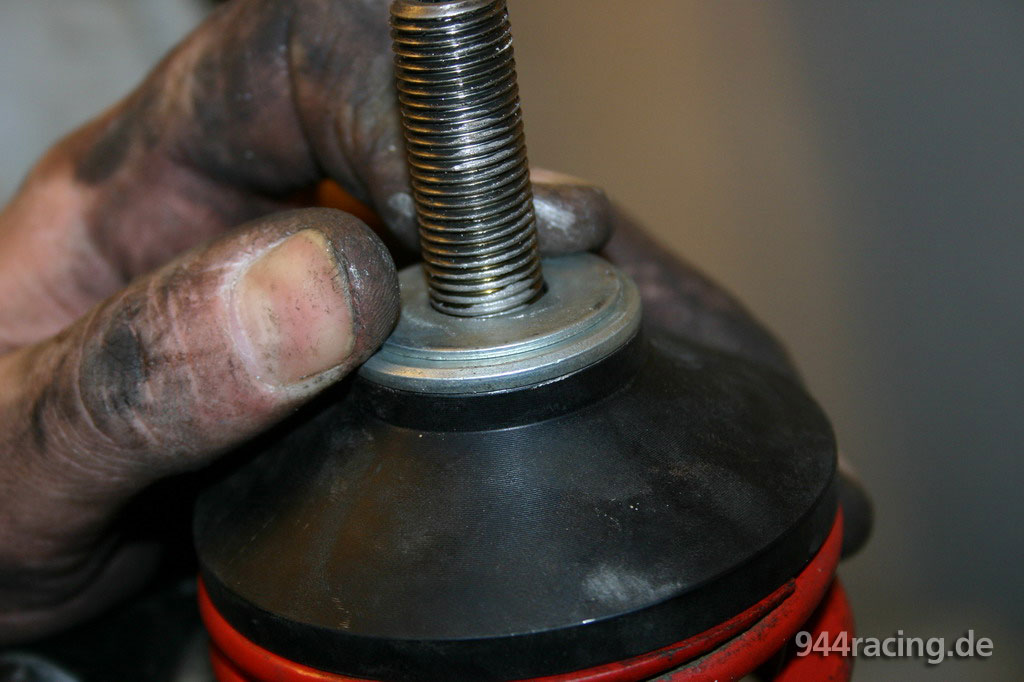
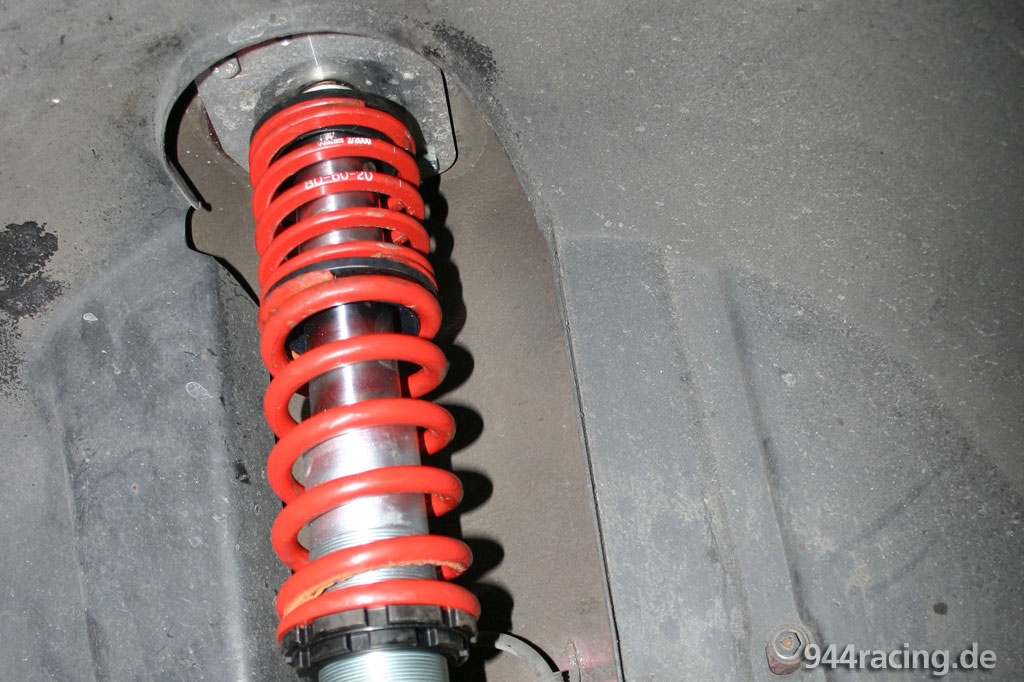
Kein Problem, jetzt passt alles. |
Auch der Einbau gestaltete sich problemlos. |
 |
 |
Leider passten die Federn an den Hinterachs-Dämpfern nicht wie gewünscht und ausserdem sollten die Dämpfer auch noch auf die von Detmar produzierten Unibal-Lager umgebaut werden. Daher bleibt die Hinterachse erstmal unberührt. Der restliche Umbau folgt demnächst! Vielen Dank an Detmar für die kompetente Hilfe. |
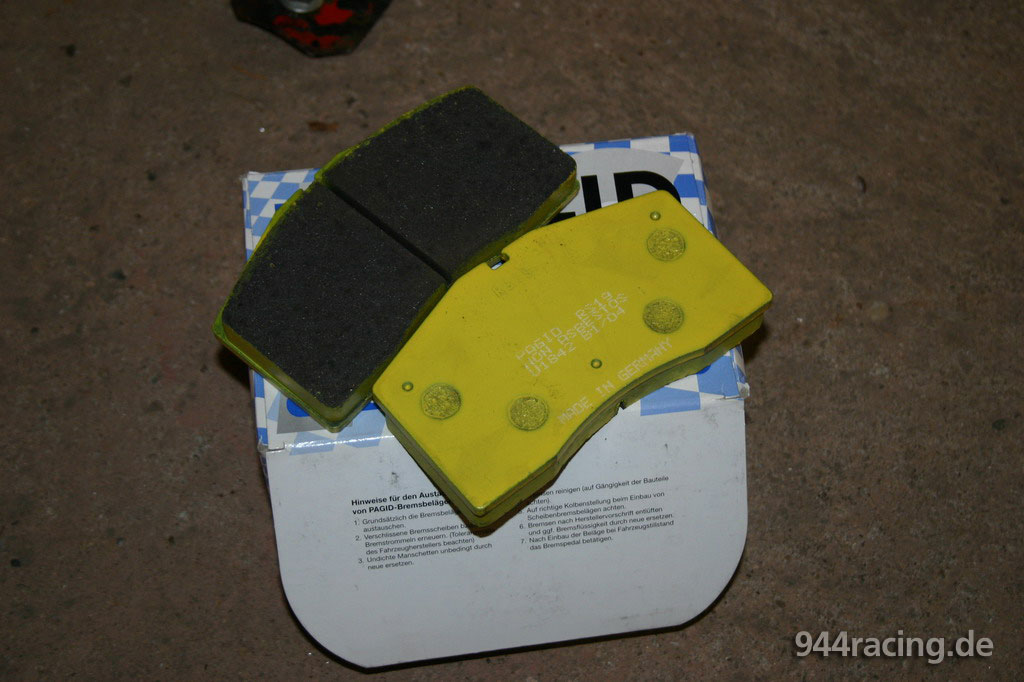
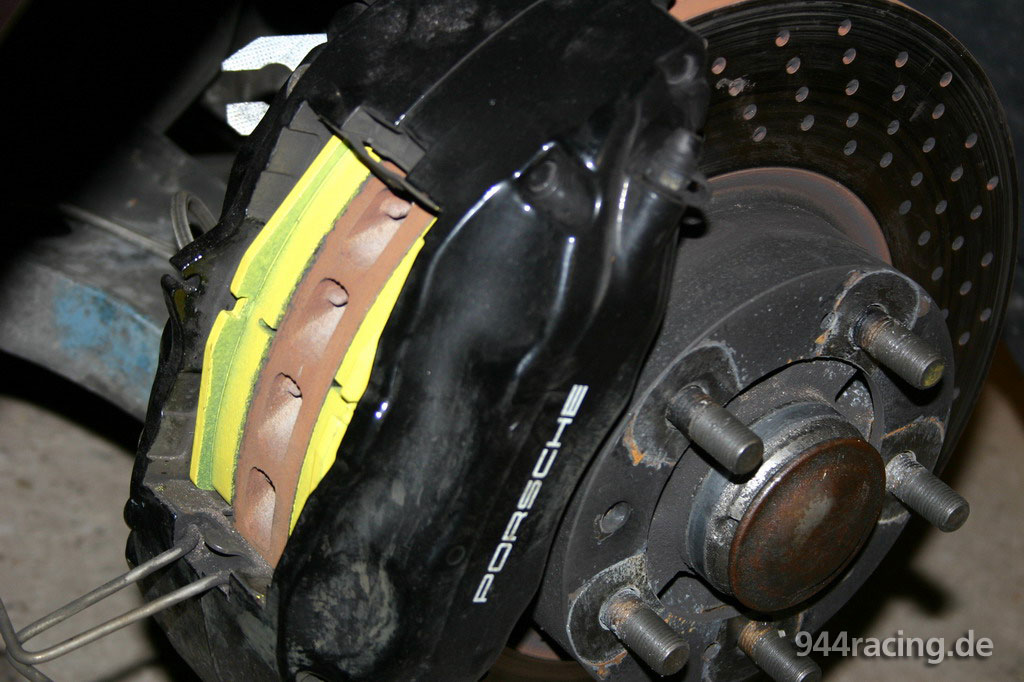
Nachdem die Serienbeläge nun komplett verschlissen waren, habe ich heute neue Pagid RS19 Rennbremsbeläge montiert. |
Die gelbe Färbung macht sich auch optisch gut zwischen den schwarzen Sätteln. |
 |
 |
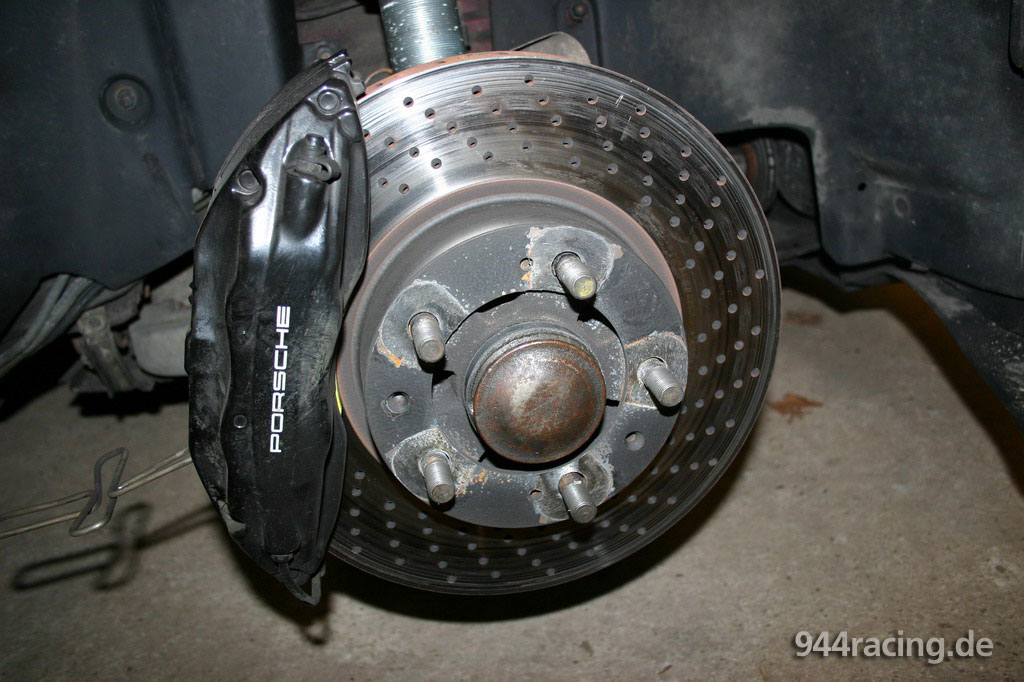
Die Löcher waren ziemlich mit Bremsstaub zugesetzt, was die Gefahr der Rissbildung erhöht. |
Mit einem Bohrer mit passendem Durchmesser können die Löcher problemlos "ausgebohrt" werden. |
 |
 |
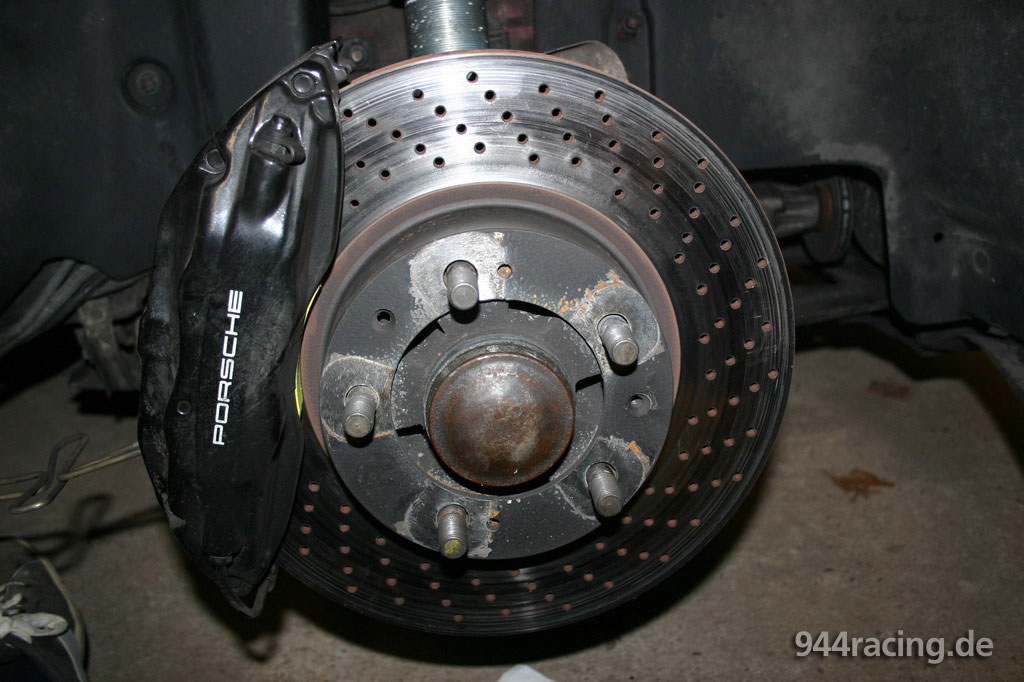
Nach dieser etwas Geduld erfordernden Behandlung sind die Löcher wieder frei. |
Hier zum Vergleich eine aus Gewichtsgründen gelochte Scheibe für eine Wilwood Anlage eines 1er Golfs. Die Porschescheiben sind aus Gründen der besseren Belüftung gelocht. |
 |
 |
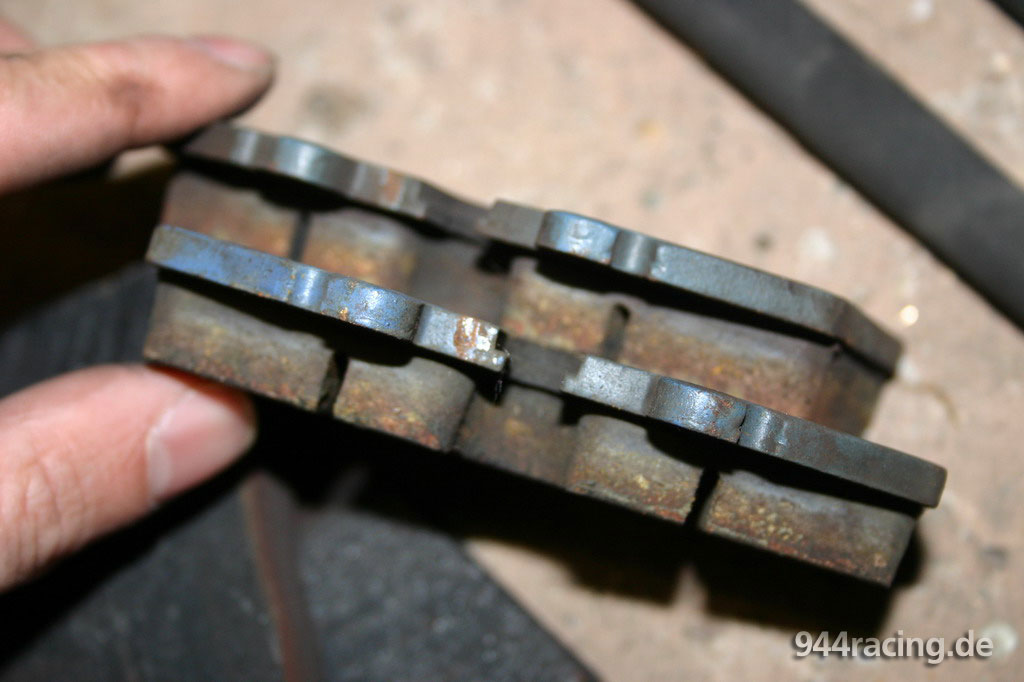
An der Hinterachse habe ich die alten Pagid RS 4-2 nochmal montiert, die noch fast nicht abgenutzt waren. |
Die RS19 und RS 4-2 haben zwar eine unterschiedliche Charakteristik, aber ich denke auch in dieser Kombination sollten sie gut harmonieren. |
 |
 |
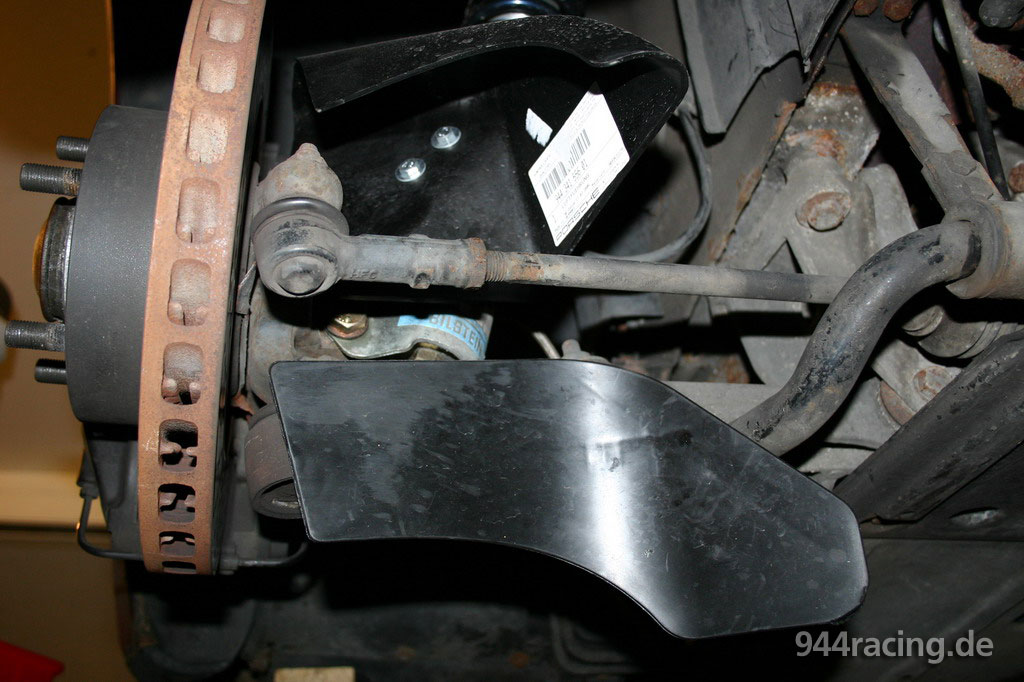
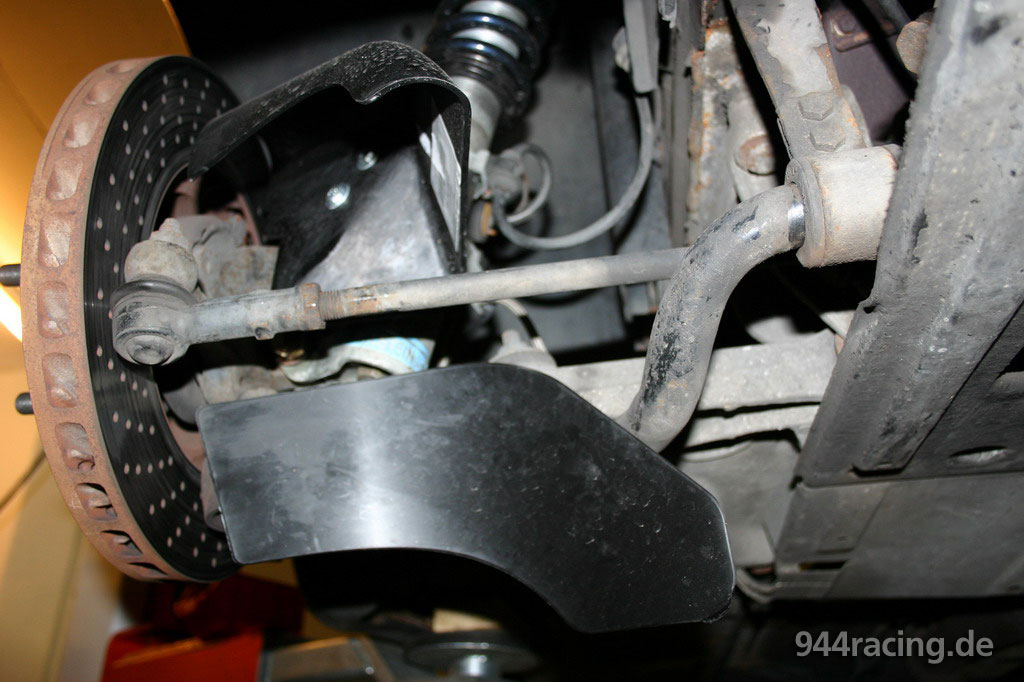
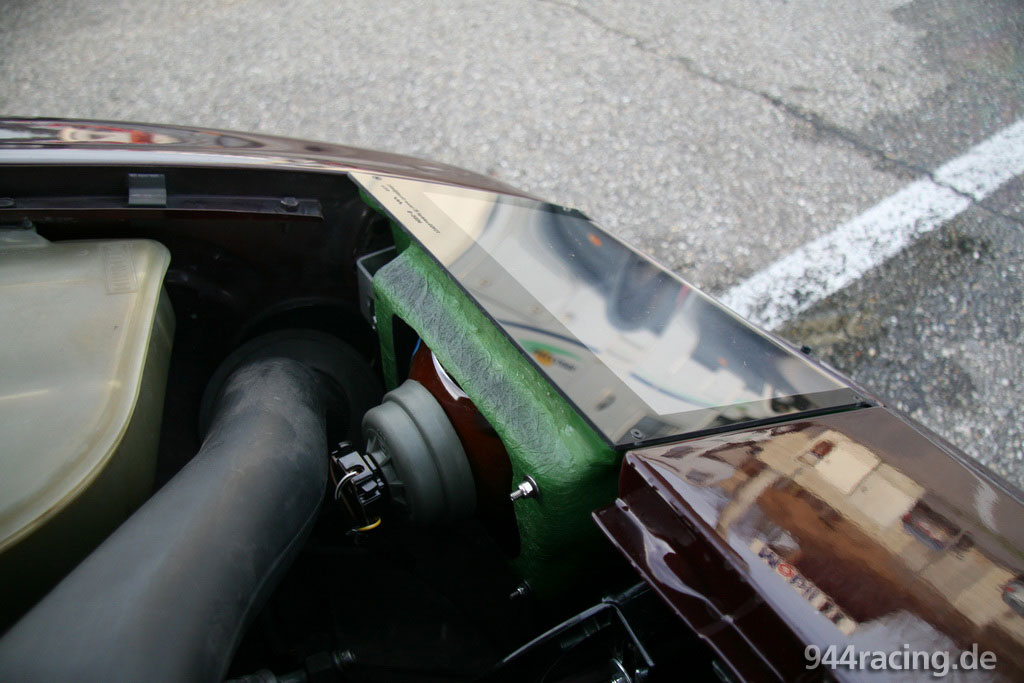
Auf der linken und rechten Seite der Frontschürze würden Luftkanäle in die dafür bereits vorhandenen Aussparungen eingesetzt. |
Die durchströmende Luft trifft auf ein Plastik-Paddel und wird nach oben geleitet, wo sie von einem Trichter zur Scheibenmitte geführt wird. |
 |
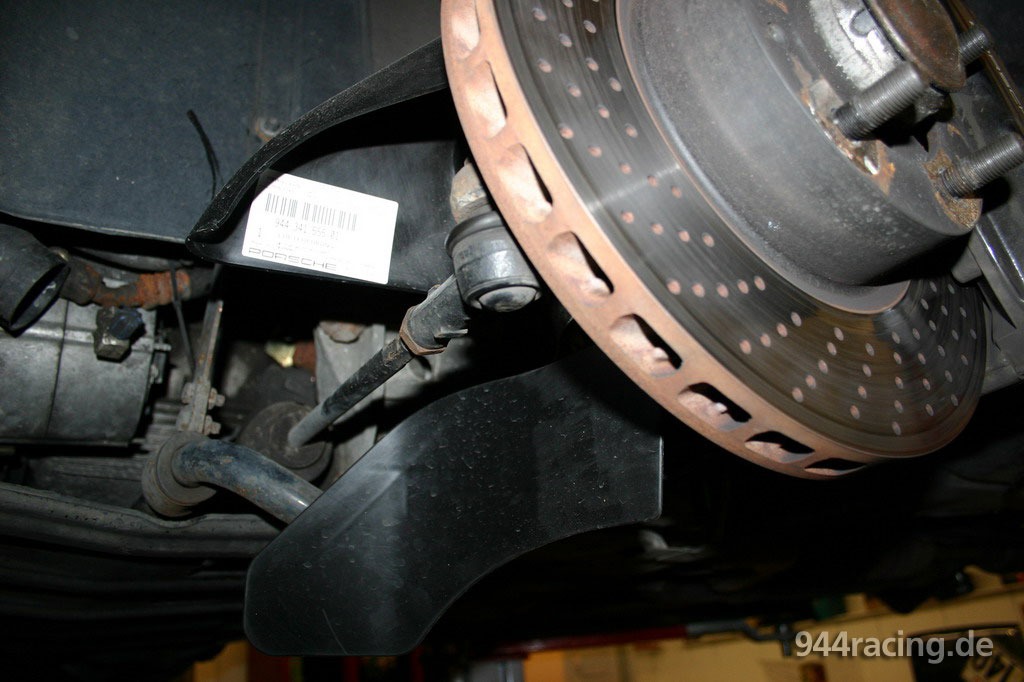 |
Die drei Teile sind original bei Porsche zu bekommen und waren im '88er 944 Turbo S ab Werk verbaut. |
Damit ist die Bremsanlage nun rundum optimiert und auch im härtesten Rundstreckeneinsatz ausreichend standfest. |
 |
 |
Besten Dank an Erhard Wagner von PEW Sportwagen für die einwandfreie, schnelle und unkomplizierte Arbeit und die vielen hilfreichen und kompetenten Tips und Ideen! |
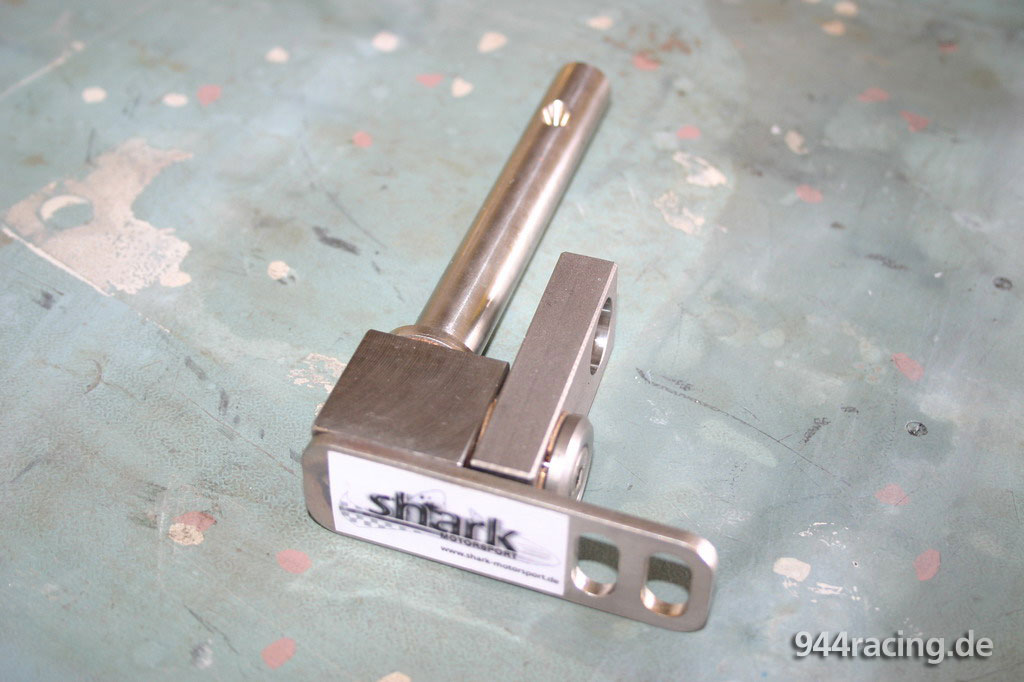
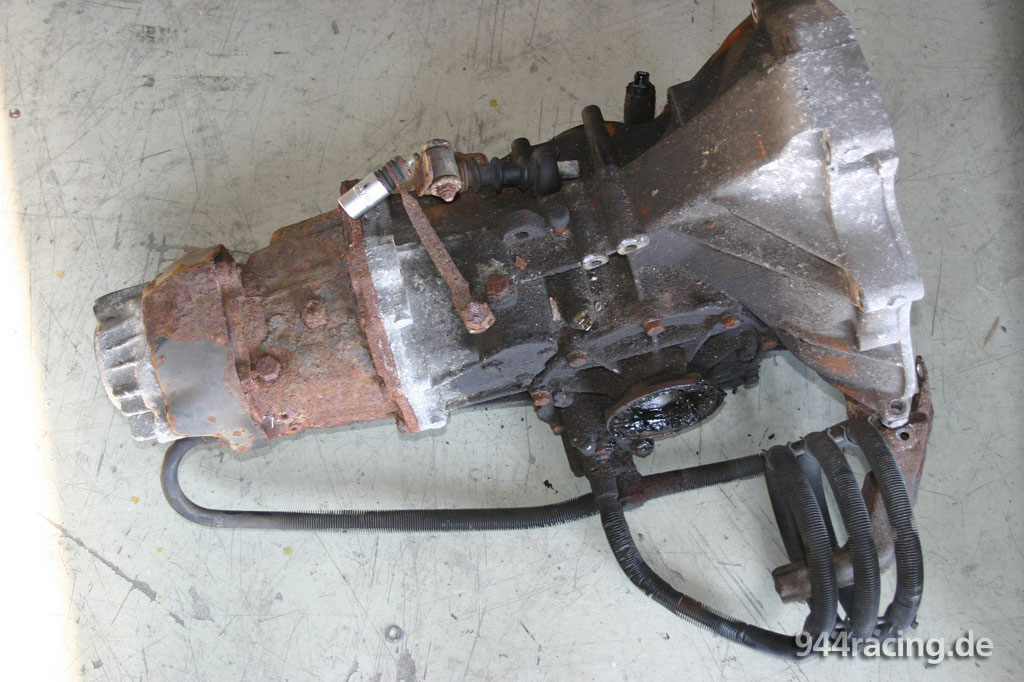
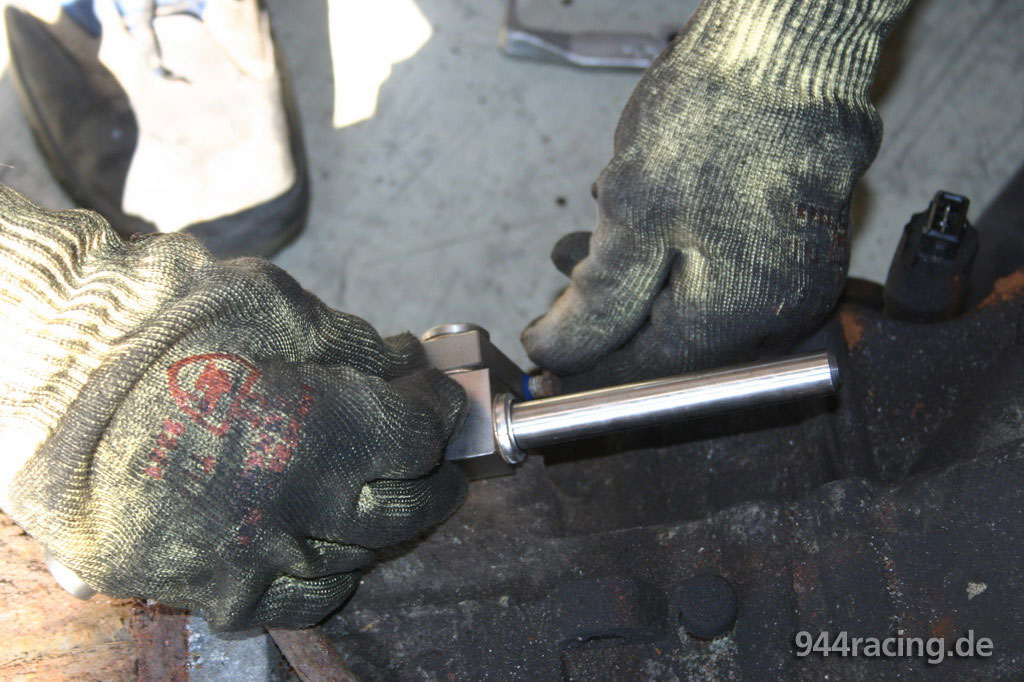
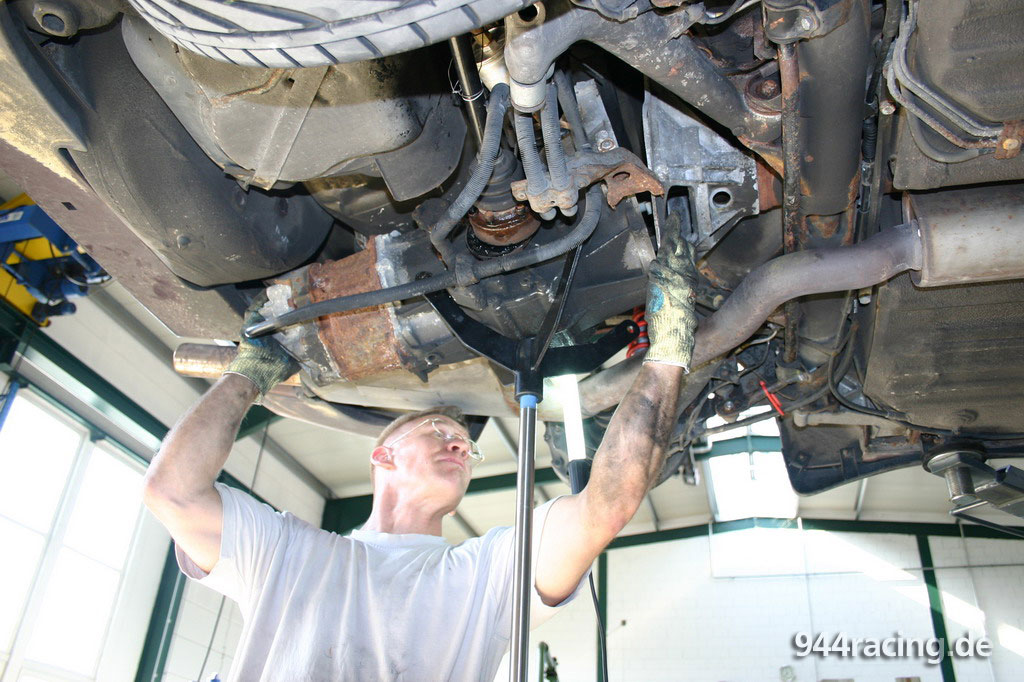
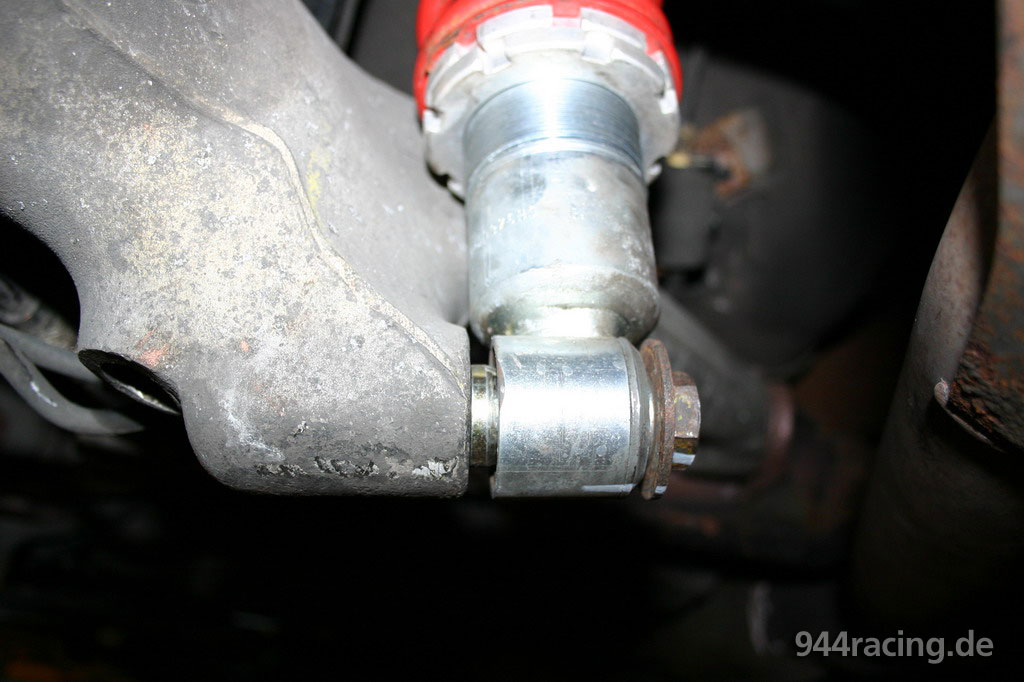
Nach langem Hin- und Her habe ich mich doch überzeugen lassen und wollte eine Schaltwegverkürzung eingebaut haben. Shark Motorsport hatte eine im Programm, die mich auch von der Materialqualität überzeugt hat. |
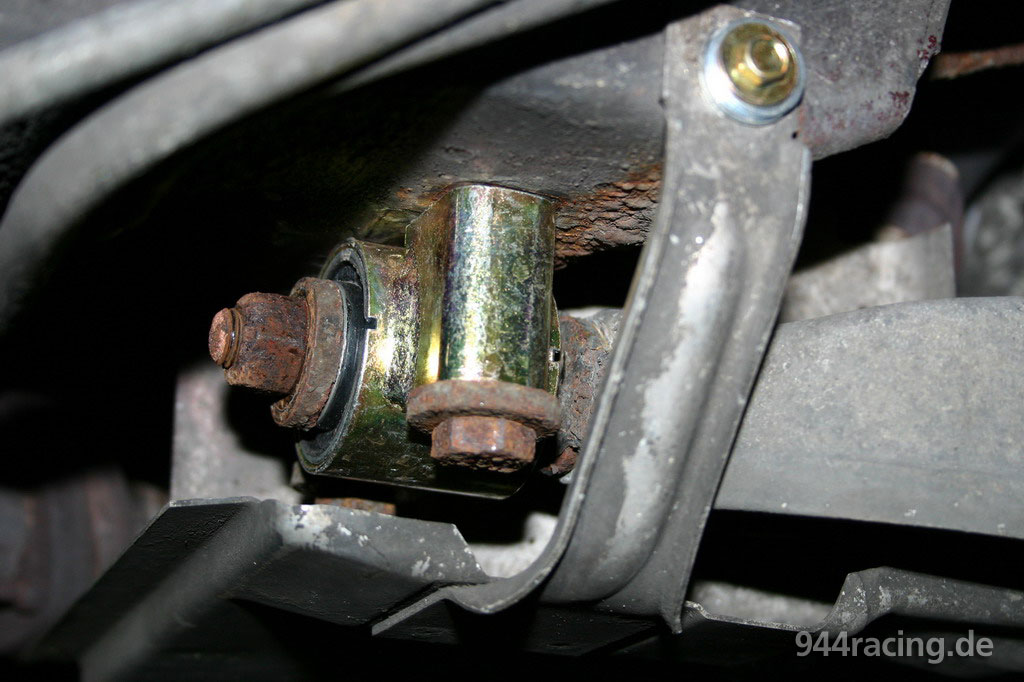
Da das alte Originalteil nach mittlerweile 290.000km Gesamtlaufleistung doch recht festgegammelt war, haben wir das Getriebe kurzerhand ausgebaut. Hier im Bild das doppelt (oben und unten) verschraubte Verbindungsstück zwischen Getriebe und Transaxle-Rohr, welches entfernt werden muss. |
 |
 |
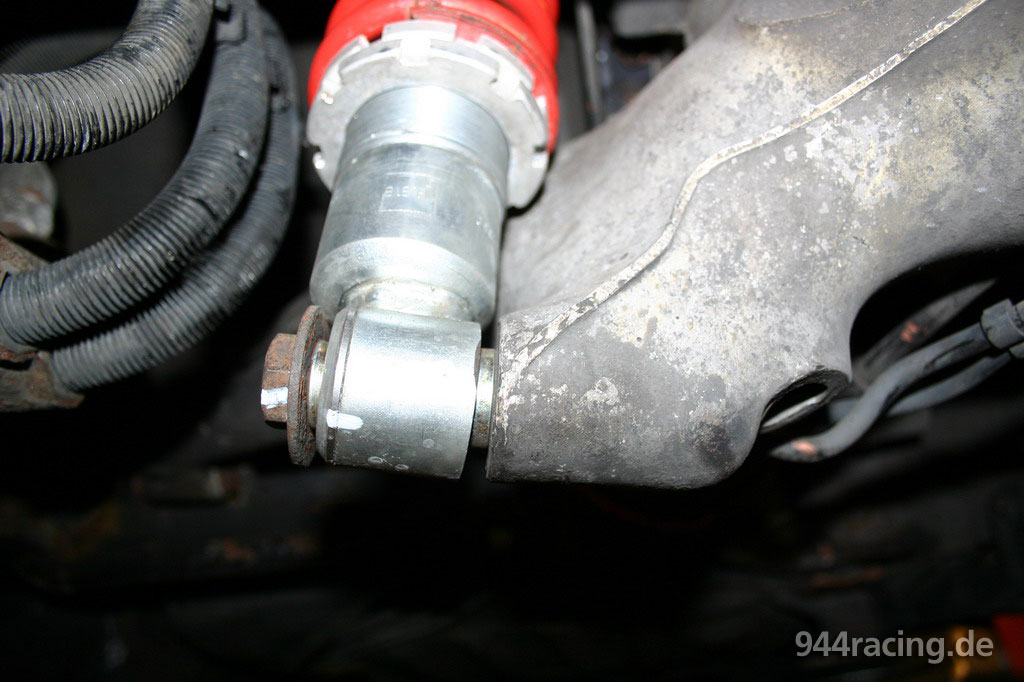
Nach Lösen der Antriebswellen hat man dann kurze Zeit später das Getriebe in der Hand bzw. auf dem Boden. Der Einbau der SWV kann i.d.R. auch am eingebauten Getriebe erfolgen. Da wir aber die Schaltstange noch wechseln wollten und das Altteil ziemlich am Getriebe festgegammelt war, haben wir uns für den Ausbau entschieden. |
Mit einem geeignete Abzieher geht das festgegammelte Altteil dann doch relativ einfach ab. |
 |
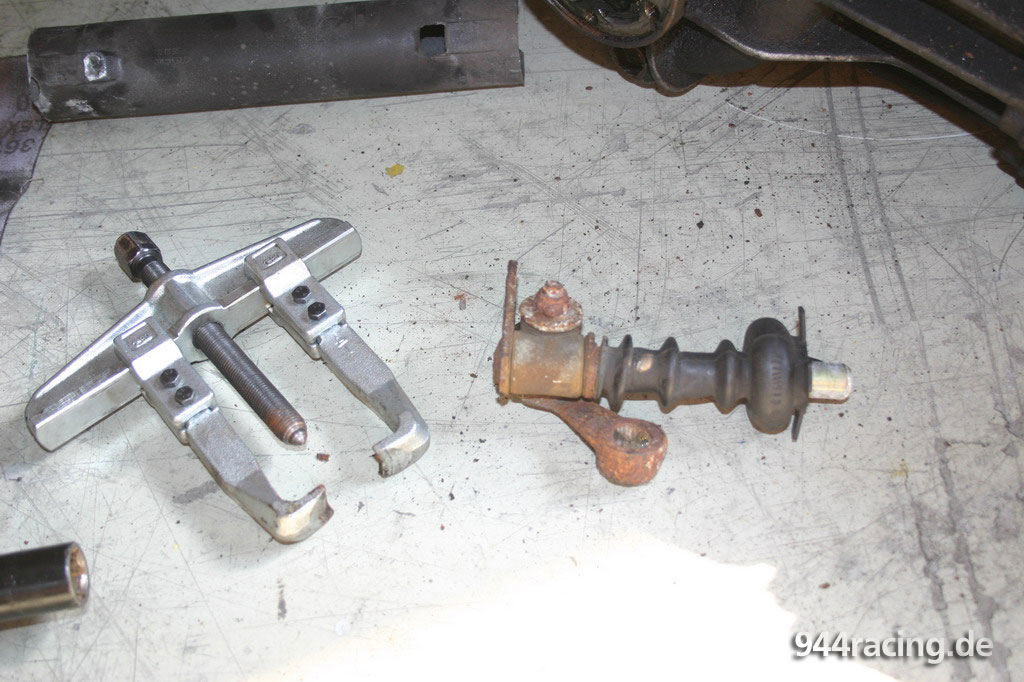 |
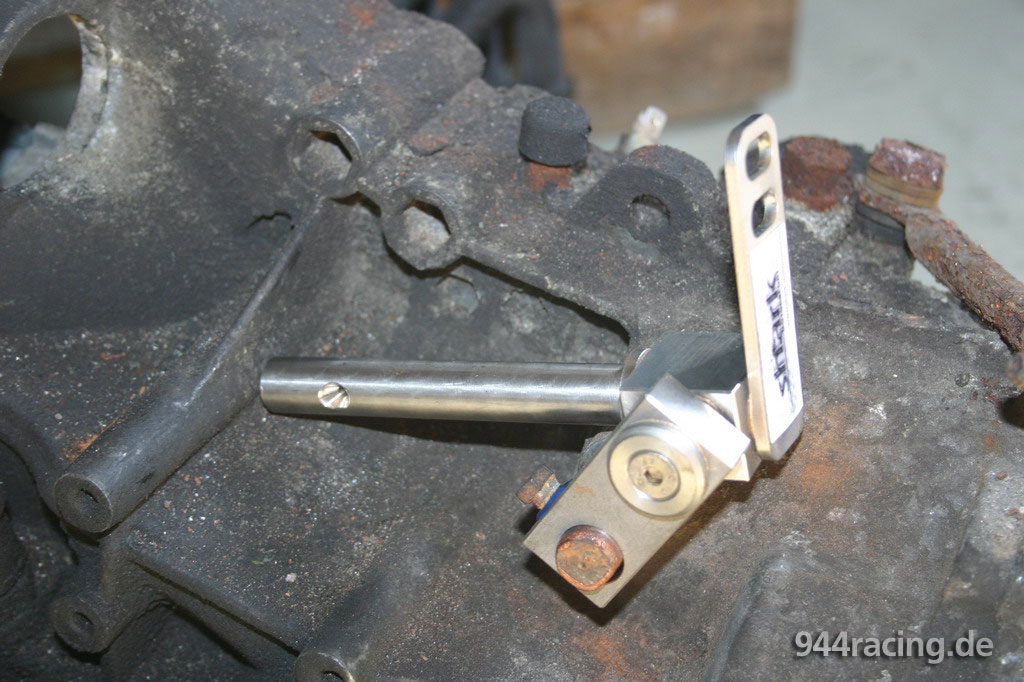
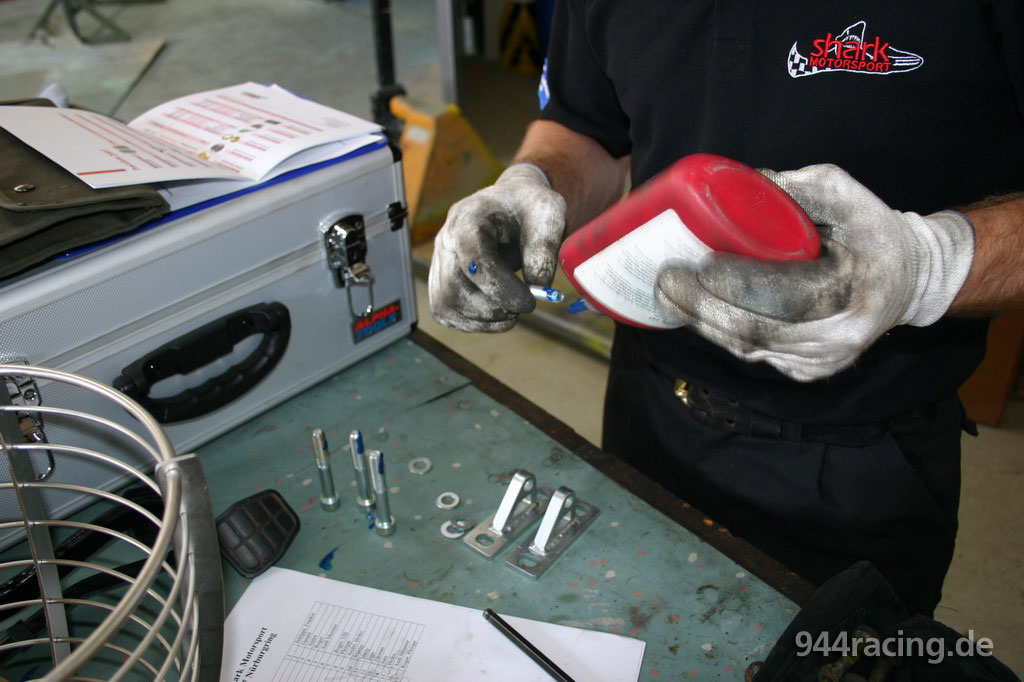
Für ein einfacheres Lösen der SWV beim nächsten mal (aber wieso nochmal lösen? *g*) wird die Verbindungsstelle mit Kupferpaste eingeschmiert. |
Hier der Vergleich Altteil gegen neue SWV. |
 |
 |
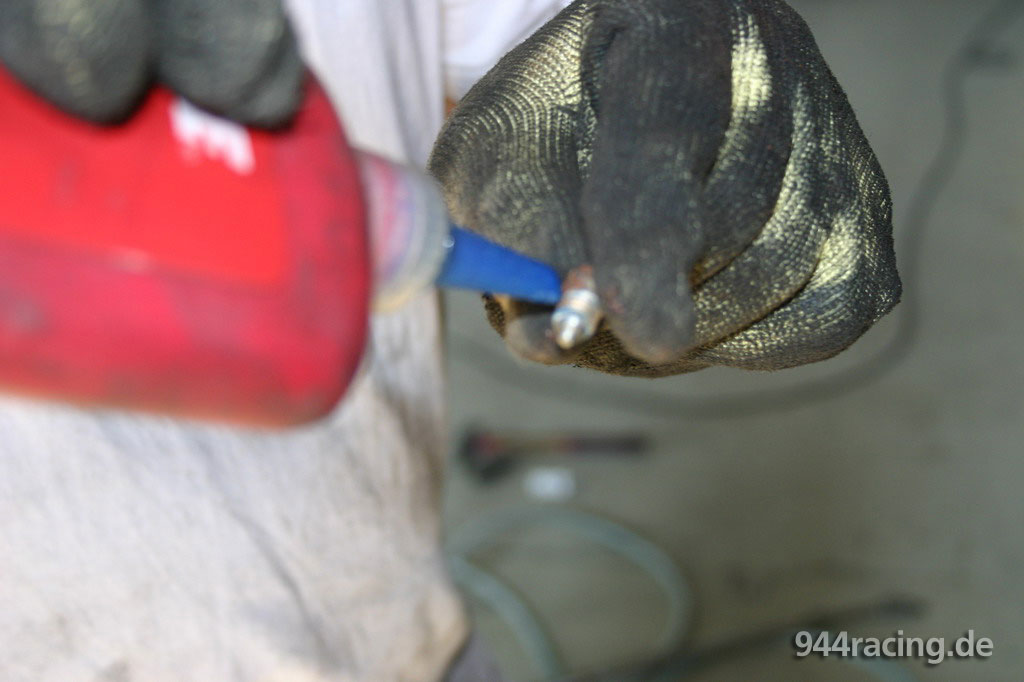
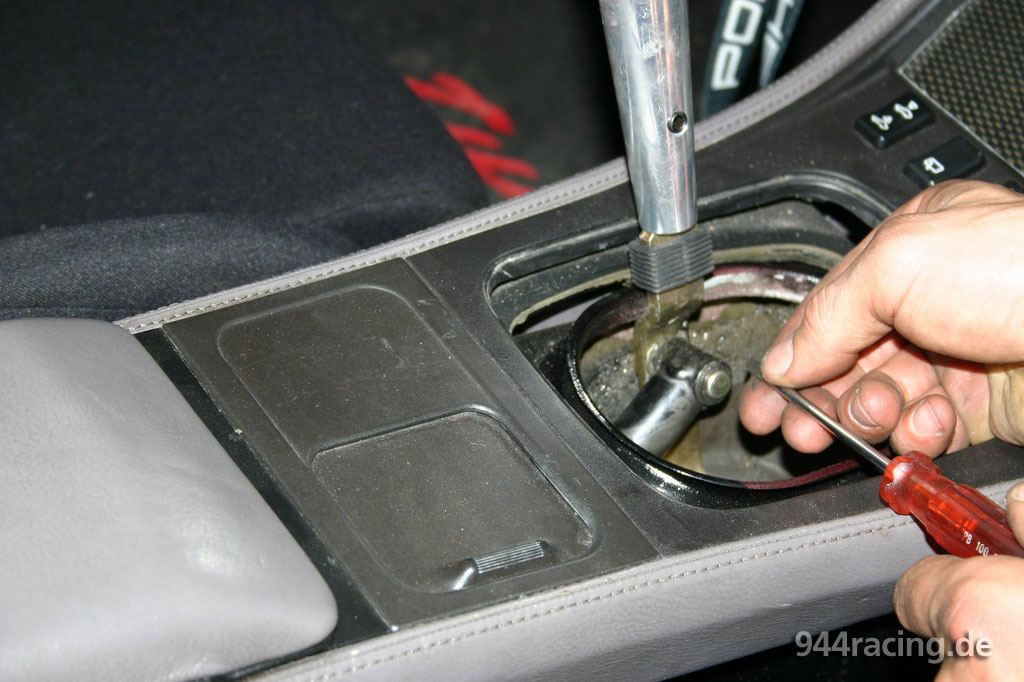
Die kleine Schraube sollte unbedingt mit Loctite gesichert werden, sonst rührt man früher oder später vergebens am Schalthebel. |
Loctite-benetzte Schraube eindrehen und der Schaltspaß ist von langanhaltender Dauer. |
 |
 |
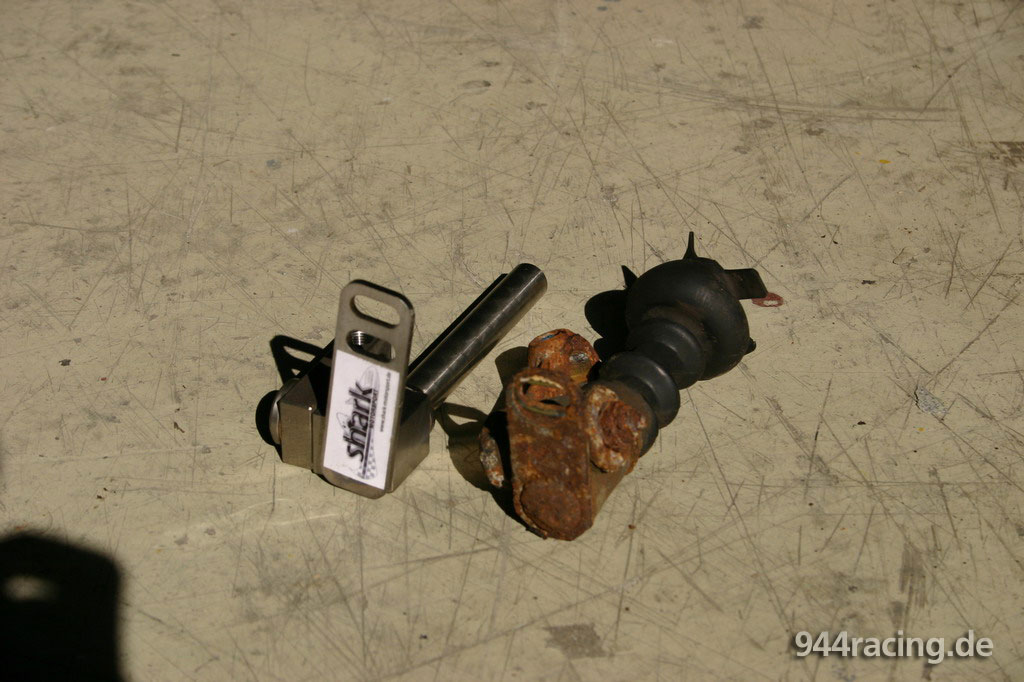
Und schon steckt die SWV fertig am Getriebe |
Die ausgeleierte Schaltstange wurde bei dieser Gelegenheit (wenn das Getriebe schonmal draussen ist) auch gleich gewechselt. Hierzu einfach den Bolzen lösen und die Schaltstange nach hinten rausziehen. |
 |
 |
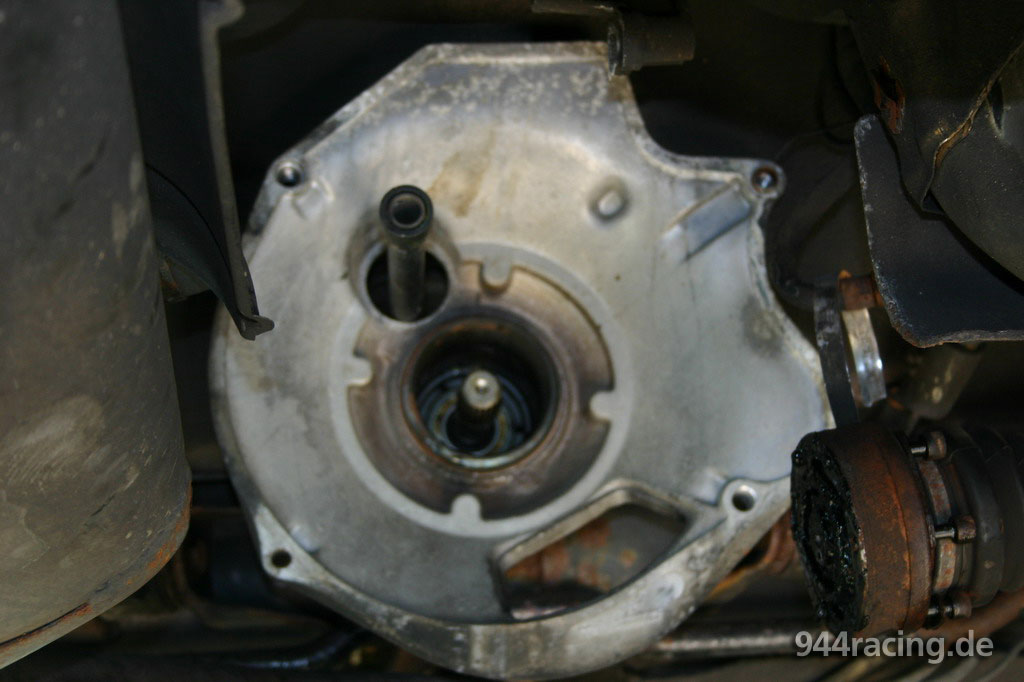
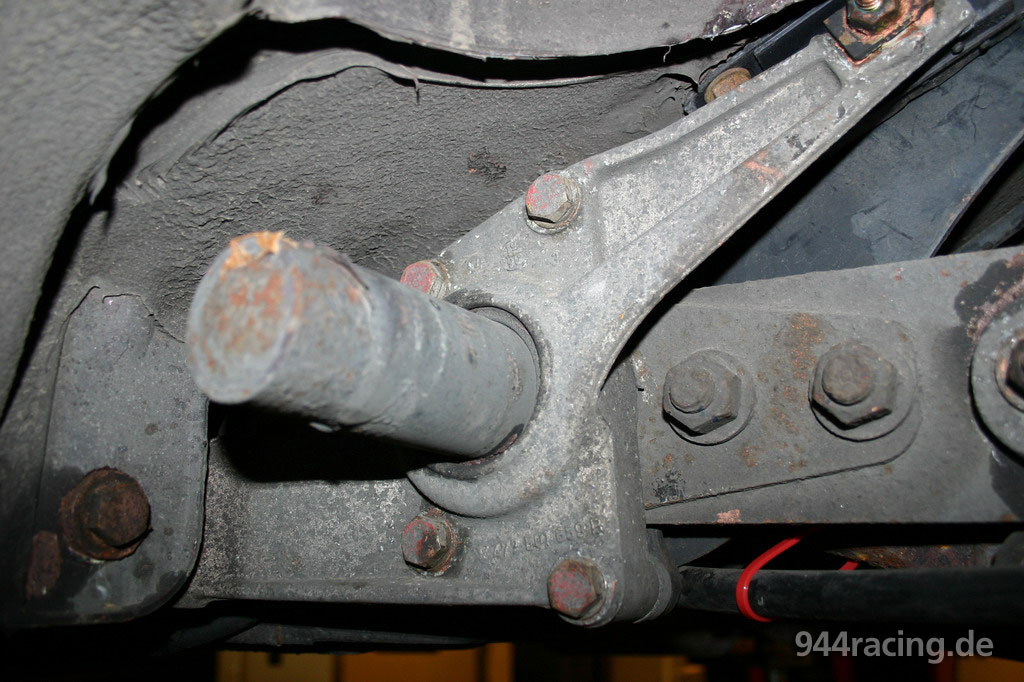
Hier oben links im Bild sieht man das Ender der Schaltstange. Nachdem die neue eingefädelt war... |
...konnte Schippe das Getriebe wieder dranbasteln... fertig! Und schon auf den ersten Metern beim Fahren merkt man den Unterschied deutlich und es schaltet sich viel knackiger. |
 |
 |
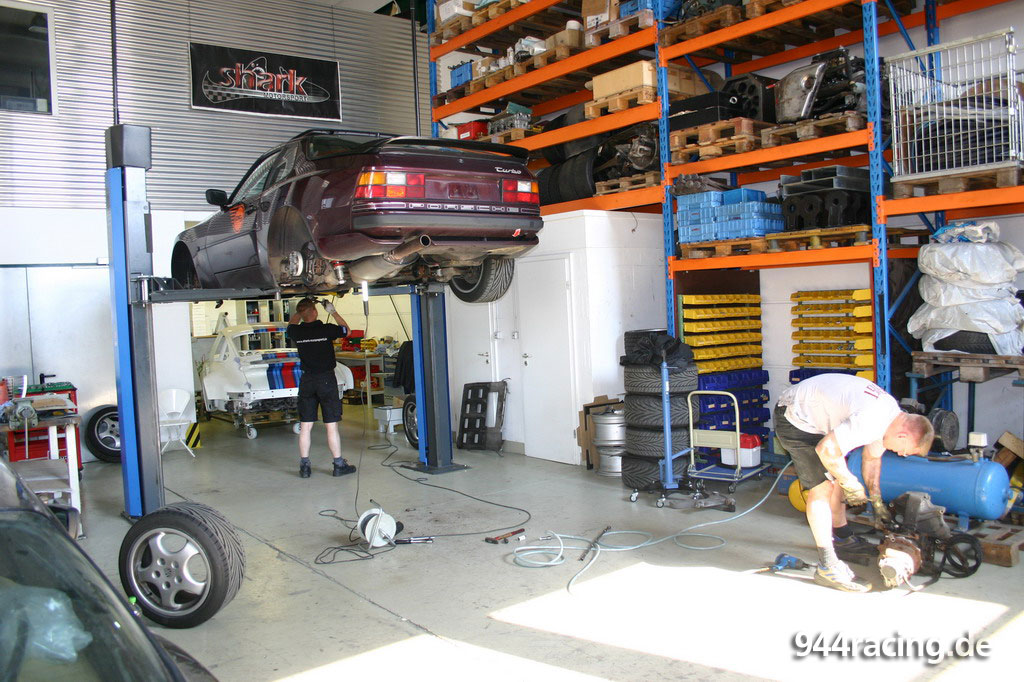
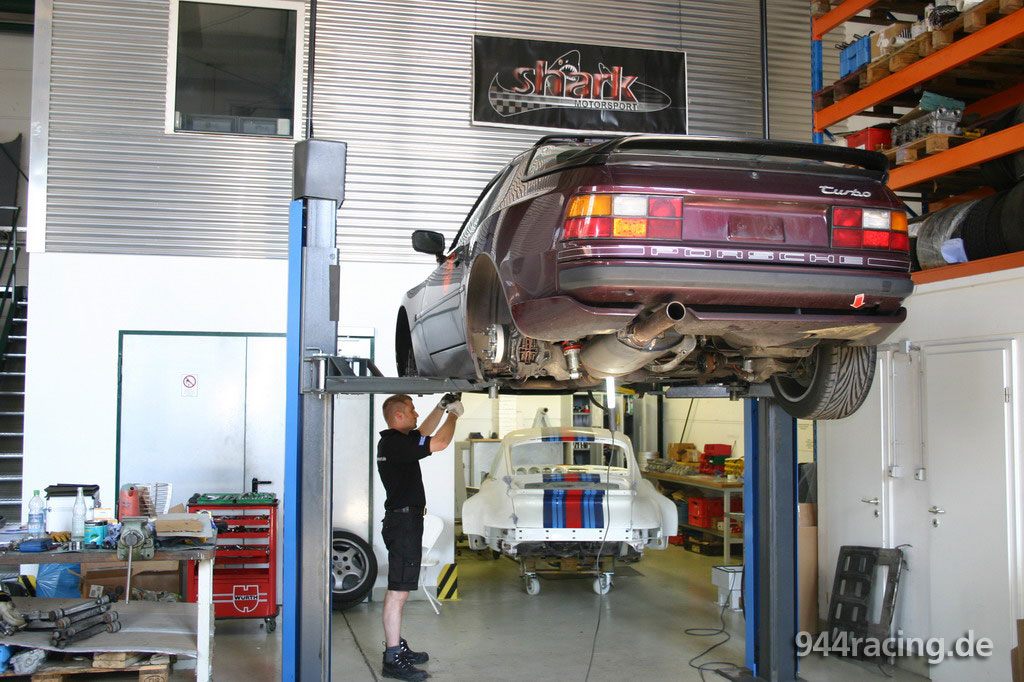
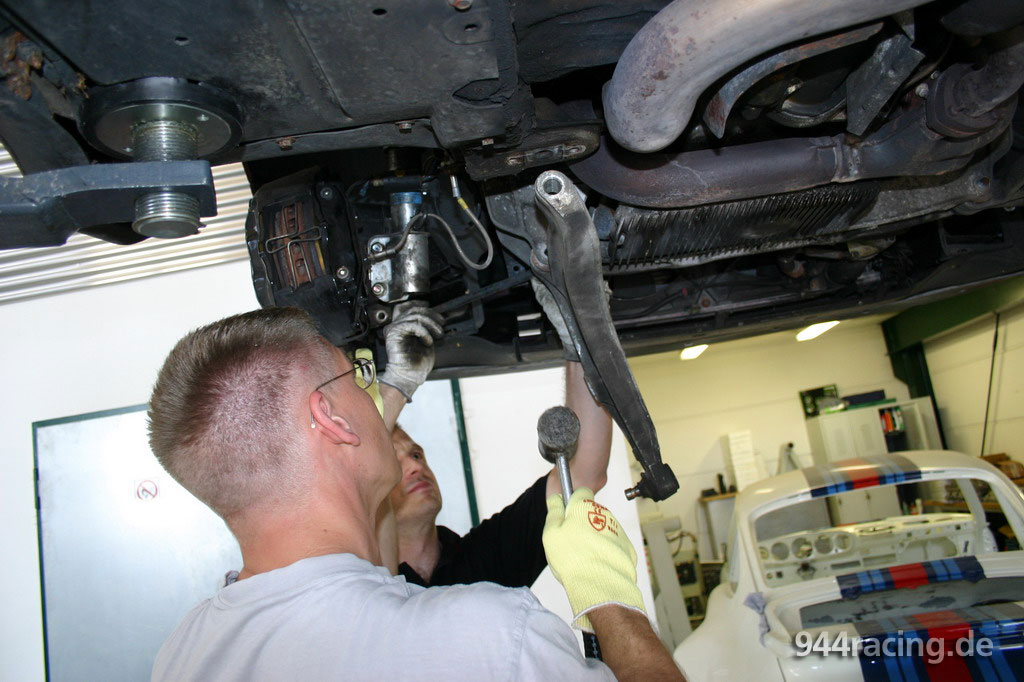
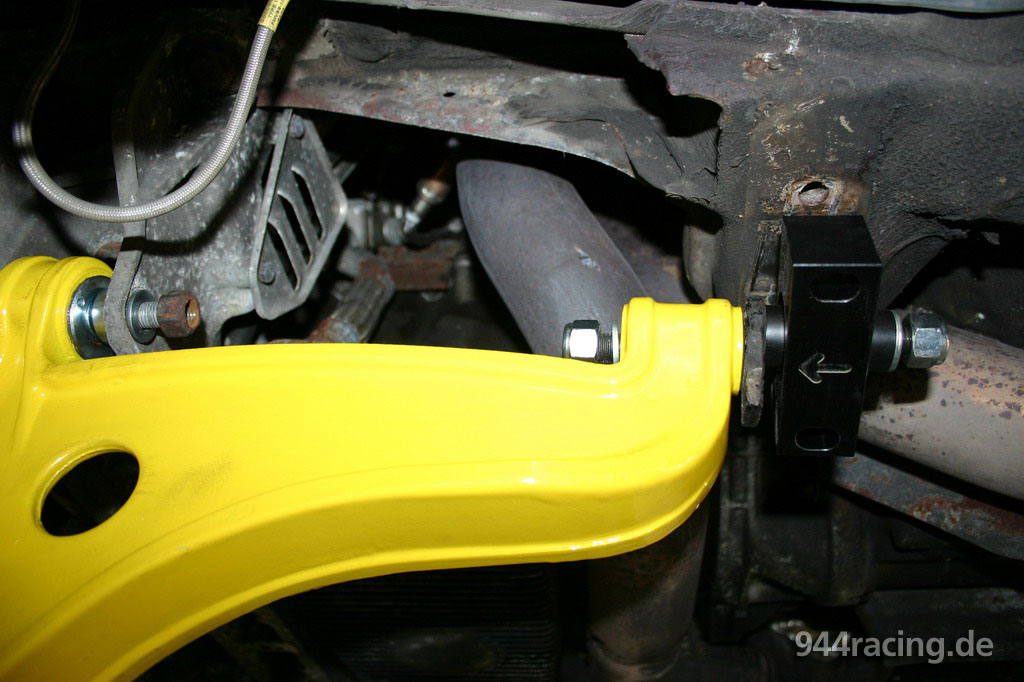
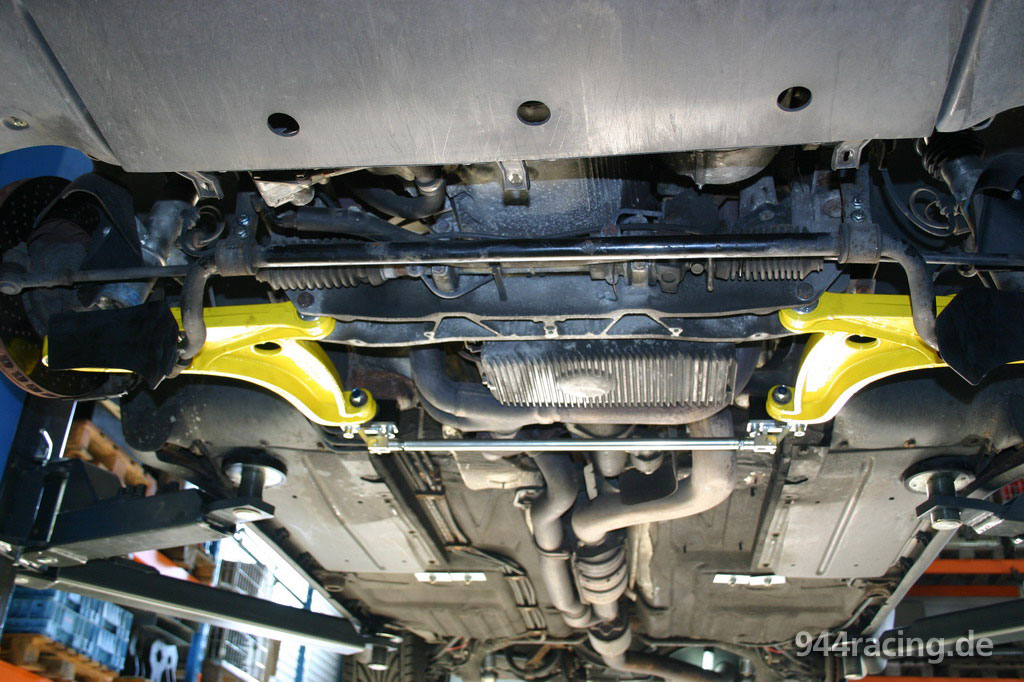
Die Hauptarbeit des heutigen Tages war der Einbau der von Shark Motorsport speziell auf Uniball umgebauten Querlenker der Vorderachse. |
In der Top ausgestatteten Werkstatt (incl. eigenem Motorenprüfstand !!!) ging es dem 951 an den Kragen. |
 |
 |
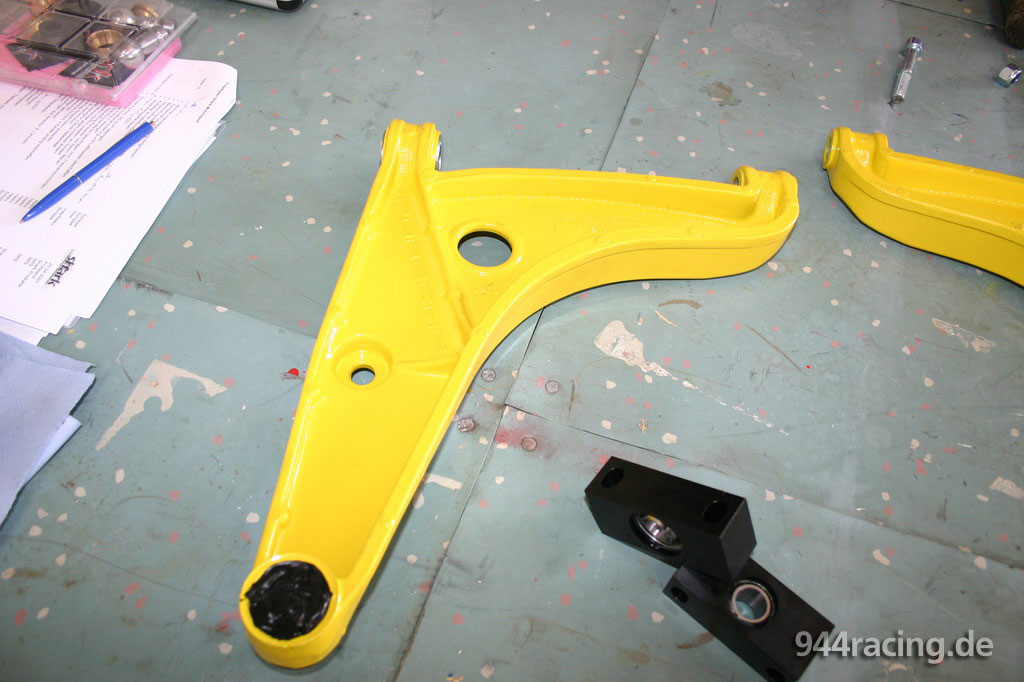
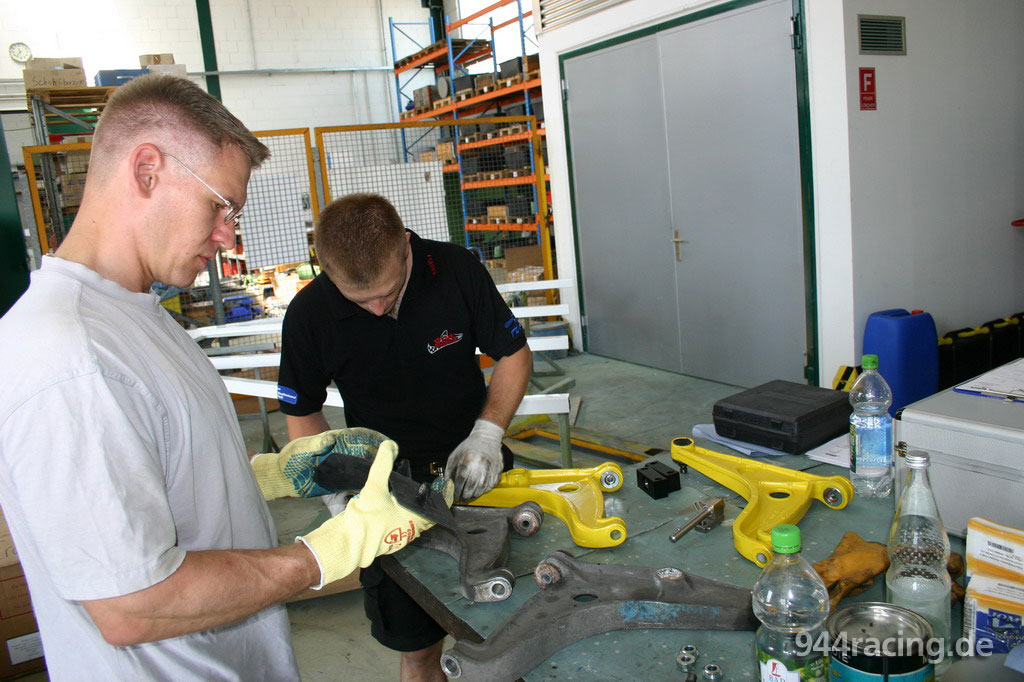
Die umgebauten Original-Querlenker lagen schon bereit. Überzeugt hat mich v.a. die durchdachte und hochwertige Materialauswahl. |
Der Unterschied steckt im (teils verborgenen) Detail. Qualitativ hochwertige Bauteile statt Billig-Uniball! Die Shark-Jungs fahren diese Teile auch erfolgreich in ihrem 944RS in der VLN. |
 |
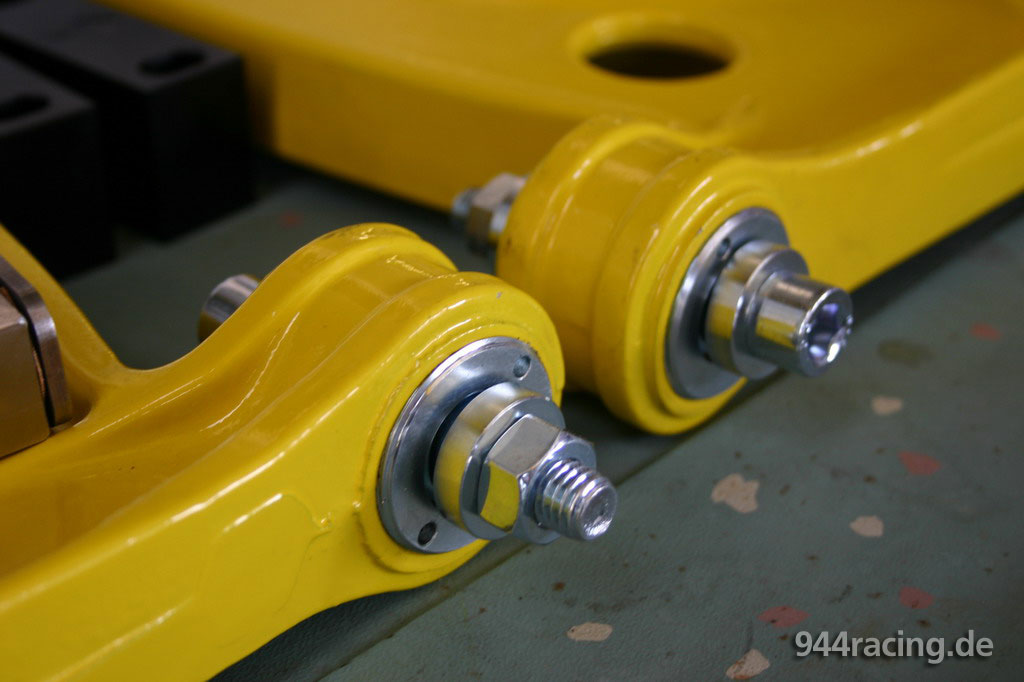 |
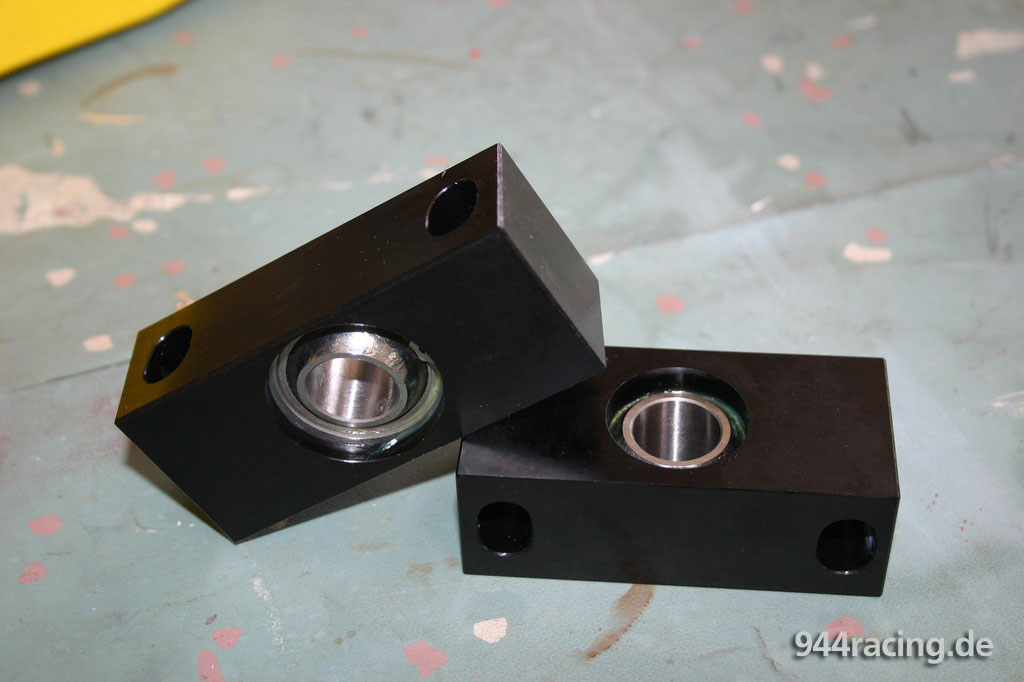
Passend zu den Querlenkern selbst ist auch die Lagerung derselben in hochwertigem und völlig spielfreiem, vorgespanntem Uniball gefertigt. |
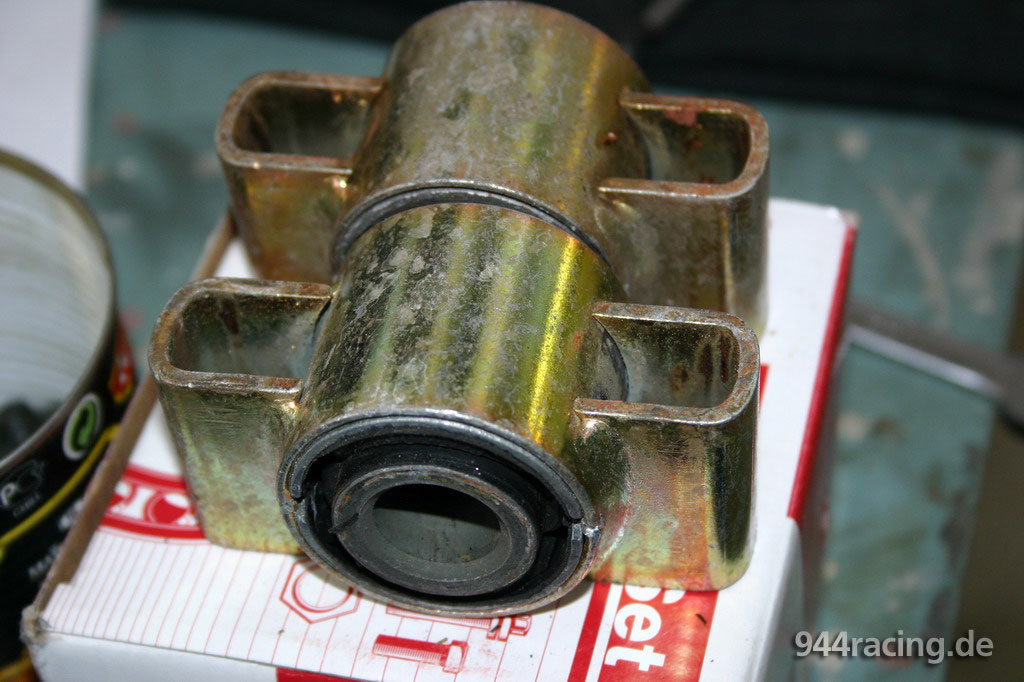
Hier zum Vergleich dazu die (neuwertigen) Porsche-Originalteile mit Gummilagerung. |
 |
 |
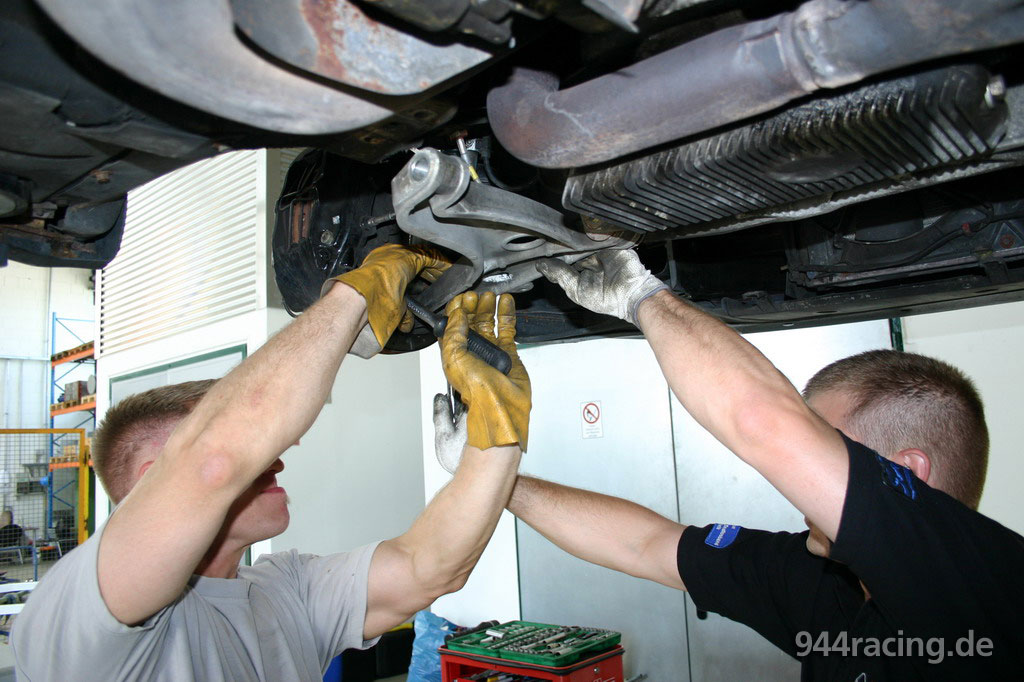
Genug Theorie, jetzt geht's los. Heiko und Schippe von Shark Motorsport legen Hand an meine alten Querlenker an. |
Der Ausbau geht relativ schnell und problemlos von statten. |
 |
 |
Ein kurzer Blick unter die Gummiabdeckung zeigt den noch guten Zustand der Originallenker. (Das ist allerdings eher die Ausnahme. Meisst sind die alten Lager arg verschlissen) |
Hier die alten und die neuen Brocken auf einem Haufen. |
 |
 |
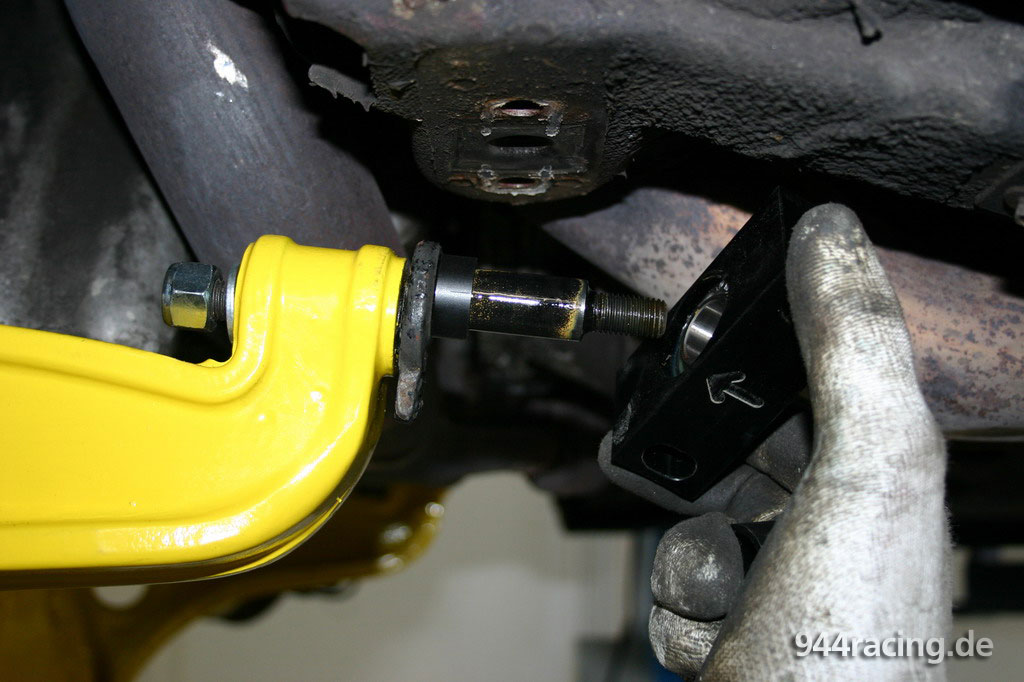
Heiko schraubt die neuen Querlenker ein. |
Die präzise gefertigten Teile verlangen Maßarbeit. Sogar der schwarze Lack an den serienmäßigen Verbindungsstücken musste mit Schmirgelpapier entfernt werden, damit sie in die Unibal Lager passten. |
 |
 |
Nach einigen Minuten ist die Konstruktion zusammengebaut... |
und muss später nur noch sauber ausgerichtet und festgezogen werden. |
 |
 |
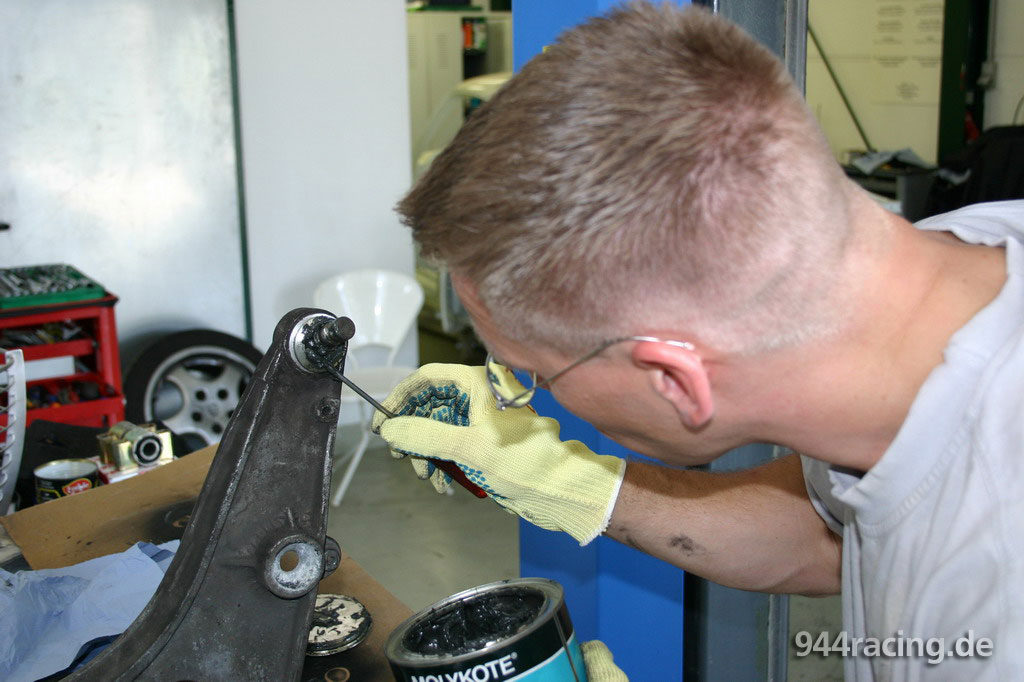
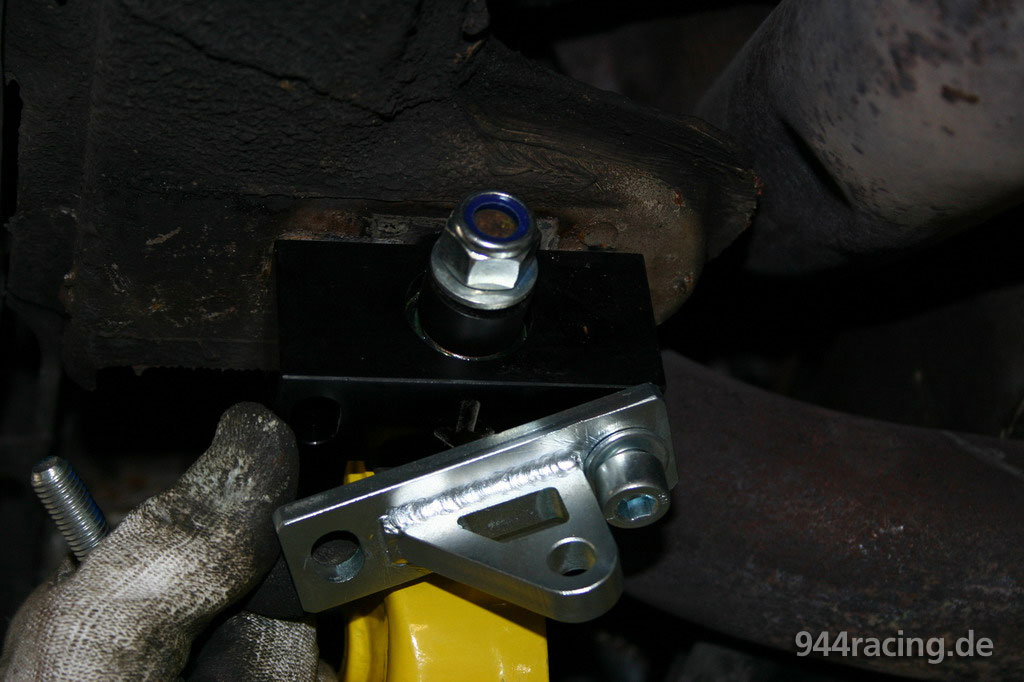
Die Schrauben der Uniball-Anbindungen werden mit Loctite versehen... |
und danach eingeschraubt. Im Bild zu sehen ist noch die silberfarbene Halterung für die später montierte O-Struktur-Strebe; eine Art "untere Domstrebe", die den Unterwagen verwindungssteifer macht. |
 |
 |
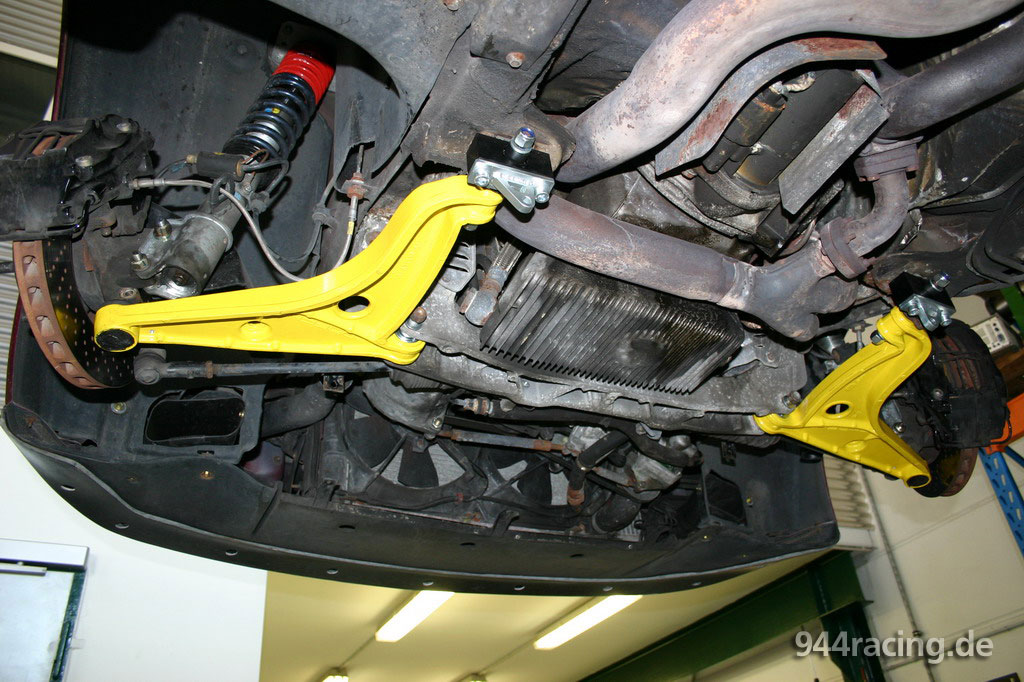
So, die Querlenker sind drinnen... |
und der ausgebaute Stabilisator kann auch wieder montiert werden. |
 |
 |
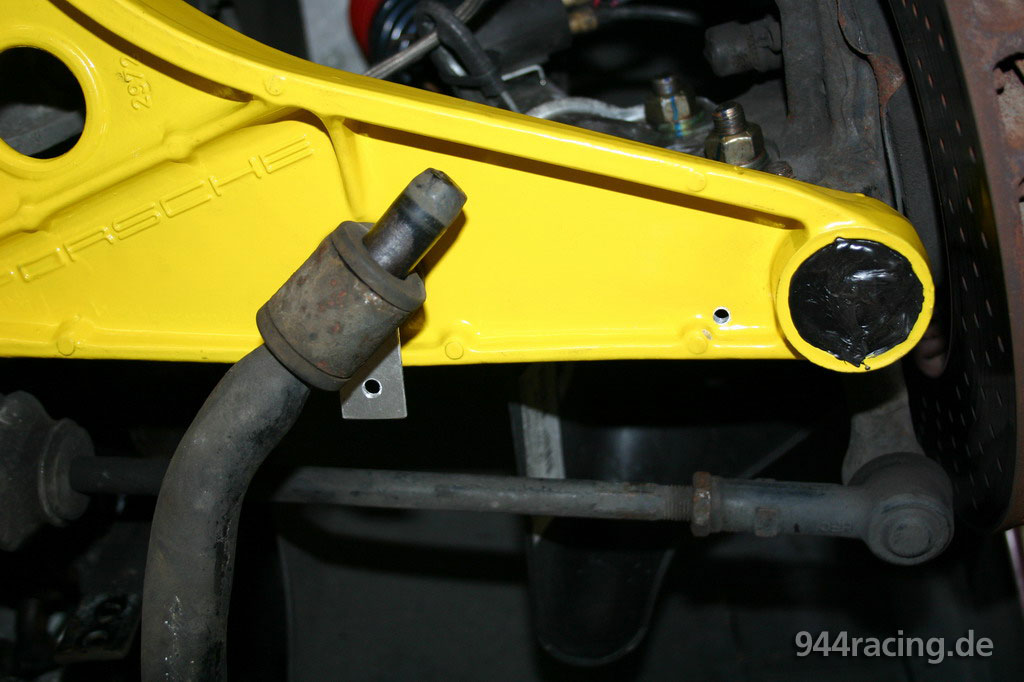
Die kleine Aluplatte und das Loch im Querlenker werden für die an meinem Fahrzeug nachgerüsteten Bremsenkühlungskanäle (Teile vom '88er 944 Turbo S Sondermodell) benötigt. |
Hier sieht man die clevere self-made-Konstruktion von Heiko die normalerweise (ohne Verwendung der zusätzlichen Luftführungskanäle) nicht nötig ist. |
 |
 |
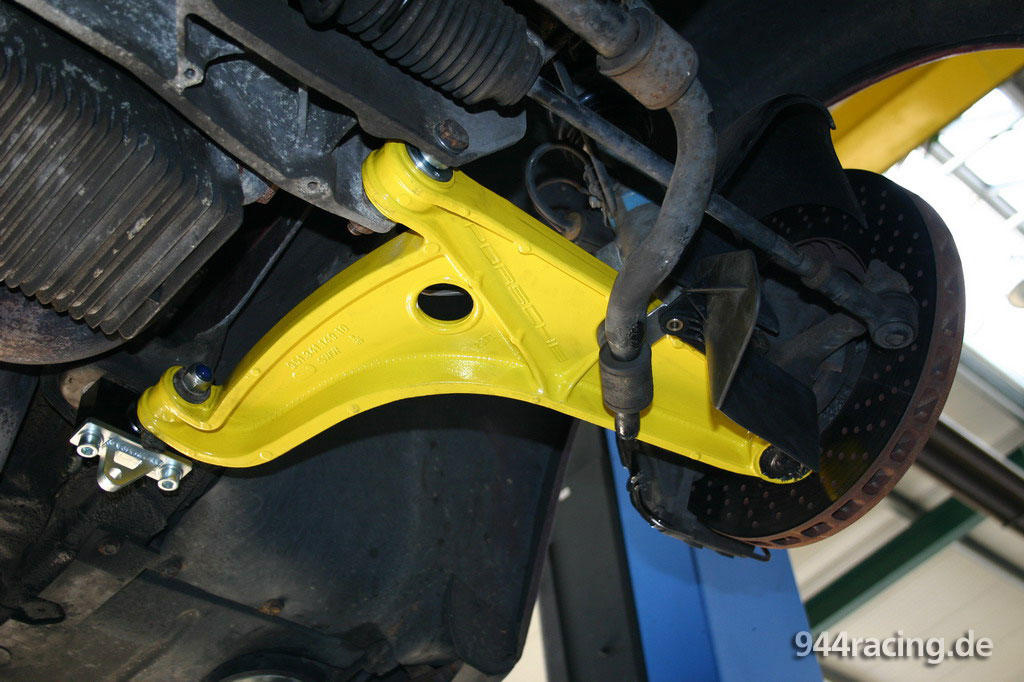
Nun können die Teile wieder problemlos befestigt werden. |
Und schon ist der Querlenker-Umbau abgeschlossen. |
 |
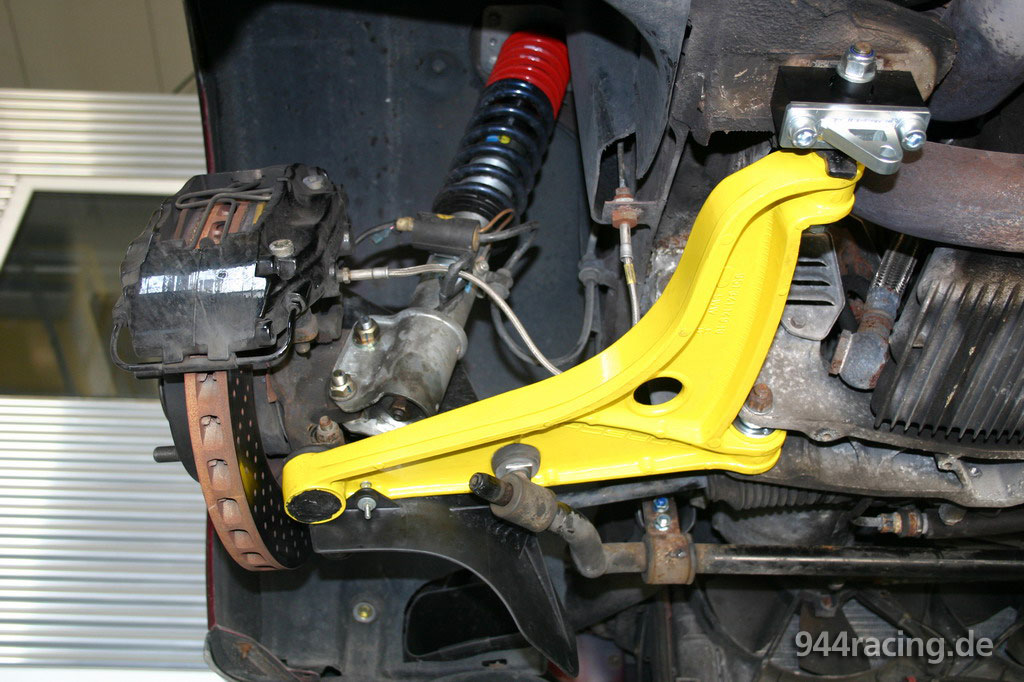 |
Hier noch ein Bild von vorne. |
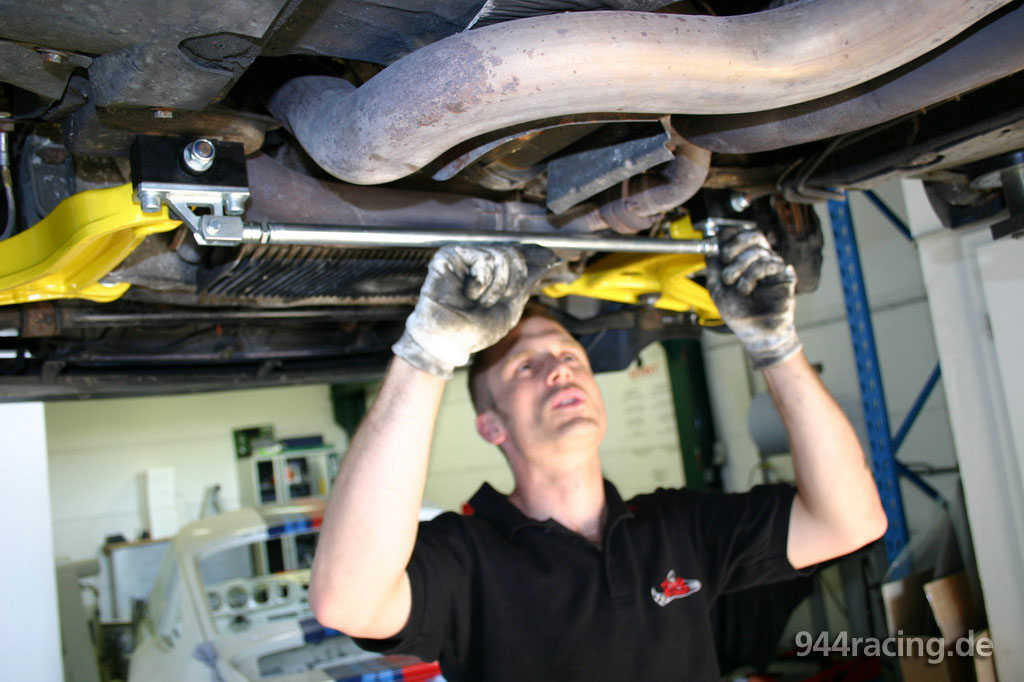
Als letztes wird noch die oben erwähnte O-Struktur-Strebe eingebaut. |
 |
 |
Fertig! Sieht klasse aus und ich freue mich schon tierisch auf die ersten Renn-km mit dem neuen Setup. |
Hier noch ein bild von vorne. |
 |
 |
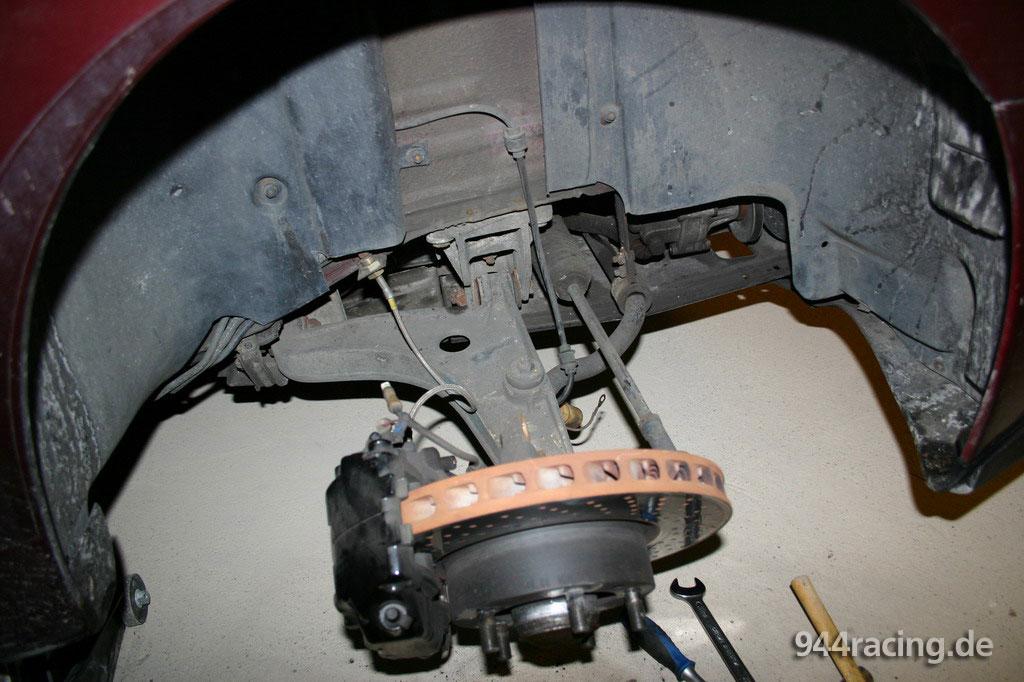
Bei der Montage der Räder bemerkte Heiko noch etwas zuviel Radlagerspiel. Also Räder wieder runter und weg mit der Staubschutzkappe. |
Das Spiel auf beiden Seiten etwas reduziert (ganz spielfrei dürfen sie auch nicht sein!) und fertig. |
 |
 |
Allerdings: Ganz fertig waren wir immer noch nicht. Die hintere Unterbodenverkleidung passte nicht über oder unter die O-Struktur Strebe. Nach kurzem Überlegen haben wir uns entschlossen, diesen ganz hinteren Teil der Verkleidung wegzulassen. |
So, das wars jetzt aber wirklich und ich bin glücklich ;-) |
 |
 |
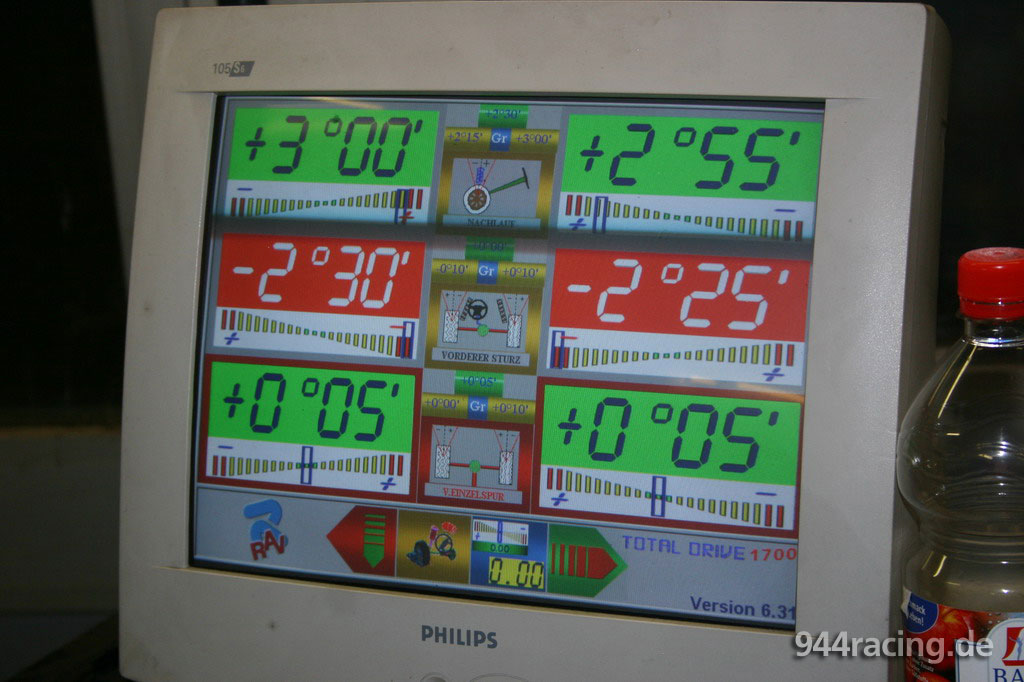
Die nötige Fahrwerkeinstellung haben wir dann im Anschluss auch gleich noch erledigt. |
Und nachdem das System montiert war, haben wir folgende Werte (angelehnt an den Turbo Cup Empfehlungen) eingestellt. |
 |
 |
An der Hinterachse: |
Und an der Vorderachse: |
 |
|
Vielen Dank an Heiko und Schippe von Shark Motorsport für die saubere und akribische Arbeit und die aufschlussreichen Erklärungen und Informationen! Hat mir viel Spass gemacht und ich freue mich schon auf die ersten schnellen Runden mit Euren Teilen. |
Nach langem Überlegen habe ich mich jetzt doch für einen Recaro Pro Racer Ohrensitz entschieden. |
Man sitzt darin deutlich tiefer, fester und enger als in einem normalen Schalensitz. |
 |
 |
Der Schulterblick ist damit zwar etwas beschwerlich, ... |
aber andererseits bietet er bei einem Seitenaufprall deutlich mehr Sicherheit als ein normaler Schalensitz. |
 |
 |
Da der Pro Racer an den Seiten deutlich höher als der vorherige Sitz ist, war der Einstieg bei montierem Lenkrad nicht mehr möglich. Daher habe ich noch einen Lenkrad-Schnellverschluss eingebaut. |
Damit läßt sich das ganze Lenkrad blitzschnell abnehmen und wieder aufstecken. |
 |
 |
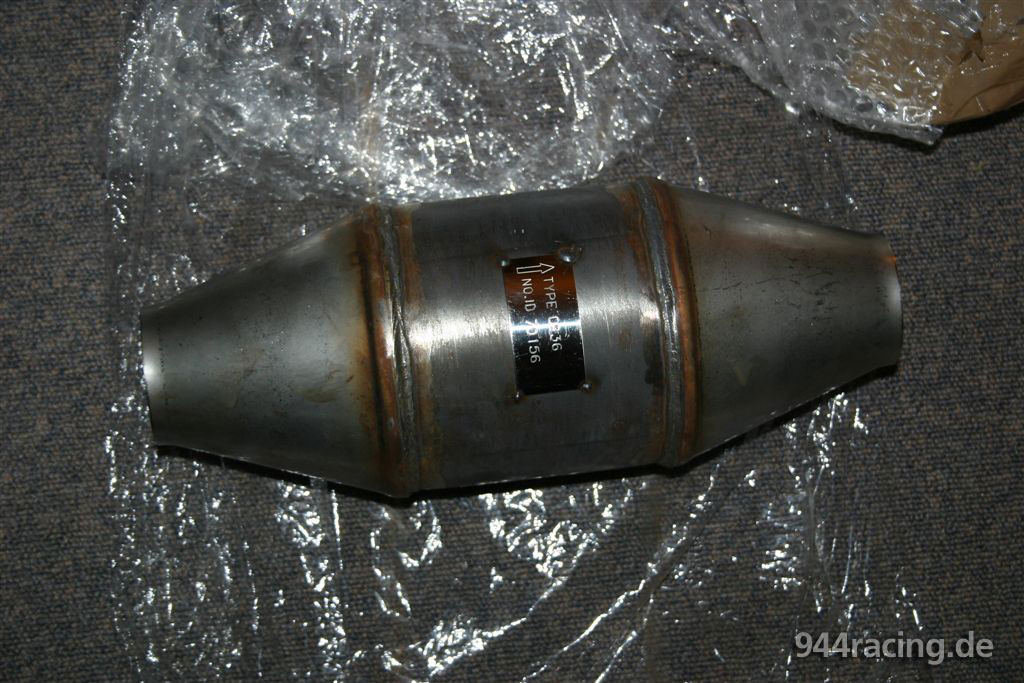
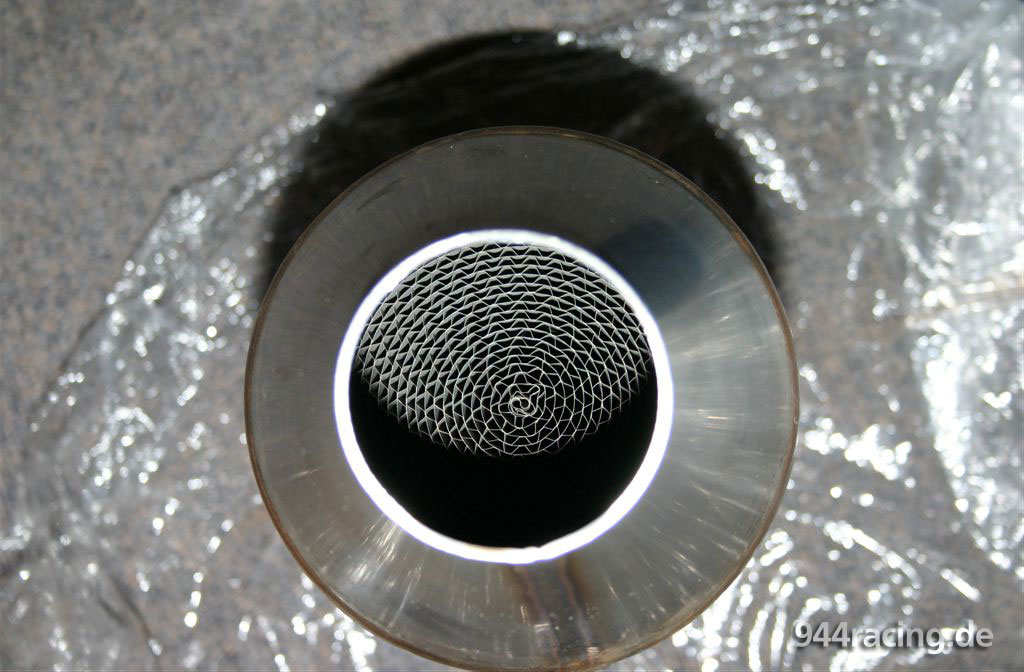
Desweiteren habe ich bei Shark Motorsport noch einen 100-Zeller Rennkat montieren lassen. |
Er bringt mehr Durchsatz als ein Serien-Kat und sollte daher ein paar (nicht wirklich spürbare) Zusatz-PS bringen. Und vor allem ist der alte Kat mit seinem ungewissen Alter und Zustand gegen ein Neuteil ersetzt, das auf jeden Fall in Ordnung ist! |
 |
 |
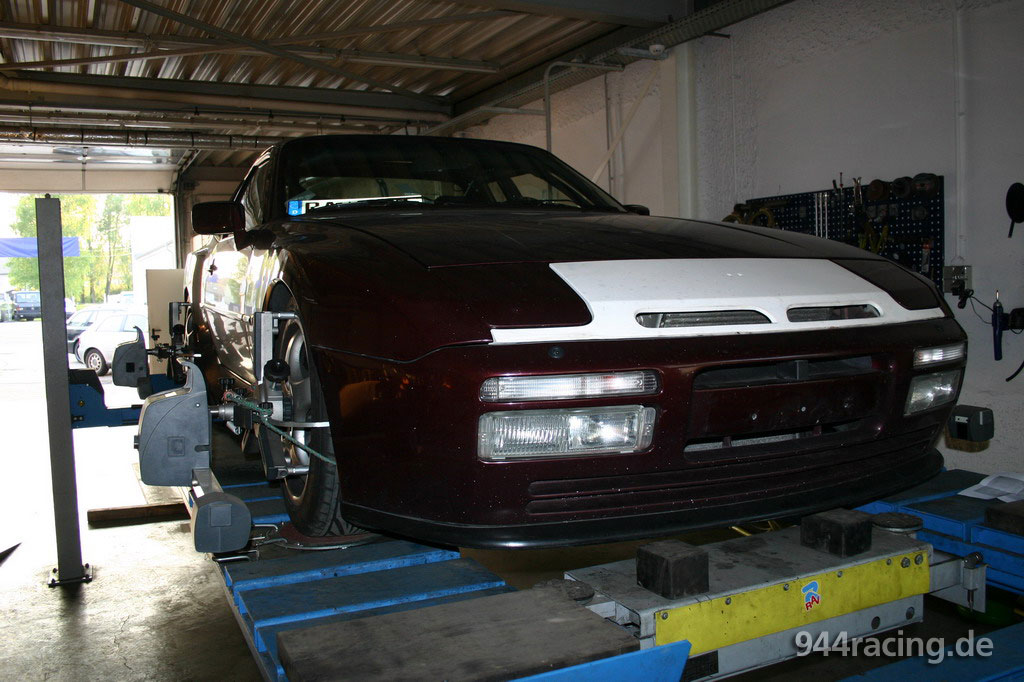
Nachdem die GTS-Scheinwerfer schon recht lange auf meiner Wunschliste standen, ich aber auf eine qualitativ hochwertige und einbaufertige Komplettlösung gewartet habe, bin ich nun bei Thorsten von Ow (www.kfz-vonoldenburg.de) fündig geworden. |
Er hat mir gleich seinen ersten fertigen Satz der speziell für die Turbofront angepassten Scheinwerfer geschickt! Vielen Dank an dieser Stelle! |
 |
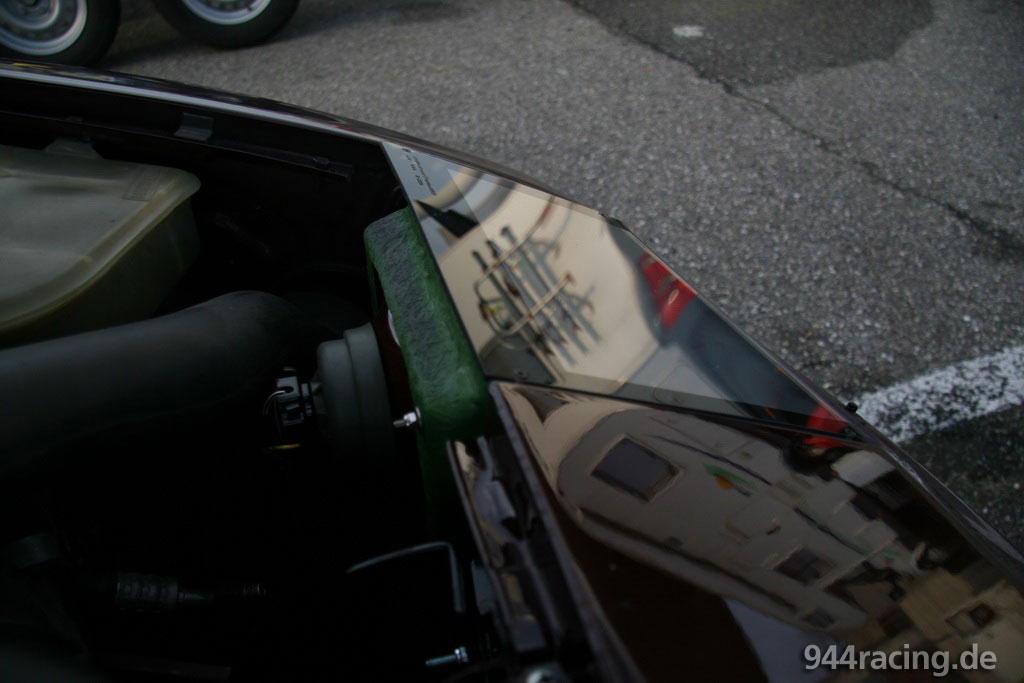 |
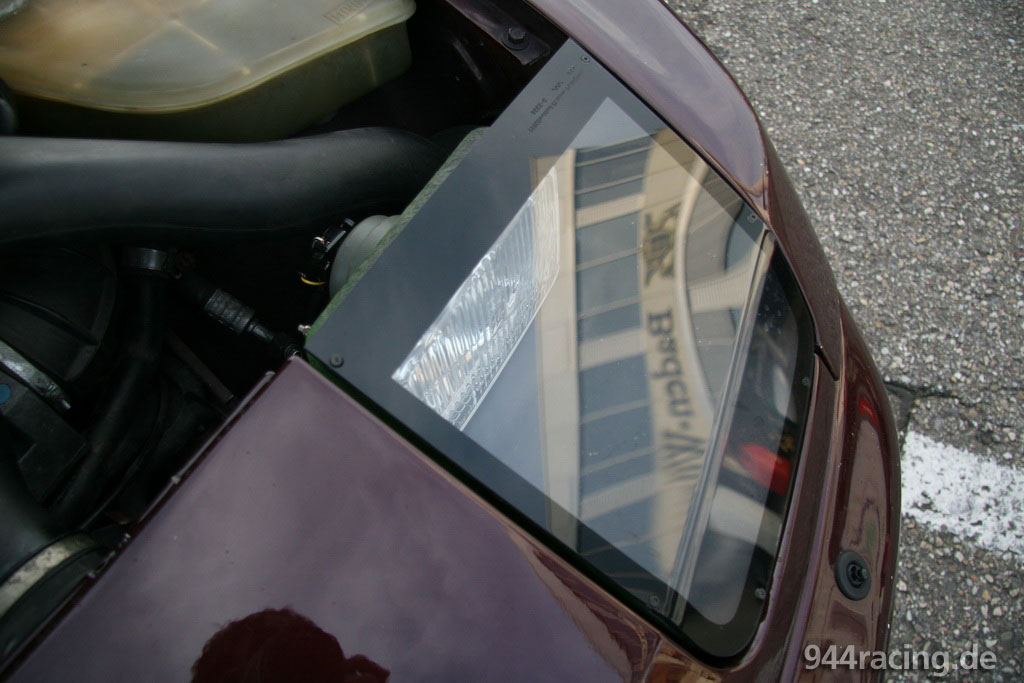
Die Abdeckscheibe ist schwarz umrandet, gebogen und mit TÜV-Wellensymbol versehen. |
Die Passform ist ungleich besser als die hier rechts zu sehende PEFA-Version (des ansonsten tollen 951 von Ralf S.; Gruß an dieser Stelle). |
 |
 |
Der Umbau hat div. Vorteile: Zum einen sind die Scheinwerfer nun auch in angeschaltetem Zustand aerodynamisch kein Nachteil mehr. Dazu sind sie insgesamt leichter als die alten ... |
und durch den Entfall des Gestänges samt Motor hat man neben der Gewichtsersparnis auch wieder etwas mehr Platz und Übersicht im engen Motorraum. |
 |
 |
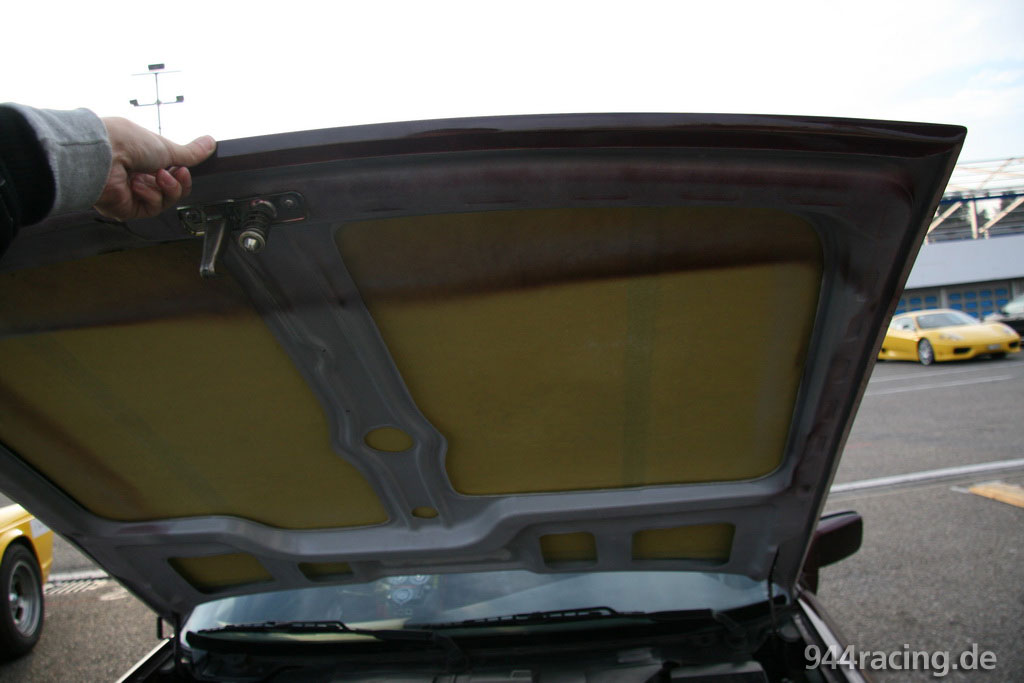
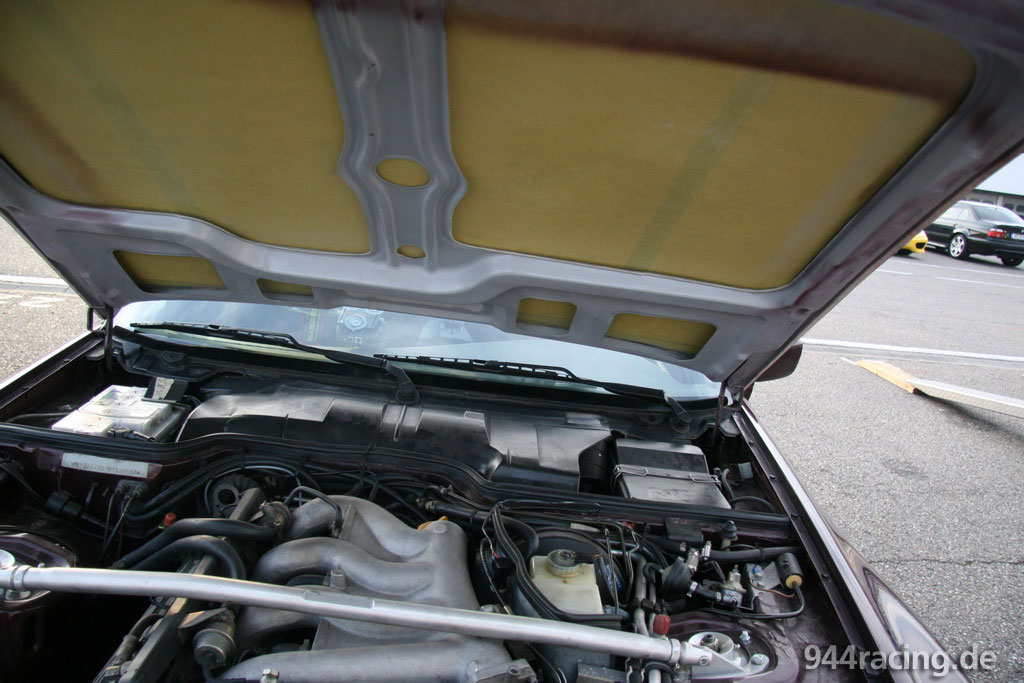
Dazu habe ich bei Thorsten noch eine leichte aber stabile Aramid-Motorhaube bestellt. Auch diese hat eine sehr gute Passform und ist mit einem Innenrahmen ausgestattet, der die "Plug and Play"-Montage erlaubt. |
Einfach die alte Haube rausschrauben und die neue an den originalen Befestigungspunkten anbauen. Lediglich die für die nun deutlich leichtere Haube zu starken Haubendämpfer müssen entfernt werden. |
 |
 |
Und so sieht das dann fertig montiert und lackiert aus... |
eine rundum gelungene Sache :-) |
 |
 |
Und den Aufkleber auf der Heckscheibe hat sich der Thorsten für die prima Teile absolut verdient! |
Danke an dieser Stelle an Ihn! |
 |
 |
Due to a lack of time i sold the car on June, 14. 2008.
|


